|
Steam Car Network
|
|
Part 5: After receiving the body parts back from the painter I started to assemble all the parts. I made new oak running-boards and attached the mudguards to them. Everything was pre-fit before painting. That made assembling the parts a easy job. I had to remake a few brackets that attach the mudguards to the body of the car. On my trip to England I collected my new Don Bourdon boiler at Basil Craske`s Workshop. At home I inspected the inside of the boiler with my new 15 euro camera. I want to do this inspection every year to see how the boiler keeps up with pollution. The boiler fits perfect in the new made boiler- ring. I putt a ceramic blanked around the boiler and covered it with a stainless steal casing. This casing needs to be easy to dismantle if a boiler inspector wants to see the piano-wire winding's. The old top on the boiler was only usable as a template and i made a new one from stainless steel. This i covered with 4 layers of dip-lag. I also cladd the inside of the bonnet with dip-lag i bought from Vintage Steam Products. Drilling and tapping the boiler was not very difficult. The instruction manual from Don Bourdon was a great help. The boiler is attached to the boiler-ring with 3 steel rods. They go trough the boiler-ring and are also the supports for the burner. Another thing that was not with the car was the exhaust/chimney and the copper end part. The exhaust/chimney was made from stainless steal and the end part from copper. I used drawings I have found on the internet for these parts. The engine steam outlet also goes into the exhaust/chimney in a special way to make the exhaust/chimney work better while driving. Last month I also received the ordered parts from the Goold family. These parts are beautiful machined and everything fits perfectly. I used the, time correct valves and valve wheels as advised by Grant Goold. With a almost ready car but without a burner and most of the plumbing I took the car to the national road traffic service to get it road legal. Nice detail is that the address for the national road traffic service unit is Stanley road. This inspection was for me the most difficult part because I did not put the car up for inspection before I started the rebuild. I had to convince the inspectors that it was the same car as I bought in America. Luckily i could convince them with a lot of pictures. So far I have spent 6 months restoring the car and i can not wait to receive the burner so I can start test-driving the car. Merry chrismas and a happy new year to you all. Best regards ROLLY EVANS 12/26/2017 12:01:43 pmBeautiful job. I see your restoring the pumps as original. If you want maximum performance add a second fuel pump back to back like the water pumps or you will need a passenger to keep pumping up the fuel pressure. I also added a pressure reducing valve on the pilot to hold the pilot fuel to 30 PSI. The main fuel I run 120 PSI. Rolly Thank you for this advice. Roel
2 Comments
STANLEY EX RESTORATION COMPLETED3/18/2018 Part 6 Pin-striping I applied black details to the green body. This was a time-consuming process of masking and spraying. After this I applied the yellow lines with a Buegler pinstripe tool. This is a tricky process that requires a steady hand. On youtube movies it looks very easy, but you have to be very patient for a nice result. Burner Two days before the planned boiler test, I received Don Bourdon's burner. This is constructed in a special way so that all maintenance can take place from the front. It is made to work on regular petrol. At the moment I am testing the car with Aspen fuel. This fuel can be compared to coleman fuel. In normal fuel are about 200 substances and in Aspen only 10. In principle, therefore, no carbon build up on the cables and also the nozzles must therefore remain extra clean. The disadvantage is the higher price of petrol. Time will tell you what the results are. Whistle From pictures I copied a brass steamboat whistle which is mounted under the footboard.  Boiler test in Norwich England On March 16th I visited Basil Craske in Norwich to have my boiler tested. Together with my car were 4 other cars, to be tested. 3 belonging to Basil and 1 belonging to Dudley Watts. After some small fuel problems which were solved with the help of Dudley, the boiler could be pressurized after which various checks were carried out. This resulted in a boiler certificate that is valid throughout Europe. 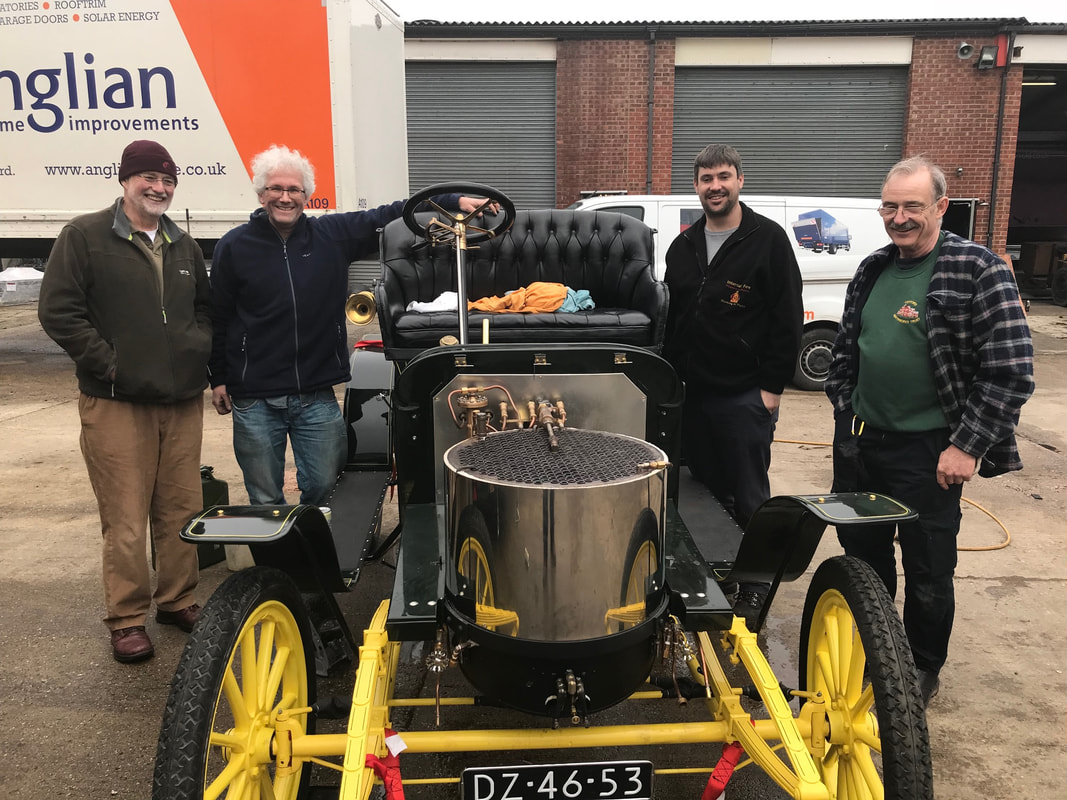 On the way back home I found out that it was freezing in the Netherlands. Therefore, before I entered the boat, I left all the water out of the car and because the boiler was still hot from the test, a lot of steam came out of the trailer. The port security came to take a look at whether there was no fire. 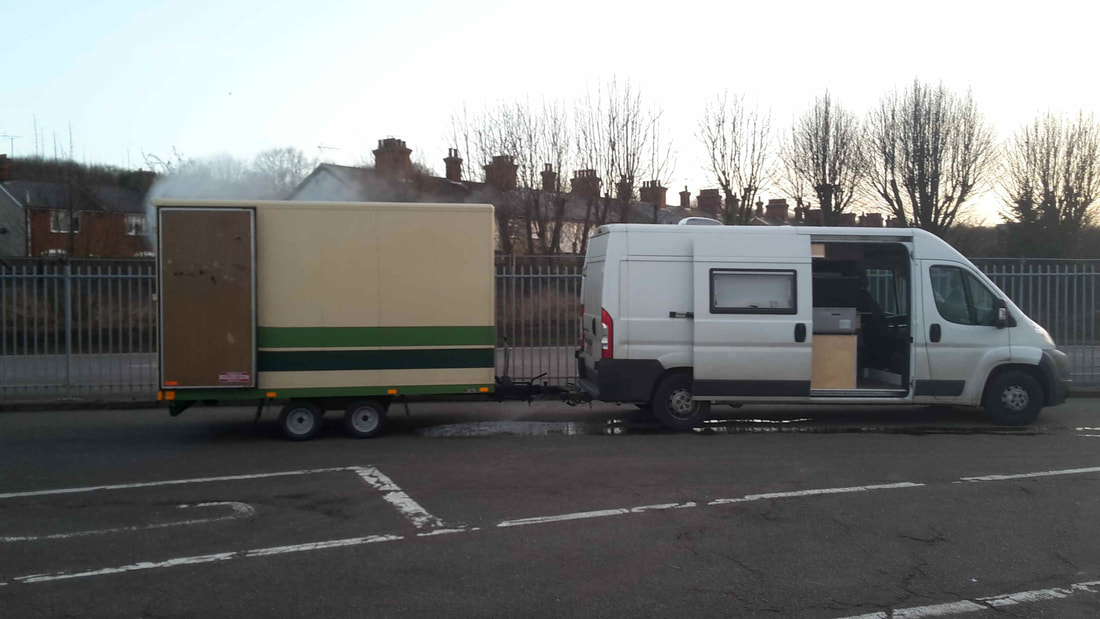 Back home I made some minor adjustments to the car. With this, the car is ready - roughly - for its first trip in Melle, 111 years after the car rolled out of the factory in America. 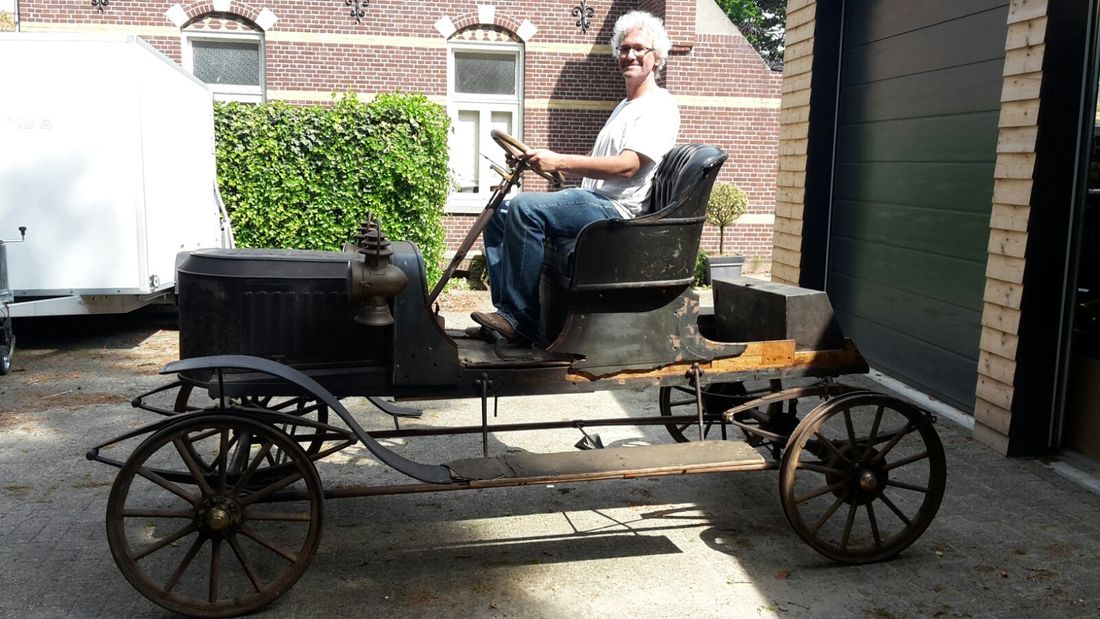 It took me almost a year to complete this car. It was great fun and I learned a lot.
I would like to thank everyone who gave me tips and advice and of course the suppliers of specially tailored parts. Roel Rasker. Part One of Brent Campbell's Steam Car Renovation. The car I am replicating is the second of three cars made especially for F.E Stanley's son, Raymond (1894-1985). As many many people know I restored the first car Raymond designed,which his father had requested the factory to build to what Raymond specified. Since Raymond was only 16 when the first special car for him was built (1910-11) FE surely had to over-see the "build" of the car at the factory.That is why i nicknamed it "Effie". Luckily this car is one of the survivors and its history has been verified and detailed information can be found on Kelly Williams "The Stanley Register Online"in the 1911 model year , serial number 6052. the second car built for Raymond was completed in April of 1912 and was serial number 6700 as verified by the original Stanley serial number book that is in the custody of Virginia Landry, Fred Marriott's (the test and racing driver for the Stanley Factory) grand daughter.This fits since the first car is recorded in the book as being delivered (sold) April,1912. The book has Fred`s name inscribed on the cover as it was his job to record the model,serial number,and delivery date when vehicles were sold. 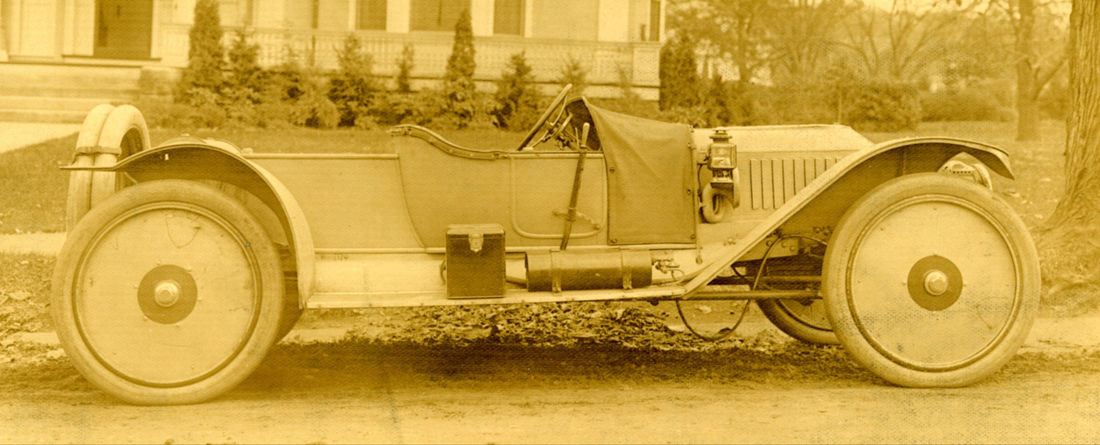 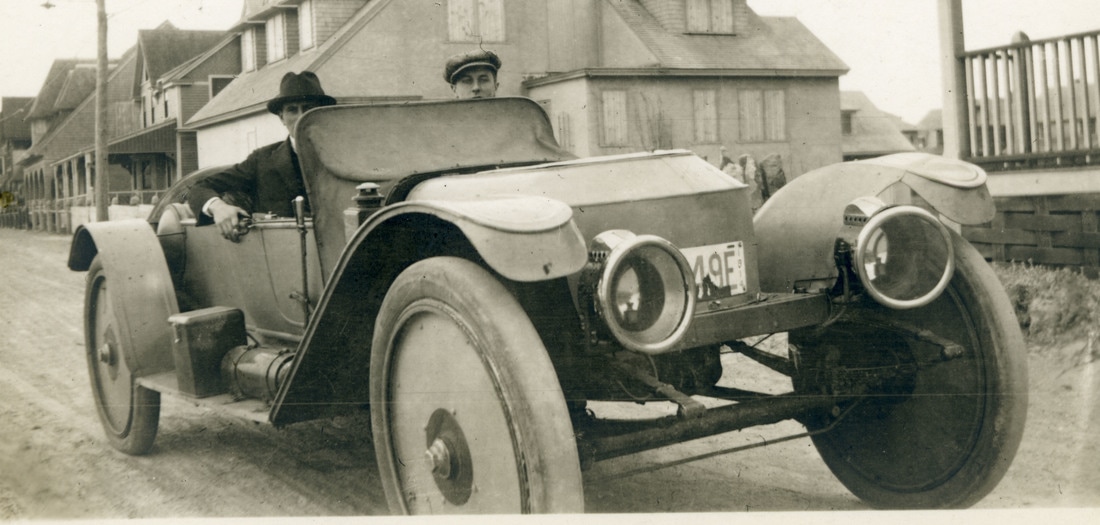 This car was not sold since it was still in use by Raymond in 1914 when the steering broke the second time. FE decided to dismantle the car after the second steering breakage which happened while Raymond and two of his Harvard classmates were on there way from Harvard to Raeburn Country Club in Brookline, Massachusetts on Friday afternoon for a game of golf. Each week the boys would try to best the previous week's time as Raymond told several steam enthusiasts during one of several interviews in the early 1980`s before his death in 1984. Ray said they were on track for a record time when the steering broke (again) and the steering wheel just went round and round in his hands with no connection to the front wheels. Luckily, he and his two passengers survived the crash and Ray walked away to the nearest house to call his father. It was after this last incident that F.E decided to dismantle the car. I used the word dismantle since those who have studied the Stanley twins know that "Maine Yankees" didn't throw anything away that could be used. I have no doubt that any usable parts were recycled at the factory! The serial number, date of delivery,and model were usually typed into the serial number book. Virginia Landry recognizes Fred`s hand writing and wrote in RWS 30HP 3P next to the number 6700.The 3P meant it was built to accommodate three people. . 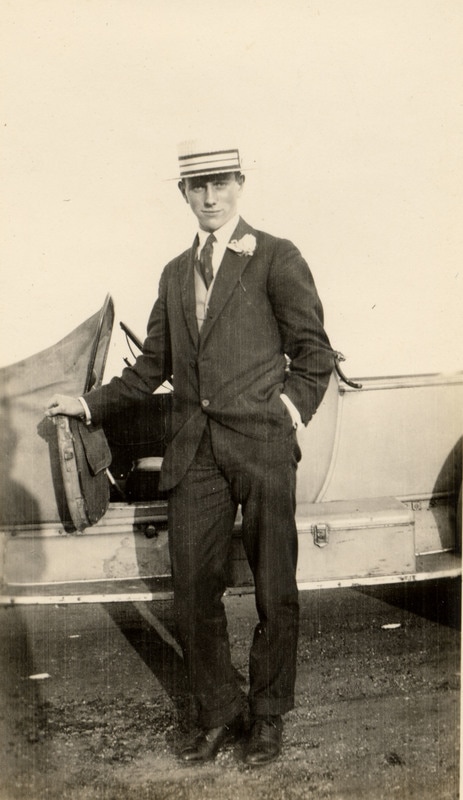 Fred Marriott didn`t like Raymond (pictured above) according to all accounts of people who new them both. Imagine an 18 year old owner's son bringing in his special car for service and advising the service manager of what needed attention. Fred would have to take care of his boss' son ahead of other scheduled work in all likelihood, even if the problem was minor such as a yellow pilot! No wonder Fred remembered the serial number, and description of the car since he probably had to drop everything to tend to it during the three years it was in service. Never "sold" but not forgotten by Fred! Ray liked his cars low with a racy look. He did graduate from Harvard with a degree in Automotive Design. The first series V nose Stanley condensing cars were designed by him and are generally considered the most attractive of the condensing body styles. "EFFIE" was almost four inches lower than production Stanleys at the time he designed it. Thirty horse power cars are large imposing vehicles, be it a model 87 touring car or a mountain wagon. The first car built for Ray is anything but large or impressive. Rather "a wolf in sheep`s clothing" in appearance. EFFIE IS PICTURED BELOW. 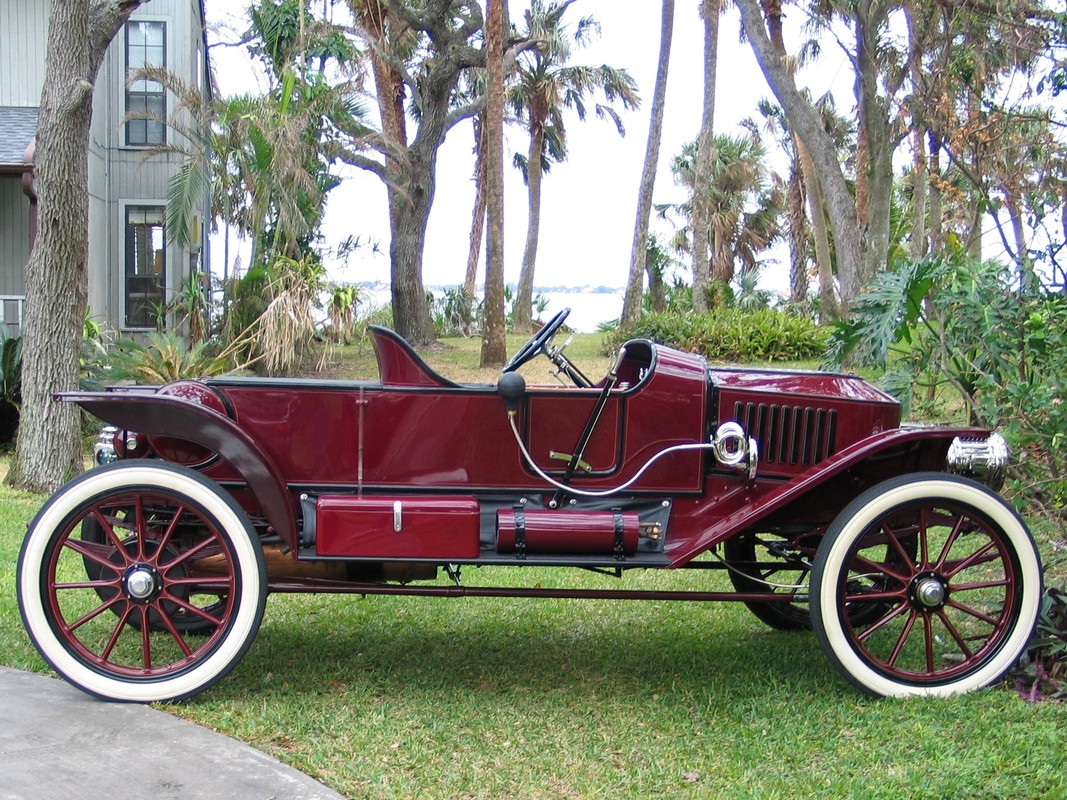 The second car Ray designed was lower by almost eight inches. He could have been inspired by Mercer Raceabouts or American Underslungs which were very low compared to most other automobiles of the period. The wheels sported aftermarket period accessory disc plates screwed to the conventional wood spoke wheels on both sides which gave them a different look. He didn't like standard windshields but preferred a canvas covering which was commonly referred to as "Cambridge Windshield" the six different pictures from Ray's personal scrap book show that this windscreen was modified three times during the time he had this car. He told the interviewers that this was his favorite of the three cars built expressly for him. The pictures from Ray's scrapbook were vital in the ongoing effort to recreate this car accurately. 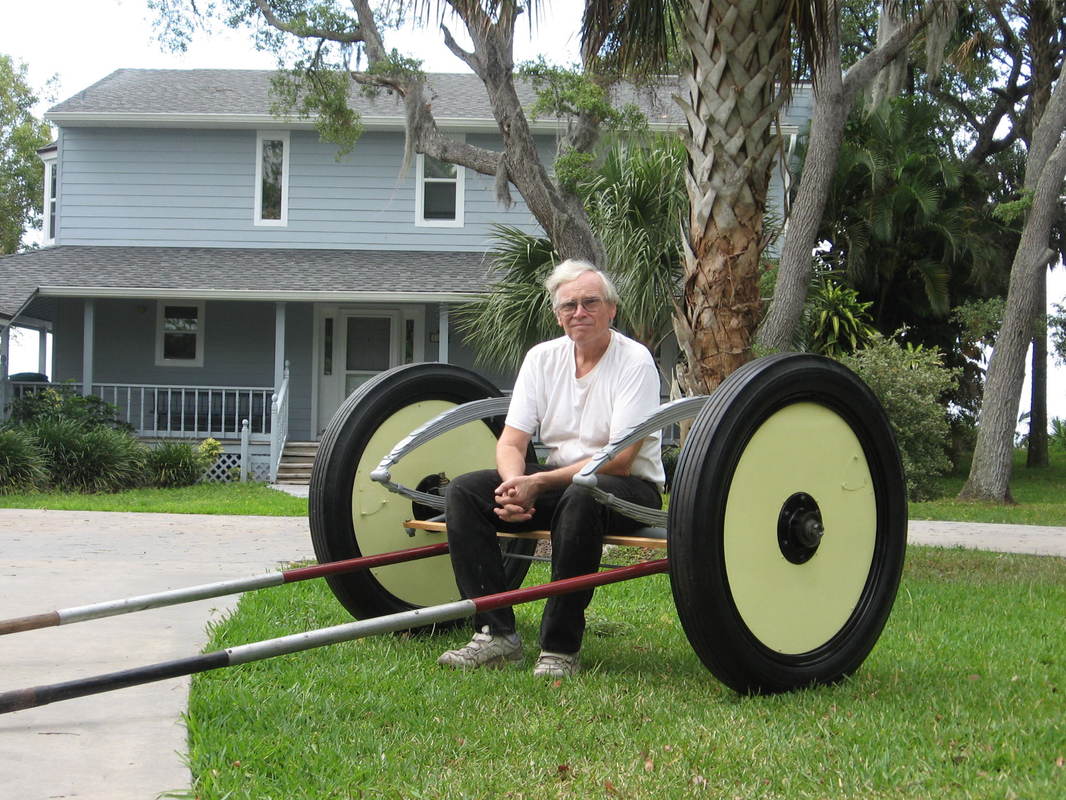 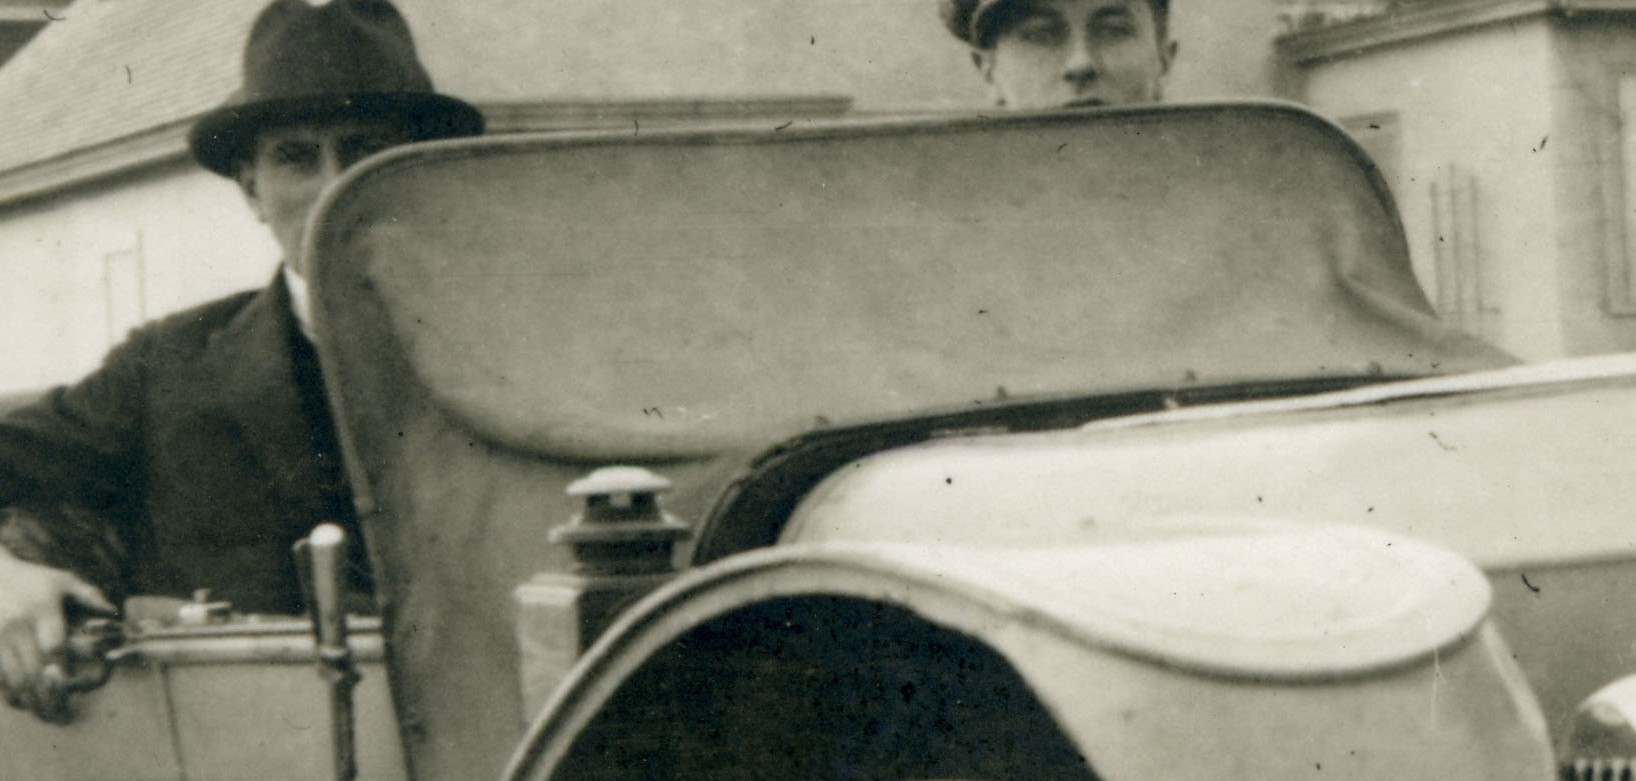 Computer aid helped determine dimensions and generating design specifications. My son-in-law, Mark Herman, is the person who has brought the car to life along with one of his employees , Peter Kruger. Mark is a cabinet maker, Stanley owner, and has built or repaired over 25 Stanley and other steam car bodies up to now.This project (Ray`s car is my nickname for it but one Stanley friend has dubbed it "Ugly Betty" which reflects what many folks feel about the looks of this car!) has been far and away the most difficult build of any car done by Mark in the past. There are no internal pictures or information about how the factory made the numerous alterations necessary to lower the car. There are countless interference issues that have had to be dealt with. We try to imagine how Stanley might have solved the problem while considering solutions. (Knowing Stanley's, we think they opted in favor of the quickest ,easiest, cheapest way possible.) One is the steering, which they didn't get right since we know it failed three times. I have experienced five steering failures in three different Stanley`s over the years and figure my luck of being unscathed so far is going to run out one of these days. We now have a rolling chassis and plumbing has started as you can see from the pictures. This is one of the things I can do myself and enjoy the task. The three passenger body skeleton has been built by Mark and Peter and is now in Northport, Michigan being aluminium skinned by an expert craftsman thanks to Mike May who resides only five miles away and is overseeing the construction for me (not to mention hauling it as well!!) The car has a 55 gallon water tank,20 gallon main fuel tank, and the wheelbase is 130 inches. It is geared 55/60 or 1.09 to one. Curb weight is estimated to come in about 4000 pounds when finished. It is not going to be a performance car such as "Effie"which curbs at 3450 pounds, or a model K which weighs in at 2900 pounds, or an H5 which tips the scales at 2460 pounds. Hopefully it will be a comfortable, good cruising, decent handling steamer with a very low center of gravity compared to production Stanleys. Like an H5 or "Effie" it will have good weight distribution since there will be more weight on the rear than the front. (Most Stanleys understeer since much of the weight is in the front). I plan to run it as a chassis without fenders, hood, lamps,etc until it is all "dialed in"; besides it is more fun and faster while lighter than it will be in full dress! UPDATE ON RAY STANLEY THREE PASSENGER 30HP ROADSTER Restoration by Brent Campbell Basil and Vicki visited with Martha and me last month while they were at their vacation home in Orlando, Florida. They came over for a visit and got to see the progress since their visit last year. You will remember that this is a recreation of the second vehicle of three Stanley’s that was built expressly for FE’s only son, Raymond. Ray designed each one (he graduated from Harvard with a degree in automobile design.) You will recall that this car was dismantled after two steering failures so we know it did not survive. Computer enhancement of the six pictures of it that came from Ray’s photo scrap book enabled my son-in-law to accurately replicate this car. I was blessed with many of the correct key components from Stanley parts gathered over the past forty years. The correct 30hp engine, front and rear axles, all pumps, valves, gages, automatics, original fittings, lamps, etc. gave me what Carl Amsley would have termed “A license to build”. Other hard to find items such as an original engine case, oil tank, correct roadster pedals, and all the leaf springs necessary to make a set were also procured or bartered for in some cases. Absolutely every part has been rebuilt before installation. Since my last report a new aluminum body was constructed around the wooden skeleton that Mark and his employee, Peter Kruger had formed. Much of the paint work has now been done. Don Bourdon recently painted the body and Loren Burch is doing the upholstery as this is being written. I completed the plumbing and all the necessary components were installed with the goal of having a running chassis. It often takes me a considerable amount of time to get a “new” car dialed in to run up to snuff. Making myriads of adjustments is much easier without dealing with painted body, fenders, hood, etc. It is also much easier to make improvement when these items are not in the way and there is no worry about scratched paint. The chassis was ready for a test drive in August. Over 500 miles have been accumulated with the aid of a compact GPS device about the size of a pack of cigarettes. Every test drive yields advancement and I am getting closer to a Stanley that performs properly. This vehicle has a 130 inch wheelbase [same as most condensers] and I am impressed with the ease of steering, excellent ride, and very good handling characteristics. 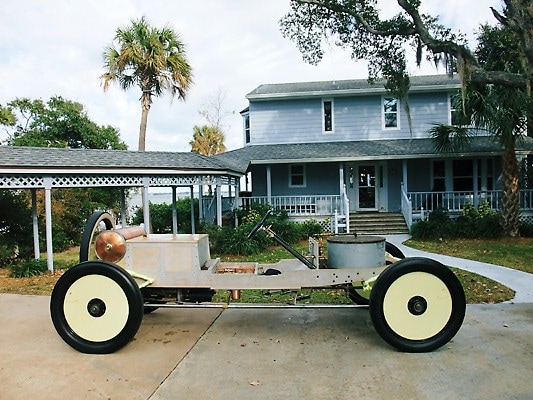 Most Stanley’s under steer when cornering with few exceptions [a model H is a notable exception]. This car has a 55 gallon water tank located behind the passenger compartment, a 20 gallon fuel tank, pilot tank, and the engine hanger strap just below your rear end. All this weight in the rear makes for ideal weight distribution. In order to get the car as low as Raymond desired [it is almost 9 inches lower than a production car] the boiler and burner were located behind the front axle to eliminate bottoming out due to normal suspension travel The steering tie rod is modified so as to be under the perch poles instead of above them. The springs were moved to the outside and at the top of the frame rails instead of underneath. These are just a few of the changes that were made to achieve the desired height. While we were blessed with various external pictures there were none of the “innards” that showed how the numerous modifications were made to achieve the original design. This has made construction much more difficult than copying a regular production car where proper measurements, attention to authenticity of components, and assembly can result in a proper reproduction. Few assembled cars I have studied come close to being a correct, authentic reproduction. Most folks don’t take the time to research or bother to reproduce parts exactly so as to achieve an accurate finished product. {Basil Craske is one of the few exceptions. He takes the time to research, study original survivors, make and procure correct pieces, and pays close attention to accurate fit and finish to achieve an accurate result. Deviations are limited to improve practical drivability, and safety issues such as modern brakes and lighting. These are areas where owners that use their cars regularly consider these modifications absolutely necessary.} At the moment a feed water heater fabricated by Don Bourdon is being installed in the exhaust duct which should improve performance considerably. This is a much heavier car than “Effie” [the first car expressly made for Ray Stanley which did survive and I feel blessed to be its current custodian]. I don’t expect it will have the same level of performance since it will be about 650 pounds heavier when finished. My plan is to continue having fun with it in chassis form until fall before the body is installed. It will come back down to Florida again next November and the lamps, electrification, and speedometer installation will be projects for next winter. It should be completed by next spring. In the mean time I will attend at least three tours and put as many miles on the chassis as I can. Driving it in chassis form is a blast and performance is more exciting than when it is in full dress at maximum curb weight. Most people who see the original pictures from Ray Stanley’s photo scrap book don’t like it’s peculiar look due to the after market wheel discs and the unusual canvas windscreen. I hope it will be more appealing in the “flesh” since it is so low and very long. These attributes are not readily apparent in the original pictures. Ray Stanley did say that this was his favorite of the cars made for him when interviewed in 1980, four years before his death. Now that it is running I can well understand why this was the car he liked the most! PART THREE TO FOLLOW SOON
The final part of the story The six year project of replicating the second car designed by F.E.'s son Raymond W. Stanley and built by the factory for him is finished with the exception of wiring [it was originally electrified like the 1913-14 cars even though it was finished in 1912]. Martha and I participated on the Rhode Island Steam car Tour last summer and made the entire week with no problems. A few adjustments were made but other than that it ran well. Between chassis running and now with the body on and in full trim the odometer has recorded 2500 miles. 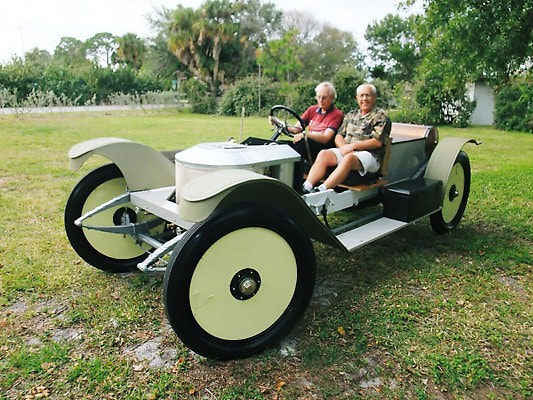 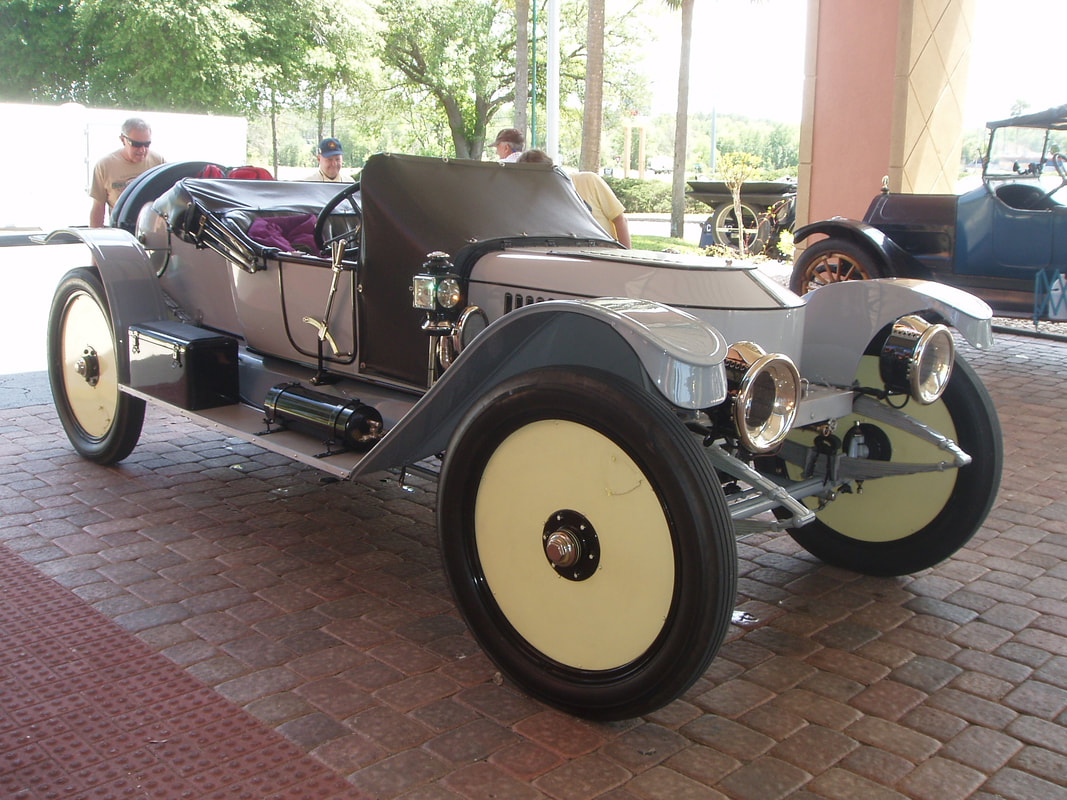 The car weighs in at a bit under 4100lbs. curb weight. Vital statistics include a 130 inch wheelbase, 57 gallon water tank, and 20 gallons fuel capacity. The long wheelbase and the weight contribute to outstanding ride quality. With fuel, water, and passengers [it will fit three if they are moderately sized] all past the center point of the wheelbase, weight distribution is very close to 50/50. This makes for an ideal handling car on curvy secondary roads. Simply put, this is one fun car to drive! It is not as "lively" as "Effie", the first special car designed and built for Raymond. That car did survive and I am the proud custodian of it. It is about 650 pounds lighter and final gearing is a bit higher. The first car was geared by the factory at 60-57 or .95 to 1. This one is 55-60 or 1.1 to 1 to help compensate for the added weight. There was hardly anything about the build of this car that didn't require special engineering to achieve the very low profile. My son in law, Mark Herman, and one of his employees, Peter Kruger; deserve most of the credit for overcoming the numerous engineering problems. A special thanks to Steve Baldock and Basil Craske for designing and fabricating the special steering arms off the front axle and the arm that connects to the steering quadrant. These changes were necessary since the boiler and burner are well behind the front axle to prevent the burner from contacting the front axle on a bump. As a result the steering radius was very limited until Basil and Steve made longer ones from a special strong steel that matches the contour of the originals beautifully. 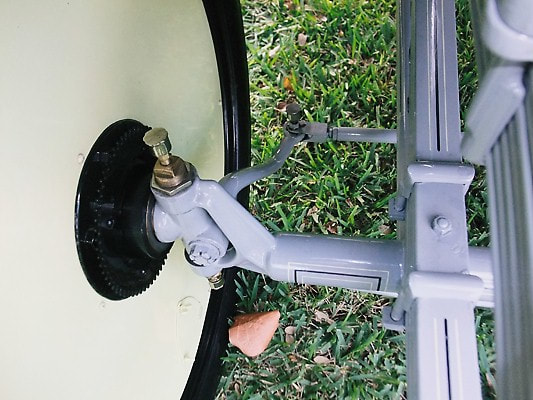 While we were blessed with many exterior pictures taken when the car was in it's prime [courtesy of Ray Stanley's original photo album and the Stanley Museum] there were no pictures of the inside detail of what the factory did to lower the car almost 9 inches compared to a typical production model. When I decided to duplicate this car most Stanley people looked at the original pictures and said "Why would you want to do that car? It is ugly! The windscreen and disc covers over the wheels drew the most criticism. What I saw was the picture of Ray standing beside the car and the top of the door was the same height as the buttoned jacket at his waistline. I knew then that this car was extraordinarily low and might just be better looking in the "flesh" than the picture suggested. Although still controversial, the car draws many very favorable comments. When parked next to other Stanley's the car stands out since it is so much lower and a frequently asked question is "is it a racing model"? This car and my other steamers will undoubtedly cover many more miles this summer starting with the Eastern Steam Car Tour at Lakeville, Connecticut the second week of July. Since driving a Stanley is my favorite pleasure, I have given up trailering to events. The cars are driven over the road, used all week, and driven home unless the tour is at least over 750 miles away, then I usually ship it and fly in for the tour. My trailer is now used strictly for retrieval purposes only when there is a break down I can't overcome on the road. On July 4th 2017 Jay Leno gave the car its ultimate test. "Jay Leno drove my Stanley "Ray's Car" up the mountain successfully without any trouble. Bill Barnes followed with his Vanderbilt Cup Racer and also had no problems. As expected, we did stop once to pump water into our boilers with a wheel jacked up. The production crew doing the filming consisted of 40 people, all very skilled and experienced. They had 12 cameras attached to my car and two of the film crew sat in the rear of a minivan facing rearward, so as to capture the event. Then there was the helicopter that flew directly above us capturing it all on film from above. It was an exciting day, and everyone enjoyed it, including Jay, who was very gracious and friendly in every way. The weather was perfect with the exception of the summit, where it was cloudy, windy, and cold. Two ramp trucks took both cars down without incident, and more filming was done when they were unloaded at the bottom. "Jay drove Bill's Vanderbilt Cup Racer the day before and had to be impressed since it has a 30-H.P. engine, and his has only a 20. Bill's car is easily the fastest Stanley I have ever had the privilege to drive! Jay also rode one of Bill's steam motorcycles and must have liked it because he didn't return for over 20 minutes. Unfortunately, the film crew was not on hand to capture Jay on Bill's bike. All in all, it was an exciting day for everyone. The show, "Jay Leno's Garage," will air our climb to the clouds sometime in the fall. We will know exactly when beforehand." On the same day as Jay Leno's climb, Lisa Cantor, accompanied by her husband Mark, drove their 10-H.P. Stanley to the top, becoming the second woman to pilot a steamer to the summit. Congratulations, ALL! Rest well, Flora and F.O., after 118 years.  Below are some mostly unseen photos of the restoration. Full Steam Ahead – 1908 Stanley Model K At the turn of the 20th century there were three main rivals fighting it out in the new world of automobiles… electric, petrol and of course steam powered cars. In my latest feature film I talk to vintage car enthusiast Bryan about his 1908 Stanley Model K steam car. You may remember Bryan from my other film last year where I went for a drive in his two vintage electric cars (you can see that video by clicking on the button below). It is rather obvious then that Bryan is a big veteran car fan. And when you watch his film, you can see why. 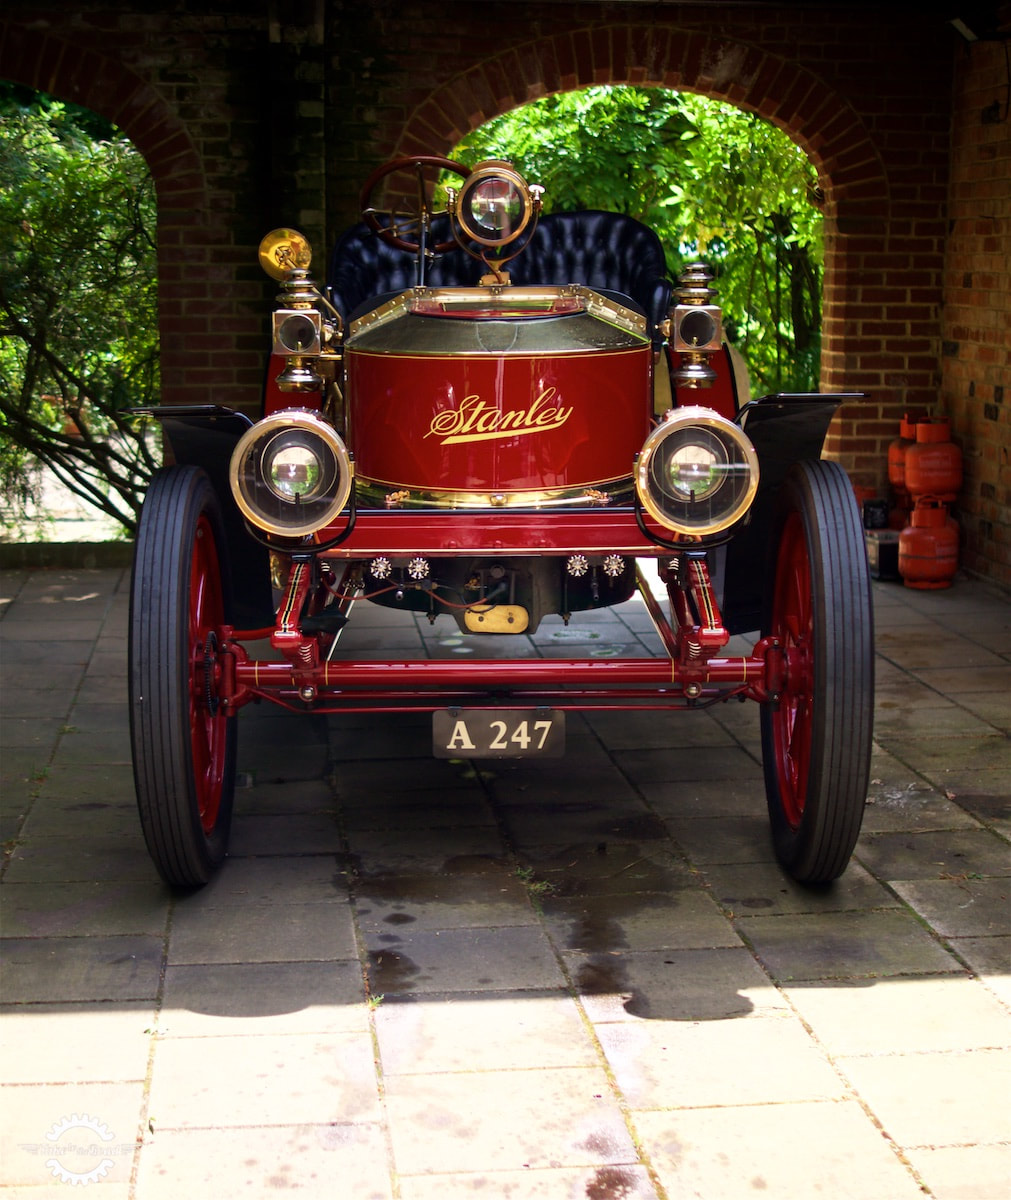 The Stanley Model K was dubbed “The Coffin Nose” thanks to its long bonnet.By the early 1900s steam technology had been around for roughly 300 years. The idea of using steam to provide power first appeared in the 17th century and it was of course the key technology behind the industrial revolution of the 19th century. So by the 1900s, steam power as a form of propulsion was advanced and well understood. That advancement allowed pioneering individuals like the Stanley brothers to develop a whole series of steam powered cars. And the Stanley Model K was one of their designs. 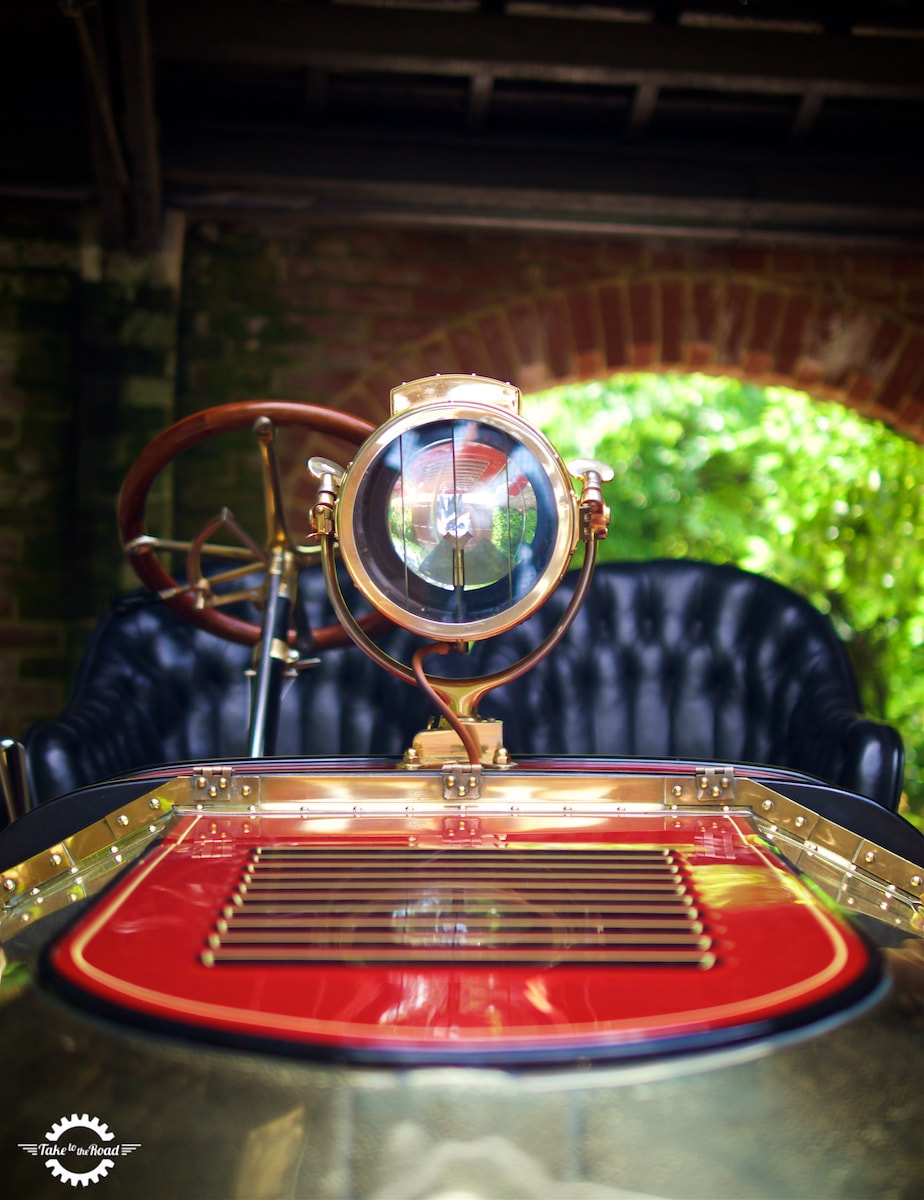 An extra search light for those late night veteran car drives.The entrepreneurial twins Francis E. Stanley and Feelan O. Stanley built steam cars from 1902 until 1924. The Massachusetts based Stanley Motor Carriage Company enjoyed much success in its early years. In 1903 a Stanley Steamer set a new record at the Daytona Beach Road Course, reaching 127mph. Another speed record was set in 1906 by the Stanley Rocket at Ormond Beach in Florida. It was these speed records that demonstrated the power a steam car could deliver. And Bryan’s light weight Stanley Model K was no slouch. 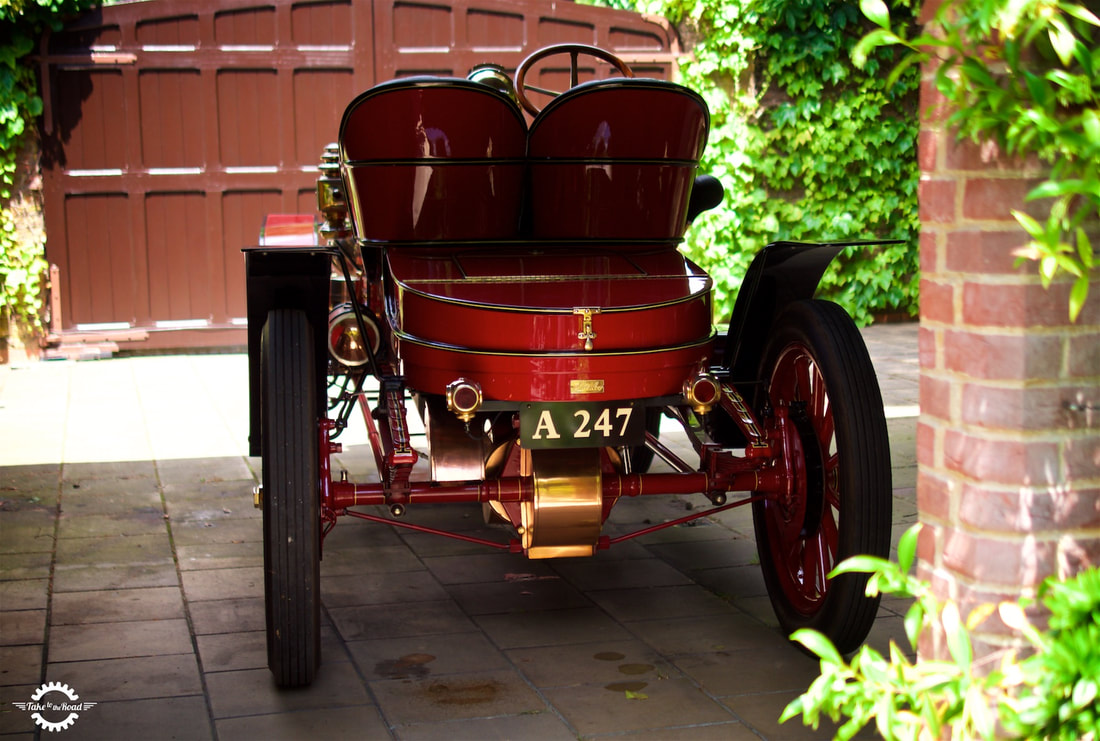 The Stanley retains the characteristics of period “horseless carriages” with big wheels and flaired arches.One of the things that struck me the most about the Stanley Model K was the sense of theatre. The hiss, pop and crackle made the car sound alive. And in a way it was. The steaming up procedure itself was not what you would call turn key by today’s standards. Indeed the slow start up of a steam car was one of the contributing factors in the demise of steam powered cars. But with the Model K, it really did feel like a return to the good old days, when the pace of life was a little bit slower. With a start up time of 20-30mins, this isn’t a car for a quick run to the shops. If you were going to take the car out then one had to get the car ready first. Hence the sense of theatre and occasion. 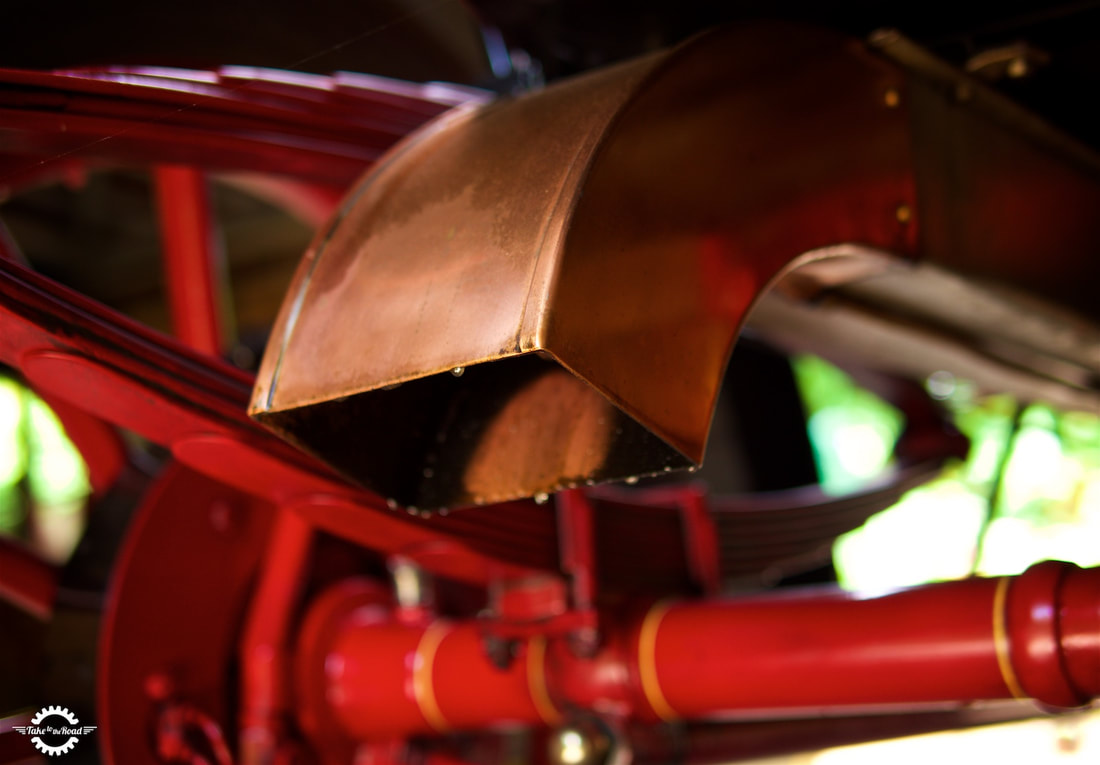 The rear exhaust which emits clouds of steam.With procedures like turning the gas on to switching on the sparker, releasing excess water from the boilers front valves, to waiting for the burner temperature to reach above 600 degrees, to cranking the fuel pressure pump, it is a lot to remember. All these steps also have to be taken in the correct order. As Bryan says in the film you have to know what you are doing. But with practice it is something you can easily get used too. The irony is that the slow startup doesn’t give any clues to the fact that the Stanley Model K was indeed a sports car in its day, or Semi-Racer as it was known.  One of the many valves that control pressure and flow on the Stanley.Once the boiler was up to temperature and the clouds of steam around the car had dissipated, Bryan took me out for a drive. One thing that is immediately obvious is that the Model K looks like an atypical brass car of the period. Dubbed the Coffin Nose thanks to its long bonnet, the Stanley was well appointed for its time with wonderfully detailed dials and gauges to a pair of leather seats that would not have looked out of place at a well to do gentleman’s club. 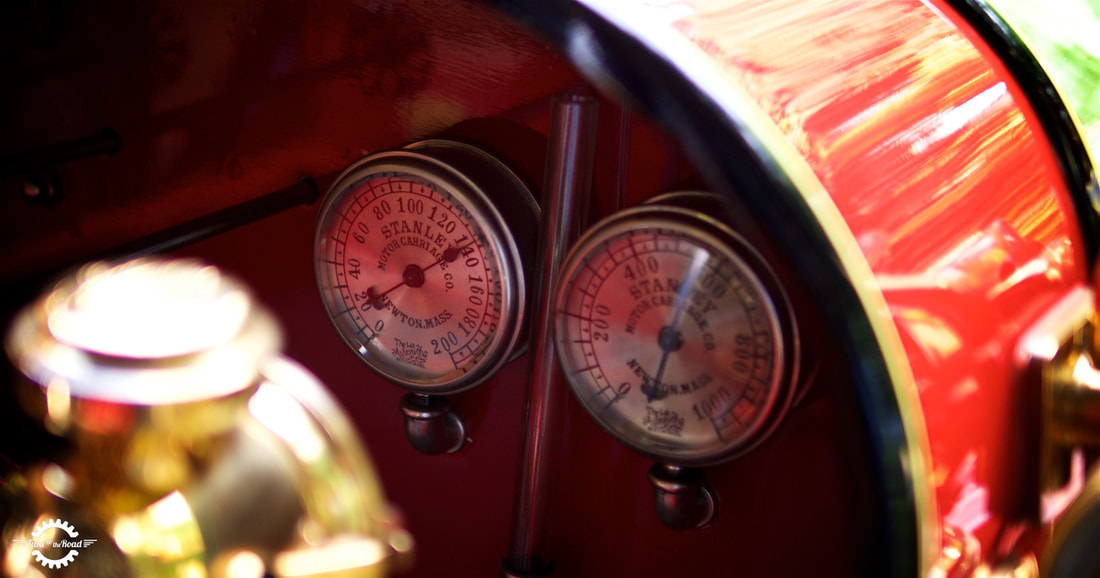 The main boiler pressure gauge is on the right and achieves optimum around 600psi.On the mechanical side the car has no clutch or transmission and it’s 2 cylinder 25HP engine runs at round 600psi. As a result the Model K is both light and very quick. Pulling away the steamer makes that characteristic chug chug sound that you can only get from a steam engine. What really surprised me was how rapid its acceleration was. When Bryan opened the regulator the car shot forward at a pace that puts a smile on your face, all whilst billowing large amounts of steam out the back. The only thing holding back the cars true performance is its brakes. The Stanley has no front brakes! 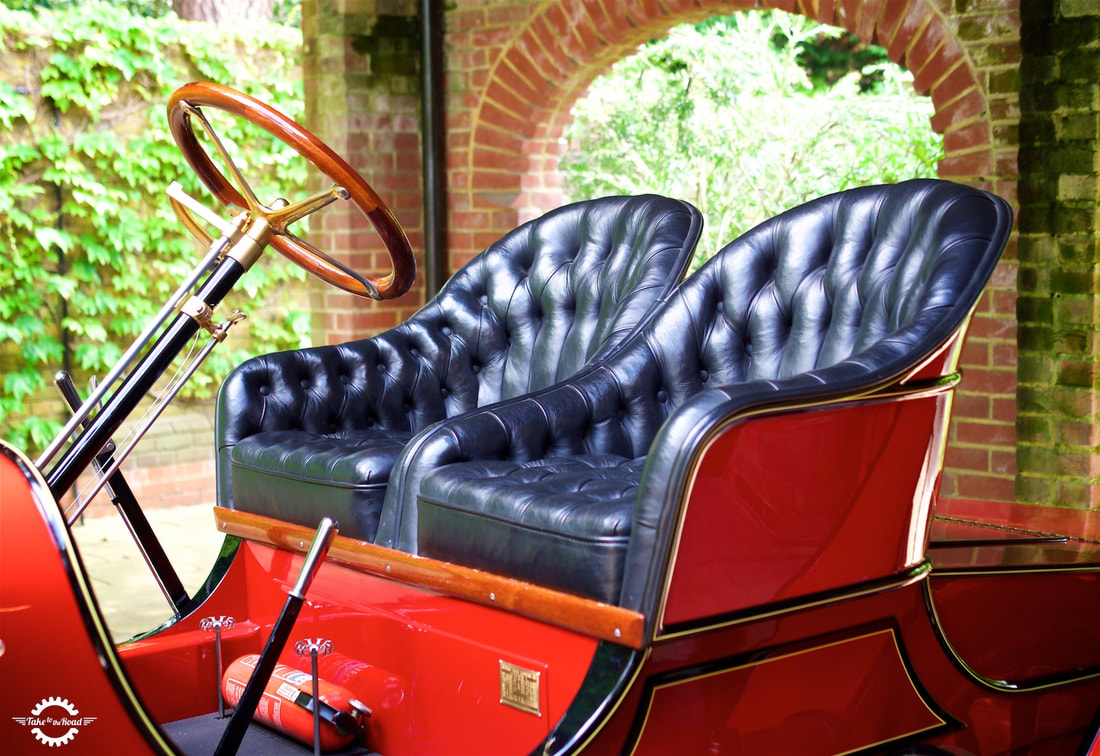 The comfortable leather seats offer a commanding position.Apart from the sound of the engine chugging away, the Model K is relatively quiet on the open road and cruises along very happily. An old vehicle like this isn’t really meant for rushing about but the bags of torque that the Stanley has on offer does mean it can mix it up with modern traffic. And sitting up high on those armchair like seats gives you a commanding position of the road. The height also increases the sense of speed as you steam along. 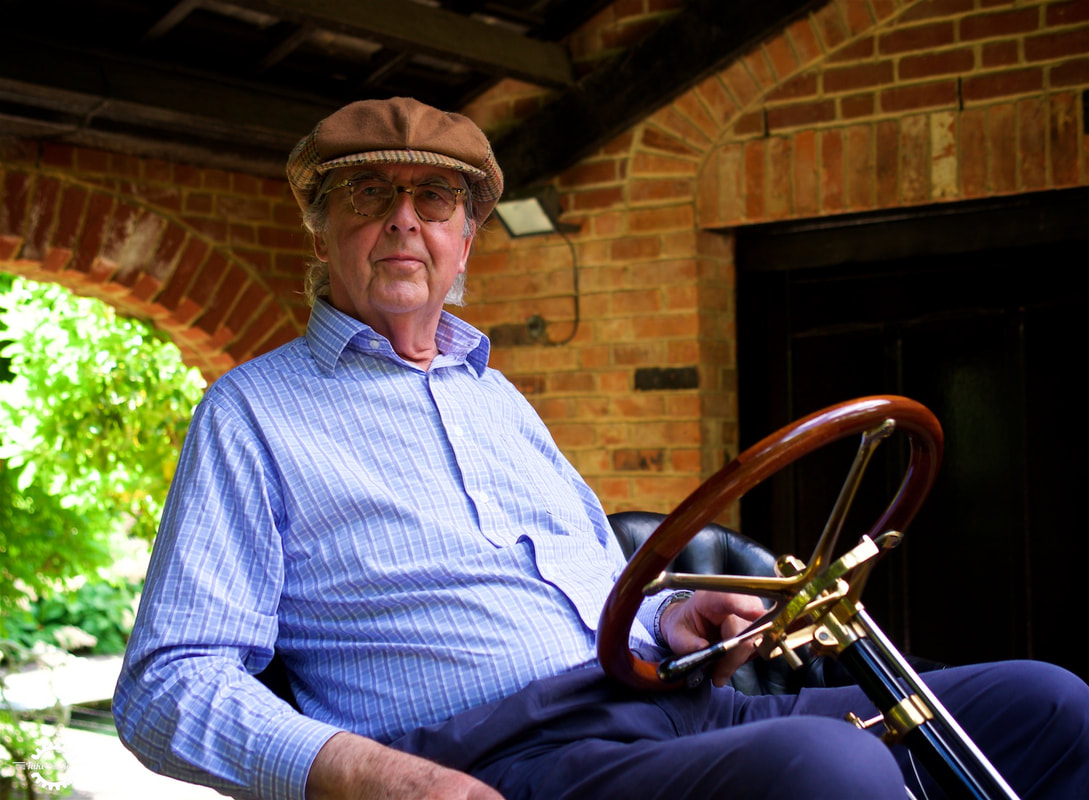 Bryan with his 1908 Stanley Model KWhat I enjoyed most about Bryan’s Stanley Model K was the huge amounts of character it has. With the brightly painted body and pin stripe detailing, the big wheels and all the brass and steam, it is a car that makes you smile. And as we sit at a crossroads in the journey of the automobile, it is fascinating to look back at the early days of the car and the use of steam as a form of propulsion. Will the steam car make a comeback as we move away from the internal combustion engine? Probably not. But old veteran cars like the Stanley Model K remind us of where the automobile has come from. And what better way to enjoy an old car than to leave a big cloud of steam in your wake.
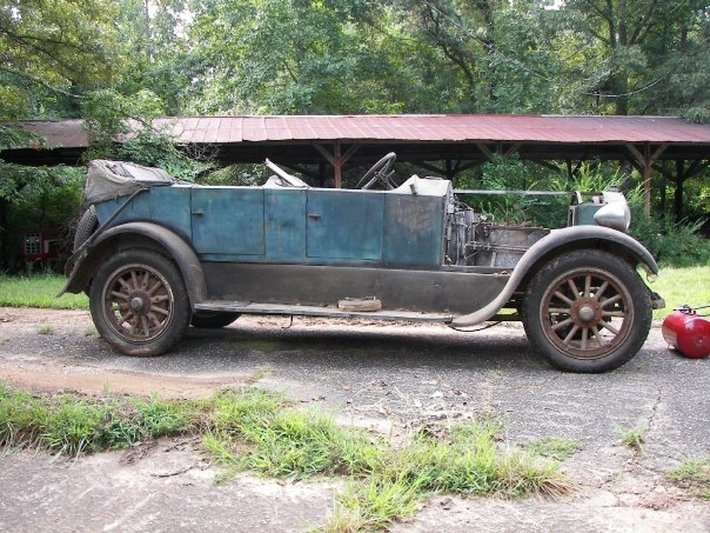 Part One The following article is Steve Bragg’s story of his family’s restoration of their 1922 Model 740B Stanley Steam car. The story of this car is a long one but I first saw this car in the mid-1970s. My dad purchased the car from the estate of Mr. George Howland, originally of Asbury Park New Jersey. Mr Howland was a chemical engineer who graduated from Lehigh University in Pennsylvania in 1925. He resided in Alabama from 1930s to the late 1940s when he moved to Atlanta GA. The car had a 1935 Pennsylvania Inspection Sticker on it, so I assumed that he did not purchase the car while he lived in PA. The car was last licensed in Ohio in 1946 (last tag for the car and it was still on it when I got the car). The car was said to have been driven to Atlanta in 1946, it was also supposedly wrecked, possibly on this drive. There is no evidence he ever registered the car in Georgia. When Mr. Howland died in 1976, he still owned the house in Atlanta but lived in my hometown in Alabama, about 75 miles from Atlanta. My father and uncle had gotten to know Mr and Mrs Howland and after his passing, they assisted Mrs. Howland with several things and she agreed to sell this car to my dad. My uncle was able to acquire their other Stanley. My father held onto his car, despite Mr. Carl Amsley coming to Alabama with a truck and trailer to purchase the car, without ever contacting my father about selling the car beforehand. My father refused to sell, whilst my uncle did sell his car later to a collector in Oklahoma who did restore the car. My dad’s car sat in his workshop from the purchase until a shop fire in 1999. It was luckily spared significant damage but was moved to another storage location until I got the car in 2009. My plan was for my dad and I to restore the car together. We started in September 2009. The car had substantial damage to the body and frame, including a repaired section of the front driver side of the frame. Mr. Howland was also a very tall man (I managed to locate his nephew, he never had children) according to his nephew (about 6’6” or 7”). This is also evidenced by modifications to the car such as lowering the from seat frame by about 4 inches and removing the air tank to the back of the front seat (where jump seats would be located). He had also moved the condenser forward about 6 inches, removing the front condenser cowl and custom making replacement metal. The tear down and restoration is documented in a series of photos and Videos both in this article and in more depth in the media section of this site and also on this sites YouTube channel. Steve has his own YouTube channel (sbragg000) Facebook (www.facebook.com/FullSteamAheadDownSouth/) page called Full Steam Ahead Steve Bragg. Mechanical Restoration The Chassis and all mechanical parts were disassembled, inspected and repaired were necessary. The chassis was restored along with all parts and fittings. An oversized 26-inch Bourdon Boiler and Burner was added along with an Earnst Boiler Sight glass. This required moving the front cross member forward two inches. The larger boiler also required fabrication of a new stainless steel bonnet, this was hand hammered around wooden forms, then insulated. The bonnet has an inner and outer shell per the original design. The story is better told in the following photos,and videos. Below we are testing the pilot, and then firing the burner. We were satisfied that the burner and pilot would be OK when installed. Major work was carried out on the engine... The car came with a spare engine which had the same number as the engine installed in the car. I can only guess that when the car was ordered from the factory that a spare engine was also ordered and hence the same number was put on the spare to keep matching numbers on the car. Both engines are numbered 740-4099. Photos of both engine serial numbers are shown. Photos of both engines and matching serial numbers are shown. Below we are checking the pump pit is working correctly. Below Doing an engine test using steam. The engine needed a major rebuild after the frame rods broke during testing the car. We made and installed new from rods, refaced the valve seats fitted new piston rings, hard-chromed the piston rods and refurbished all other parts of the engine. We have a second engine still to be rebuilt. Engine slide valves in motion. 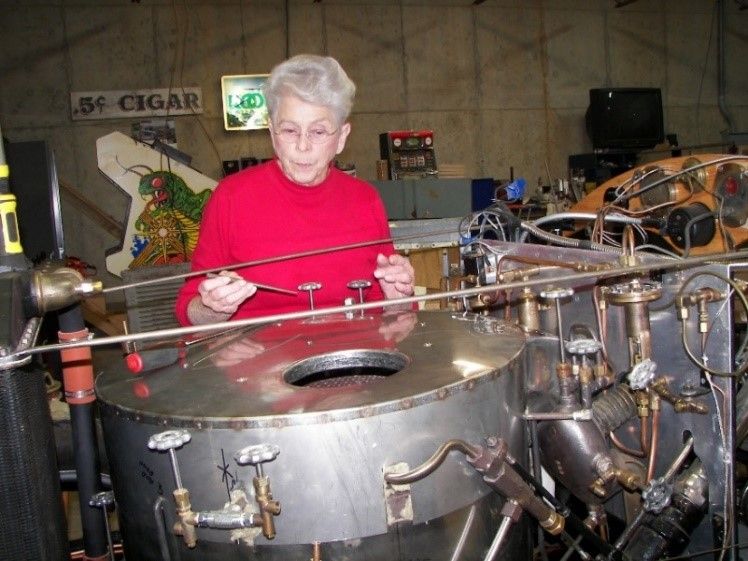 My Mother inspecting some of my work. The video below shows one of our many test runs. Series 1 issue 2 will present part two of the restoration. JERICE TALLEY ( JERICE.C.TALLEY@GMAIL.COM ) 1/24/2017 07:34:54 pm SUPER job well done! The following article is Part Two of Steve Bragg’s story of his family’s restoration of their 1922 Model 740B Stanley Steam car. Finishing the Mechanical Renovations. The fire wall was carefully removed and the rotted wood replaced and reconstructed. A new aluminium plate was also fabricated and installed with new fasteners, all matching to the original steel slotted screws. During the mechanical restoration, we are careful to match all of the original style fasteners, no phillips screws, all slotted, fillister head screws, square head, heavy hex and flat head bolts were all carefully matched and replaced as needed. Good sources for correct fasteners are McMaster-Carr (mcMaster.com), Restoration Specialties & Supply, (restorationspecialties.com), Restoration Supply Company (restorationstuff.com), my wife seems to think they deliver every day to my workshop. The front cross member was moved forward to accommodate the larger boiler. All the valves and fittings were refurbished and packed. A few required replacement – those were sourced from the J.R. Goold in England (stanleysteamcarparts.co.uk), Howard Johnson (Steam Works Ltd) and Don Hoke (Vintage Steam Products). The steam automatic was rebuilt and calibrated, the fuel automatic was also rebuilt and tested along with the water automatic. The relief valve was rebuilt and tested (it relieves quite nicely about 750 psi). The kidney gauge was also dissembled, cleaned, restored and water level indication verified. An additional level indication was also added in the form of an Ernst sight glass. The water automatic, kidney gauge and sight glass were all tested individually and as a group to verify tracking and function – all of this was done cold and after initial steaming. The Smoke Hood With the over-sized Bourdon Boiler, the smoke bonnet had to be re-fabricated. 308 stainless steel sheet, .032” (.813mm) was cut into circles, fitted to wooden forms and hand hammered into the proper shape. An inner and outer shell, like the original, was fabricated, then insulated with mineral wool. All of the insulation is completely covered in the sheet metal, including curved angled caps, so that the inner wall sits directly on the top of the boiler per the original design. It makes a good smoke tight seal. A new exhaust down comer was also fabricated and it also seals and drafts nicely. Water Tank and Drive Covers The tank was taken off of the car for cleaning and repairs. Although the tank did not leak, the top and water return did have a few spots where solder was needed. There was still water (although very nasty) from the last time the car was operated, it had not fully evaporated. The steam siphon was also cleaned and reattached to the support on the tank top. Upon trusted advice, a tank cap was added to the copper water tank and while the tank was opened, the interior was further cleaned. A large amount of hardened sludge was removed after some painstaking work. The water intake screen was also carefully cleaned and re-installed. New hangers and strapping were also made. The tank was cleaned (for final appearance) with technical grade citric acid mixed to a solution of 5-10%. The cleaning solution turned a nice green colour and the result was too nice to paint like was done at the factory. The engine cover was fairly well bent up and required some attention so after some hand work, it was straight and shiny like a new copper penny. The mid band (to cover the engine packing) was missing but luckily an almost perfect one turned up in the Stanley Museum Auction in 2012. The covers will be installed once the second engine is installed in the next couple of months. The pump rod cover was in terrible shape, it apparently had been badly mangled in the wreck and requires a new one to be made. That is still in progress but is being fashioned out of copper sheet to look like the engine cover and water tank. The original was galvanized but all of the copper (now unpainted) begged for a similar cover for the pump rod. The Condenser The condenser shroud was bent and coming apart where it was soldered together. It was taken completely apart, cleaned, re-soldered and then nickel plated. The condenser core was found to leak so we refurbished it and re-soldered all joints. The 740 condenser was quite a challenge to stop all of the tube sheet leaks so a few of the tubes were flared again at the top and once flared, soldered an in a few cases some extreme temperature (>2300F) epoxy was used. The condenser cap was broken, all of the Bakelite was missing. A condenser cap proved almost impossible to location, none could be found for sale so I resorted to making a new one. I found one for loan so I could cast a mold. From there I used a modern two part epoxy of the correct specification to make an identical replica. My custom designed jig allowed me to make replacement caps. I have produced several (contact me for information). The loaner for the mold was captured in exact detail so even the scratches were duplicated down to the colour, weight and feel. Sitting side by side, the original and replica are identical. The Burner The new Bourdon Boiler was also purchased with a new burner. The original mounting clamps were salvaged but a new mounting ring and new super heater ring were fashioned. This resulted in a very tight seal on the burner to boiler connection that is sealed with flat surfaces, bolts and high temperature fiber gasket. So far, there have been no indications of air leakage. After seeing Howard Johnson's temperature indication for his 1916 Stanley, I knew I wanted to make this addition to our car. I was able to locate a proper thermocouple and a period correct meter that all functions quite nicely. I have assembled several meter kits that are available for sale (contact me for details). The added thermocouple, when tested with a modern millivolt meter, and compared to the thermocouple table, have proven to be extremely accurate, checked against a laser thermocouple and the proper tables, the meter setup is within 5 degrees accuracy. With just the pilot lit and at operating temperature, the meter will register 250-290F and at full fire, almost 600F. This gives a high confidence level of the burner's operating condition and with the sight glass also, quick response for upset conditions. The Body Except for the front fender and splash aprons, the body at first appeared to be very in solid shape but the top had fallen in so there was some concern. Further investigation though revealed a great deal of rot under the aluminium skin. This discovery resulted in the wood work taking a great deal of time to complete but the results have been worth it. Once the skins were removed we could inspect and see the extent of the repairs needed. By use of some modified pliers, small chisels and a lot of patience, all of the tiny nails and brads were removed. There were hundreds to remove. We decided to salvage as much of the wood framed body as possible, as a result the work took over a year to complete. The rotten and damaged wood was carefully removed and replaced with new wood. Jointing of all replacement sections into the original was carried out in an attempt to keep to the precise shape and style. Good quality glue was used as well as mortise and tenon joints. In some of the joints, only tenons and pegs, along with glue, was used. Original style slotted wood screws were also used, hopefully meaning the longevity of the wooden frame would last for few more decades to come. On one of the rear sections, at the driver rear door, there was only surface rot present. I found an epoxy made of wood based products that was designed to repair surface rot. The rotten wood was drilled every ½" to make a grid of holes to get to good solid wood, then treated with ethylene glycol to kill the organisms present. That takes the glycol 203 weeks to kill everything. A two part epoxy filler was then carefully applied and when hardened, created a solid surface repair to the rotten wood. This was sanded and reshaped and could be drilled, and was in fact as strong or stronger than the original wood. This is an excellent means of repairing surface rot. 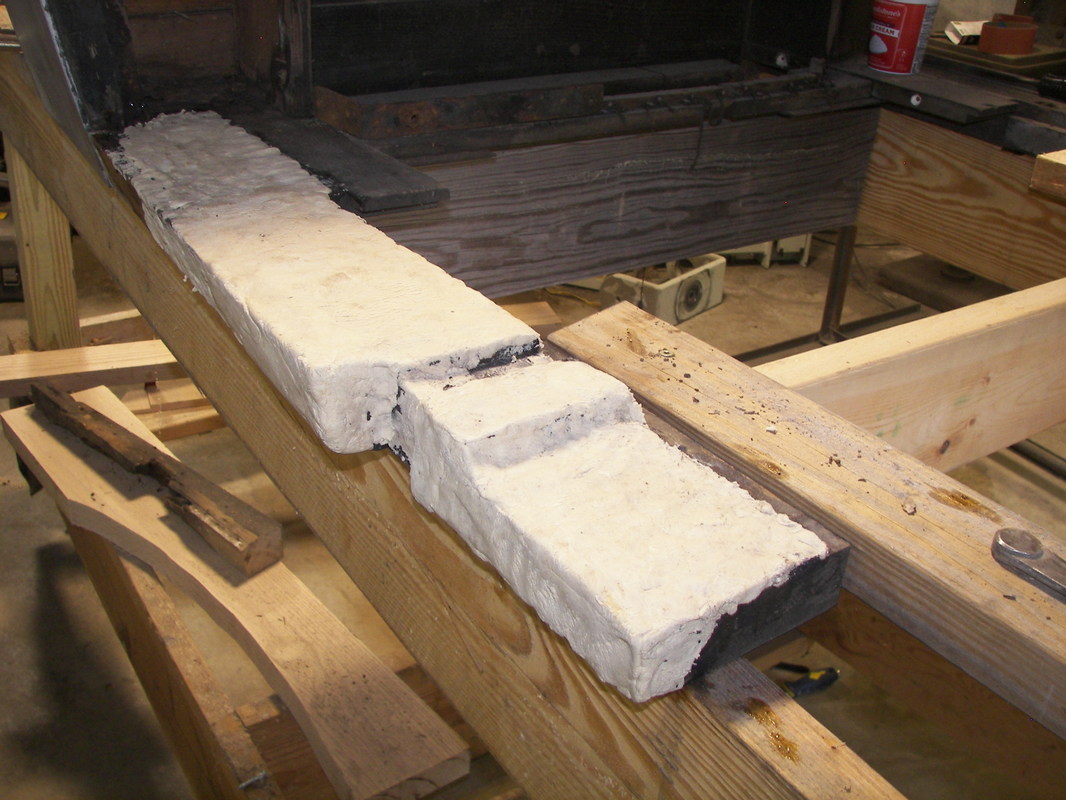 Some interesting notes: The body for our car was made by the Shields Carriage Company in Massachusetts. The wood used for the rear seat supports was apparently wooden slats from the shipping pallets. The top material was also apparently supplied by the Troy Sun Shade Company. After researching both of these companies, both have very interesting history's with Stanley (that will have to be a chapter in the yet to be written book). The wood in the photos below is original to the car, the body was made by the Shields Carriage Company, the top materials from the Troy Sun Shade Company. This wood and as you can see, looks to be shipping pallet material and the lettering was preserved with the car. Now that we were satisfied that the wood framework of the body was completed, we turned to the aluminium body work.
We will talk about that in part 3 of this story. The following article is Part Three of Steve Bragg’s story of his family’s restoration of their 1922 Model 740B Stanley Steam car. The wooden frame of the body was finally completed after almost one year of work. It was then time to mount the body to the now restored chassis for final inspection. This gave us the opportunity to make sure all our work was completed correctly and to do any final adjustments. It was very satisfying that the body fitted correctly after all of the wood replacement and repairs. This was a significant point in the restoration; I think for the first time we could really see the end point of the project. This was very satisfying after, at that time, almost 6 years of work. Now that we were satisfied that the wood framework of the body fitted the chassis, we then re-skinned the frame with the original aluminium “skins”, which we had also cleaned and repaired. There were a few spots that required some welding, we used a MIG wire system that enabled us to properly repair and then grind back down and shape the skin being careful not to “heat work” the thin aluminium. The aluminium sections of body were in pretty good shape when removed with only a few square inches of repair. Most of the minor dents were removed using a wooden and leather “slapping” stick. When done, we turned to the doors and again completely restored them to the same standard. We did not have to remove the skins but completely dissembled the doors except for the skins and wood frames. The latches were removed, cleaned and preserved and then re-assembled with the door. The Bakelite handles were cleaned and replated with nickel, then being re-attached to the door with metal locks, made on our lathe, in the same manner as the originals. The latches were made by the English & Mersick Co. New Haven, Connecticut Manufacturers of Automobile Hardware, Specialties, Mountings, Etc. With the body completed, we turned to the fenders and splash aprons for the next piece of the puzzle. The driver fender and splash apron were severely damaged, part of the splash apron was missing and the front fender was wrinkled and split in several pieces. We were convinced that it would have to be fabricated but we were able to resurrect it. It required cutting it into several pieces, shrinking sections of it, and also the creation of a support jig so we could use the good fender to mirror the one being repaired. Pretty good results on the two. Tony “Tinman” Inman did some outstanding work on the fenders and the two splash aprons. The complex curves of the aprons required some great hand work but the results are very pleasing. A new pilot door was also required to be made. Once the body, fenders, and splash aprons were all fitted correctly, it was time to take everything apart, remove the body and get it finally prepped for paint. Again, this took a lot of time and effort to make sure the final product was the way we wanted it. One of the pieces of metal trim was in poor shape. This was the trim around the hood. It is a simple aluminium piece with a rolled edge detail. This proved to be impossible to find so I set out to make it. First we had to make a die for a bead roller to match the original trim. Once this was made and matching to the original, then it became fairly simple. Rolling the proper width took some trial and error but proved to be simple enough. Now with the fitted trim and hood lace, the assembled hood could finally be installed. The original windows (both wooden and side curtains) were with the car but were good only for patterns. The canvas and leather had shrunk to the point of not even fitting all of the snaps. The side curtains even have labels to show which position to install them. The eisenglass was well beyond yellow and brittle but again serves as good patterns. The wood windows could not be repaired, although we did salvage all of the hardware and saved many parts, including the two brass plates from the G. A. Schmidt Company (from Chicago – the address and telephone number is imprinted onto the plates) who made them. This makes a nice detail in the restoration of the windows (this is not yet completed). We have made new wooden frames and in progress of making a full set of new side curtains along with a storage bag to match the originals. I think that will be a project for next winter! There are shows and tours to try to get in this coming summer. The paint colour was selected after a great deal of research into the available paint colours from the 1920s. While the original green and black was acceptable, the car seemed to beg for more. We finally settled on the colours after narrowing down to three on some test panels. The black fenders and Washington Blue body was sprayed by Jonathan Embry who did some excellent work. The base and clear coat was applied over epoxy primer after many hours of blocking and sanding to get the aluminium skin almost perfect. We considered reds, blues and the original green but ultimately the dark blue and black just suits the Stanley perfectly. We briefly considered painting her in the same manner as original but decided the work was not worth the reward – the car had been brush painted with varnish and hand rubbed. I really can’t imagine how hard that task must have been: Automakers started painting cars around 1900, and it could take up to 40 days to apply a paint job. These early cars were brushed with varnish, which came from the era of horse-drawn carriages. After the varnish dried, the car was sanded, refinished and polished. By the time this car was made in 1922, the car painting process began to speed up. Automakers like Henry Ford began using nitrocellulose lacquer, which had a quicker drying time, on assembly lines. Then, in 1924, paint spray guns made their way onto the assembly lines as well. The spray gun made it possible for workers to paint cars more quickly, and also apply the finish in a more consistent manner. As a result, cars didn’t need as much sanding between coats, and a car could be painted from start to finish in a third of the time that it used to take, so while it was at least 2 years out of time, we decided that spraying was ultimately the way for us to go. The paint work has turned out very well. A great deal of time and care has been taken on the paint work preparation and finish, but as can be seen it was worth the effort. The colour is Washington Blue, I found several references to this colour from 1920s paint literature and chose this deep rich blue to show off the Stanley. Every part of the car was stripped down to either bare wood or metal. Epoxy primer over the bare aluminium was needed for proper paint adherence, and sealer, stain and polyurethane was used for the wood. Electrical System The electrical system was intact except for the missing generator and the incorrect headlights. The Solar 1130 headlights were missing along with the light bar. I assume it was destroyed in the wreck. Also missing (later found in a door pocket, was one of the light switches. This car had a three gang light switch assembly on the dash. All of the interior lights were present, two dash lights, one under dash light and the pump pit light. The pilot light was missing. We did discover that the car had been assembled with the electrically heated pilot so that was a must to restore it. Imagine directly shorting the battery through the pilot to heat it up before assembly. No wonder the battery would have to be charged after starting – the Owner’s manual states to drive the car for 20 miles or so after starting to properly charge the battery. The wiring for the car was intact except for the proper headlight wiring so it was decided to test the wiring after inspection. I never made it to testing, during inspection, I found that the wiring had to be completely replaced due to missing insulation, splices and overall condition. I found the proper wire, complete with wrapped metal sheaths like the original. I also replaced the metal armour and all of the connections with the proper brass terminals. Next I wanted to ensure I had plenty of fused portion, so I did add an additional correct style fuse block. With the re-installation of the new wiring harness, the car’s electrical system was almost completed. It took some time to find a correct generator but felt it best to stay with the 6-volt system per the original. I finally located the correct one and it was a fresh rebuild. However, one cannot just find a wet cell 4” X 9” 6-volt horizontal battery so I went with a modern 6 volt AGC battery that can be mounted on its side – it fits the battery box perfectly. I also have added a disconnect to allow the battery to be isolated during shutdown periods just as a safety measure. I did manage to acquire a new John Packard pilot that I modified to accept the electrical connections. This meant that I could test the pilot heater switch – this arrangement worked great – with the high capacity of the AGC battery, it quickly heated the pilot and after only 20 seconds or so, the pilot lit without problems. I have yet to finalize the configuration on the car so, for now, it is a torch to preheat the pilot. I did find a couple of the correct headlights (from Honest Don’s Steam Car Emporium), along with the Patterson Lenz – this is an interesting lens in that it is thicker at the bottom thus weighted, to keep it from vibrating and turning. It is important to keep the proper alignment of the light beam. 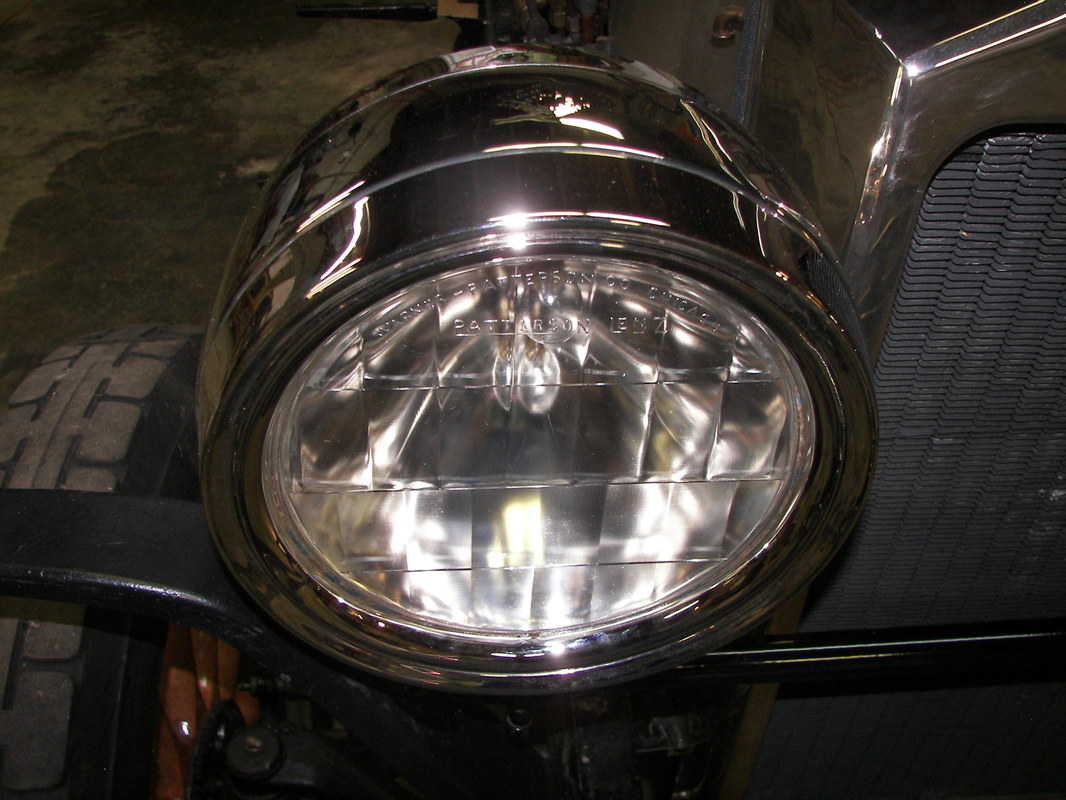 It also took about three years of on and off again research – the three gang light switch was made by Cutler Hammer (the same one as in business today). From everything I could find, the switches last went out of production sometime around 1911. So of course Stanley used them until they had no more. After months of painstaking research, I found 5 switches, new old stock, in a warehouse in Colorado, some complete with new bezels. Needless to say, when the gentleman told me the price, I bought them all. He also had a few two gang and single gang switches, the single gang have removable pull handles that function as a key. (Yes I have them all). With the electrical system reassembled and fully functioning, it was time to install the painted body. TOP BOWS After the body was installed, the final assembly has been worked on over the summer and is nearly completed. Quite a while (about 4-5 months) was spent measuring, designing and constructing the top and top bows. Out of the original top bows, only one was intact. The rest had collapsed, broken or otherwise rotted beyond use other than patterns. The rear bow was in at least three pieces, and the side rails were missing except for an 18” piece on each side. I was able to use the remaining pieces to figure out the length, width and shape of the bows. From this, I constructed forms from plywood and built a wood steamer from a section of 6” pipe and an old pressure canner for the steam generator. I could get about 3 hours steaming time on a fill up of water. This would allow the wood to get to near 200F and allow the proper bending. The rear bow was about 9 feet long, 1-inch-thick and 4 inches wide. We put two 90-degree bends in that piece and it worked perfectly. After a bit of trimming and sanding, it fit onto the top sockets just fit. The other top bows were also bent and the top frame was completed by constructing a new visor, along with the matching trim for the visor. Once the top frame was completed, the top could then be installed. I bought good quality top material from Restoration Specialties and proceeded to design and constructed the top, the result is pleasing and functions nicely. This is a California Top, a soft top that does not let down. There are multiple snaps installed per the original design that allows the side curtains to be installed. Those will be made later this year. And finally the interior We selected black full grain leather like the original. We chose a flat colour, nothing flashy for the old girl. After careful restoration of the seat springs, a new rear seat frame and several other fixes, I began to install the leather door panels and seat sides but kept the upholstery as near to original as possible. I did replace a few broken springs, cushioning and the like but as you can see the result is well worth the effort. Leather kick panels and matching leather Hidem trim (custom made) really trim out the new seats and door panels. Remaining work: Finish up the new floor boards and trim along with a few trim details. The white-haired lady in the photo below is my great-aunt Kathleen Wood, she is 97 in this photograph. When she came to visit on Memorial Day of 2014 (May 25th), my uncle asked her if she would like to ride in the steam car. Her short reply was "yes, that's why I came up here, to have a ride". She climbed in, sat down and said let's go. Her 100th birthday is in March 2017; her health is still good and she plans to ride in the car on her birthday. 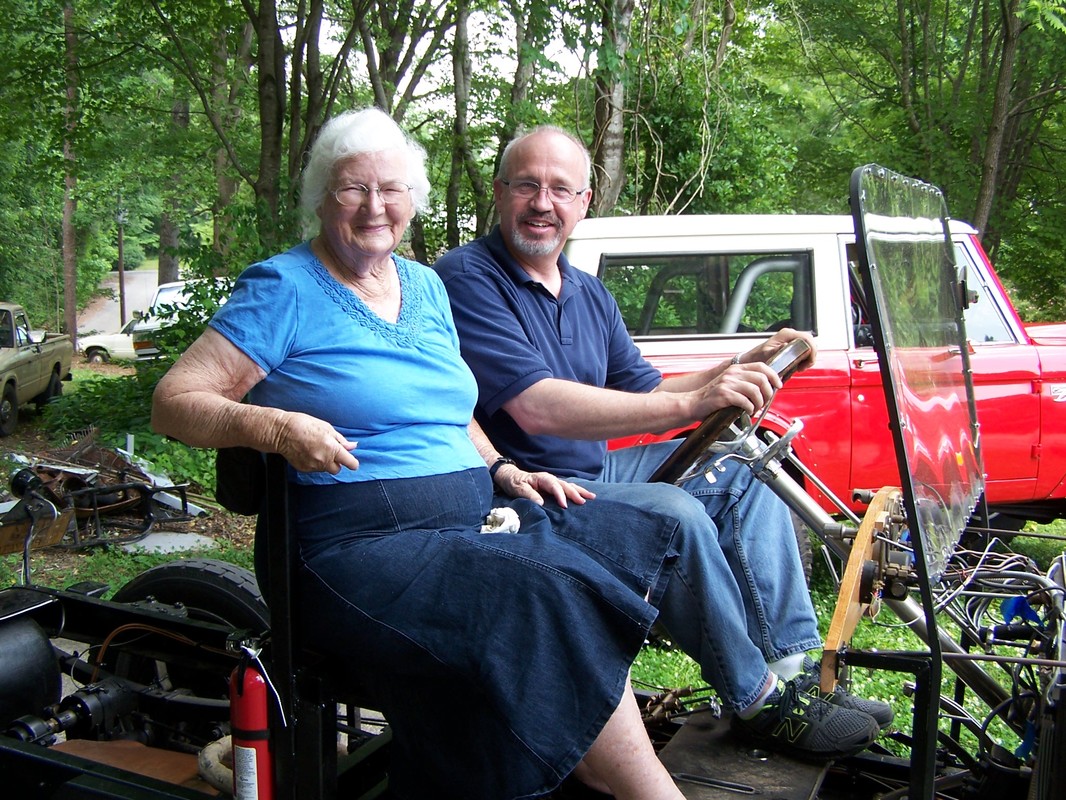 The previous owner of this car (from 1930 to his death in 1975) was George Asbury Howland. He and his wife never had children but in the photo below is his nephew Steven Howland and his wife. As you can see, Mr Howland second from left is quite tall and his uncle was even taller. This is why there were several modifications done to this car – the seat height was lowered, the under seat air tank was relocated to the rear of the car, along with the jump seats being removed to accommodate that change. Mr. Howland located me after hearing about me restoring his uncle's steam car and wanted to see the car in person. 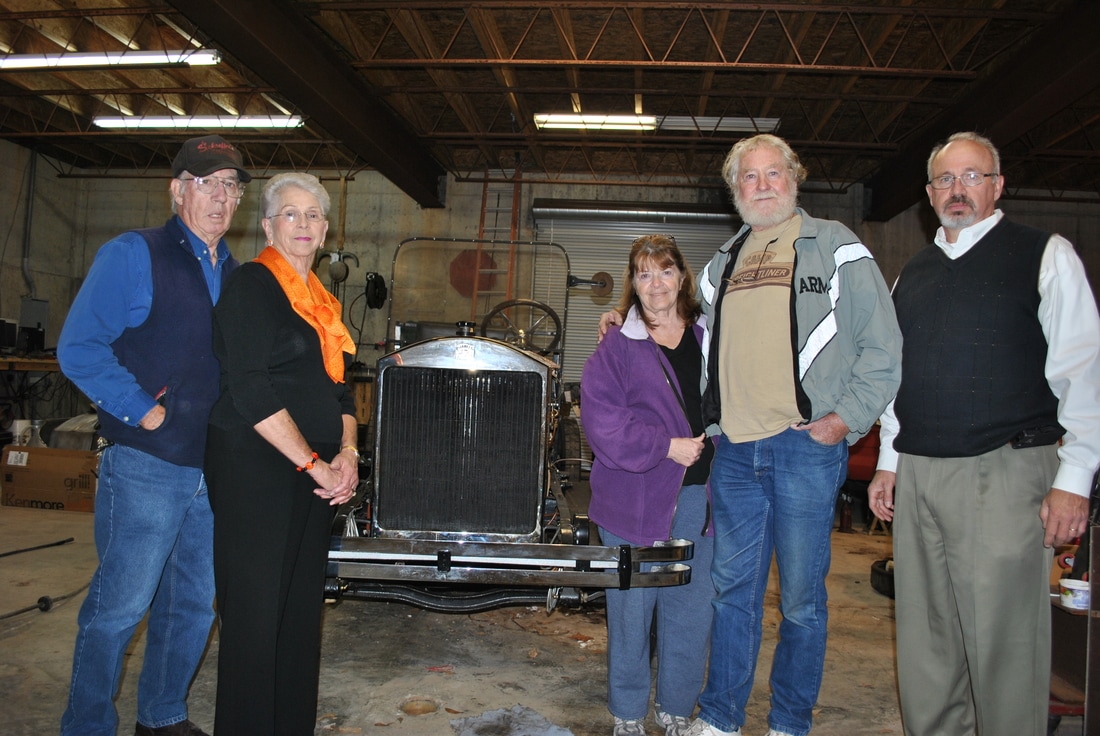 In the photo below is Tony "Tin Man" Inman – master fabricator and restoration / rod expert. He has provided much in the way of metal fabrication and project advice, doing most of the body metal work. He was responsible for the paint preparation. 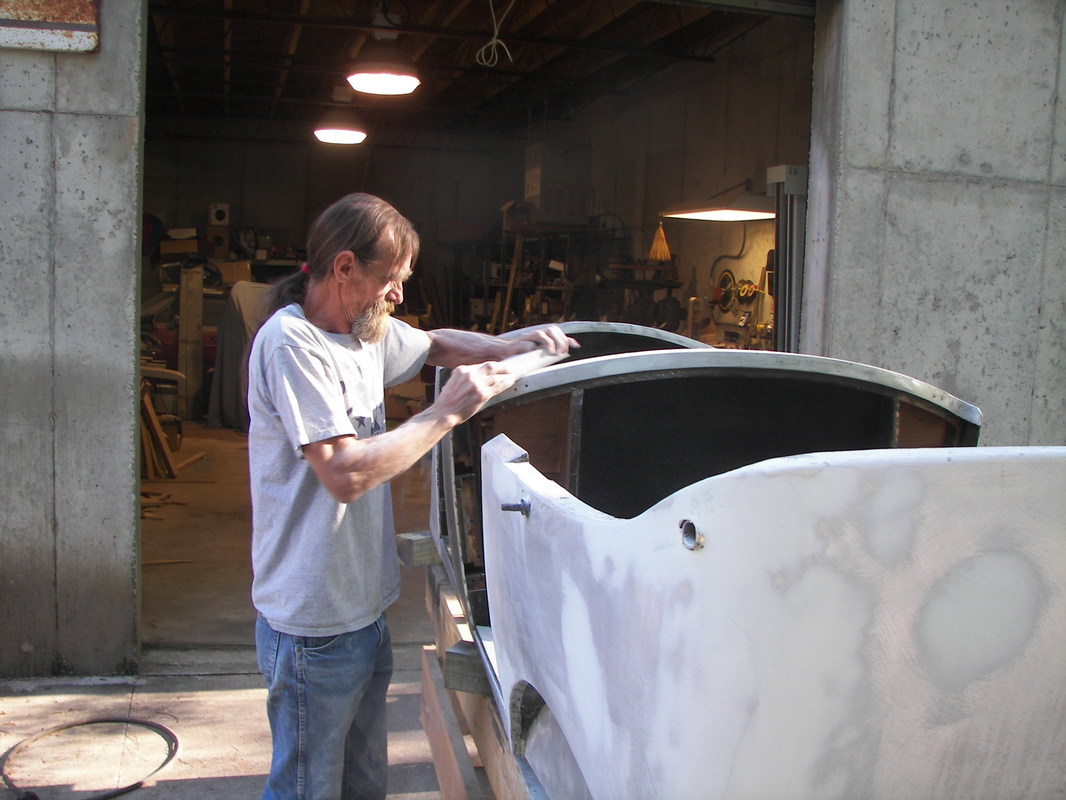 The Photo below is of my parents waiting for a ride.  In the photo below is Tin Man and crew working on the body and prepping for paint. 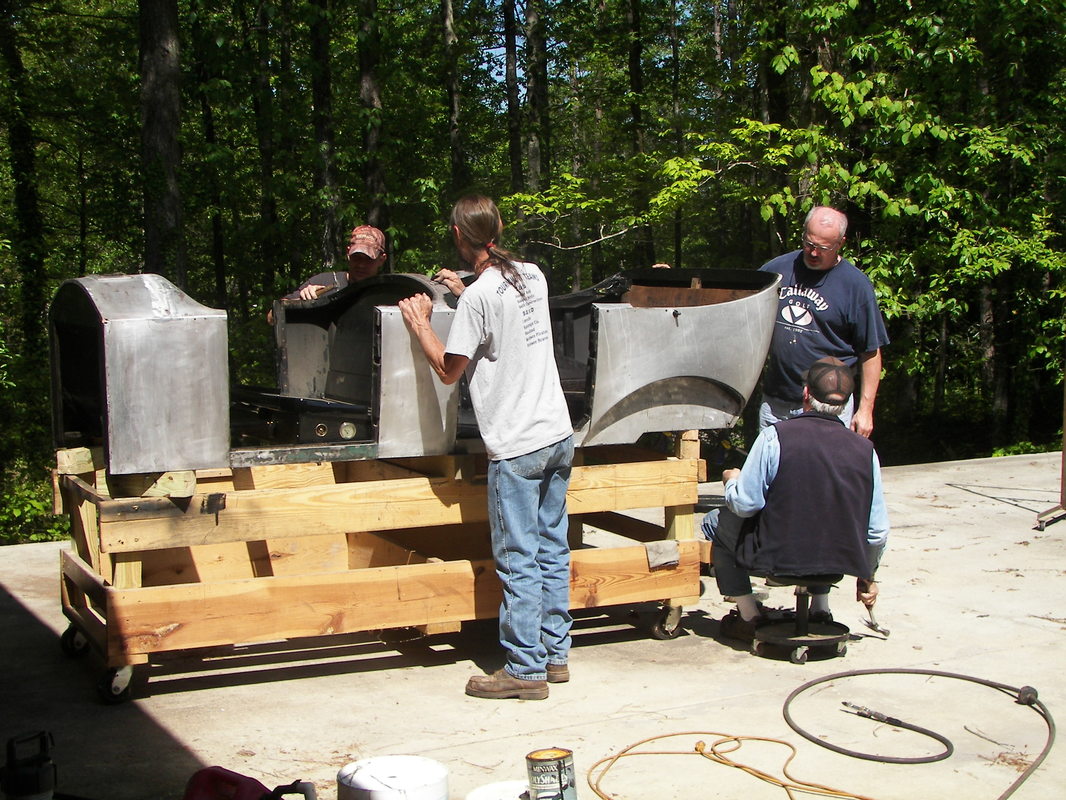 In the photo below is Jonathan Embry of Embry's Paint and Body Shop preparing to spray the PPG Washington Blue base and clear coat. 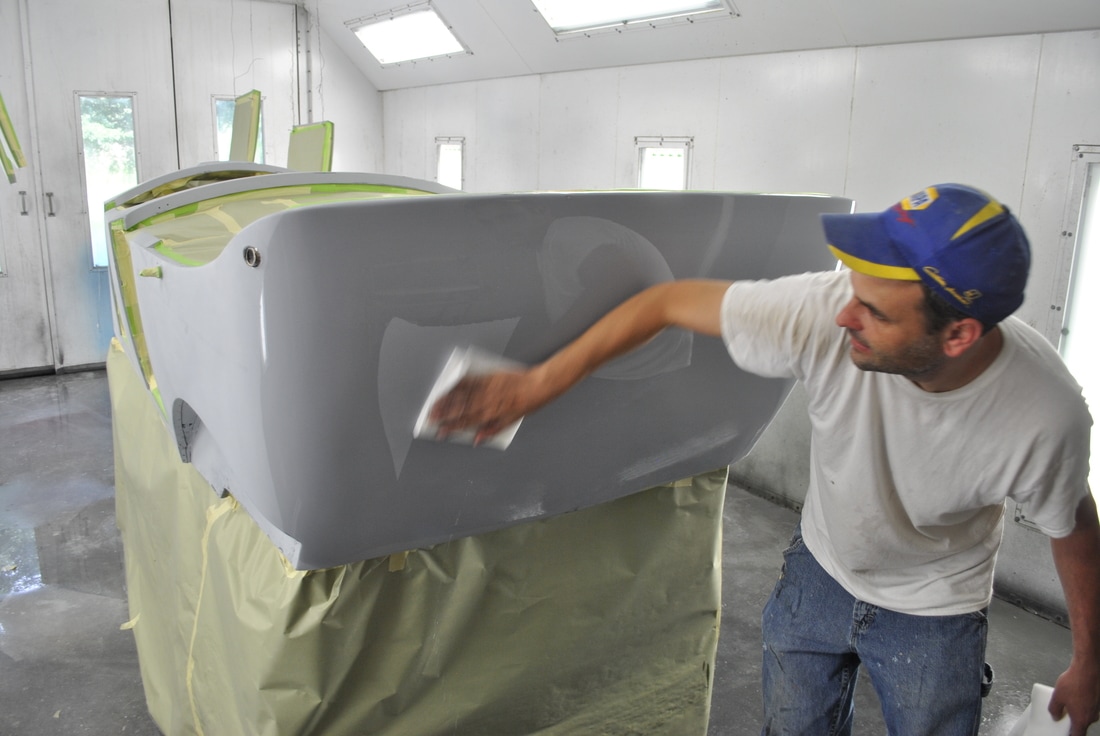 In the photo below is Tin Man and crew working on the complex curve of the splash aprons. 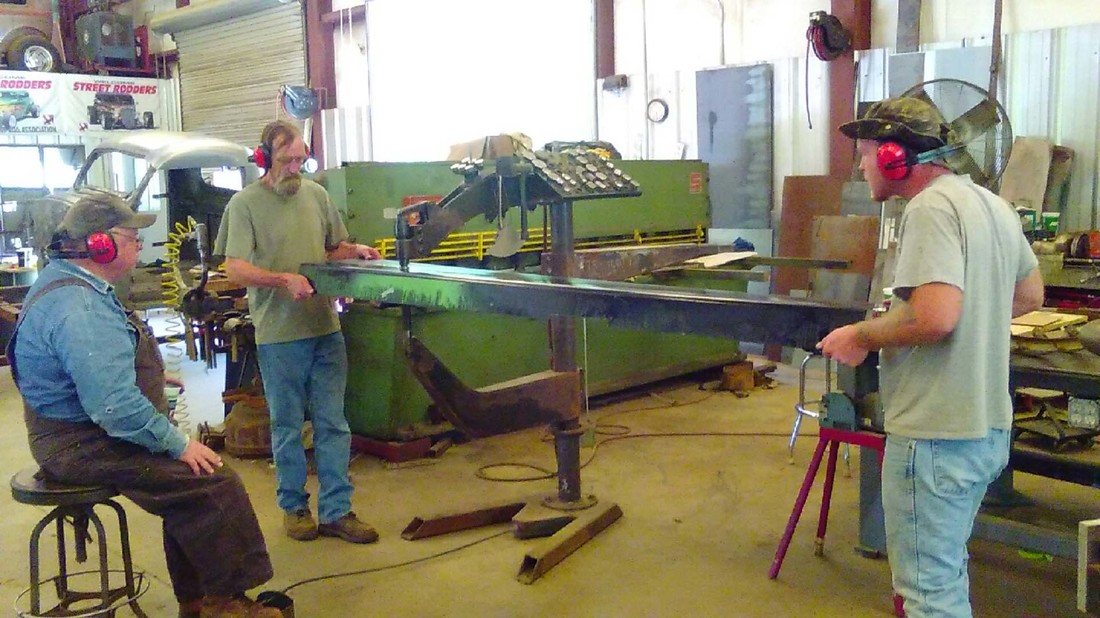 In the photo below is Tin Man: Using a custom die to put the correct radius on the splash aprons 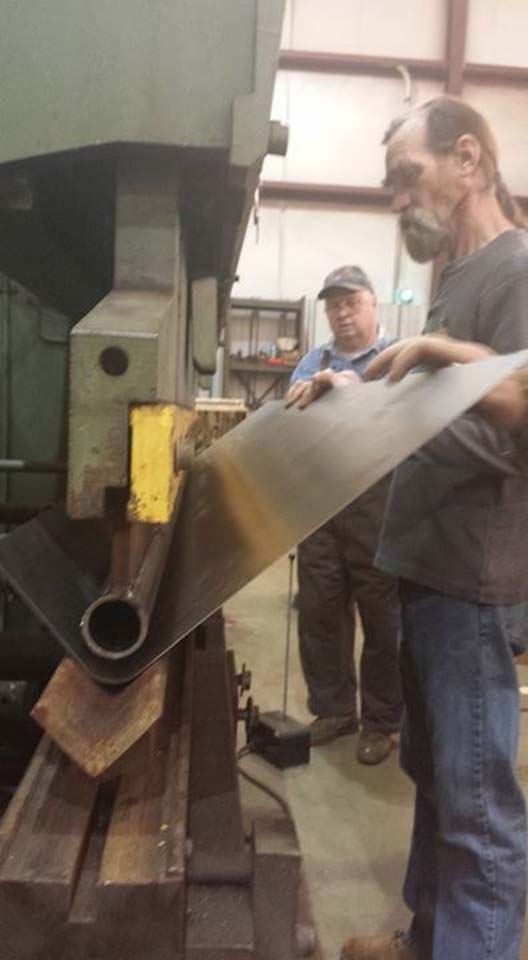 In the photo below is Brothers Jackie Bragg and Joseph Bragg (my uncle and father) working on trim for the running boards.  Special thanks to: My family, particularly my wife, father, and children: Sabrina Bragg – my wife of 30 years, patience, inspiration, encouragement, keeping me in line. Joseph Bragg– my father and inspiration for the project, help, advice, guidance, and the most encouragement! My children: Landon, Alex and Millie for all the help, questions, and checking in on me when I am “in the shop”. Mildred Bragg – my mother, always helpful, and doing wonderful sewing for parts of the upholstery. Jackie Bragg – my uncle - encouragement and advice along with help. Dennis Bragg – my first cousin – help, assistance, metal work, advice and encouragement. Howard Johnson, training, mentoring, guidance, advice and encouragement – as well as several parts. Don Bourdon – new boiler and burner. Don Hoke – parts, advice, supplies. J.R Goold Vintage Steam Restorations – parts and services. Tony “Tinman” Inman – metal and body work. Jonathan Embry – Paint. Dallas Plating – nickel plating. McMaster-Carr – they should have sponsor recognition after the almost weekly deliveries. The 4th and Final part of the story of the restoration will follow soon. BARBARA HILL Impressive patience, stick-to-it-ness, and loyalty to the original. Beautiful! |
Archives
December 2022
Categories
All
|
 RSS Feed