|
Steam Car Network
|
|
PART 2 A recap of what we took on and the problems and work needed. Note the fire damage as well as wiring quality. Note the oil soaked sections all over the body as well as diff and other areas needing repairs. Now we start the body repairs and paint. With the the car completely disassembled, the body was steam cleaned in an attempt to remove all the oil and dirt. Once done we then looked at all the burnt areas to assess what needed replacing by cutting in new wood. We took the decision to rub down the body with 180 grit paper. This took a few days but did reveal some more de-lamination problems. Repairs were then carried out by cutting in new sections of wood and repairing many small section over the entire body. With these repairs done, sanding of the body continued in an attempt to get to an acceptable surface finish to allow sealing of the exposed wood areas with a coat of West sealer. The sealer was then rubbed down and a coat of primer was applied to the entire body. The body was allowed to dry for a few days allowing for some shrinkage of the primer. We found whilst preparing the body for paint that the car had been painted after full assembly. This was clear under the seat bases and under all the steel fittings and steel framework. 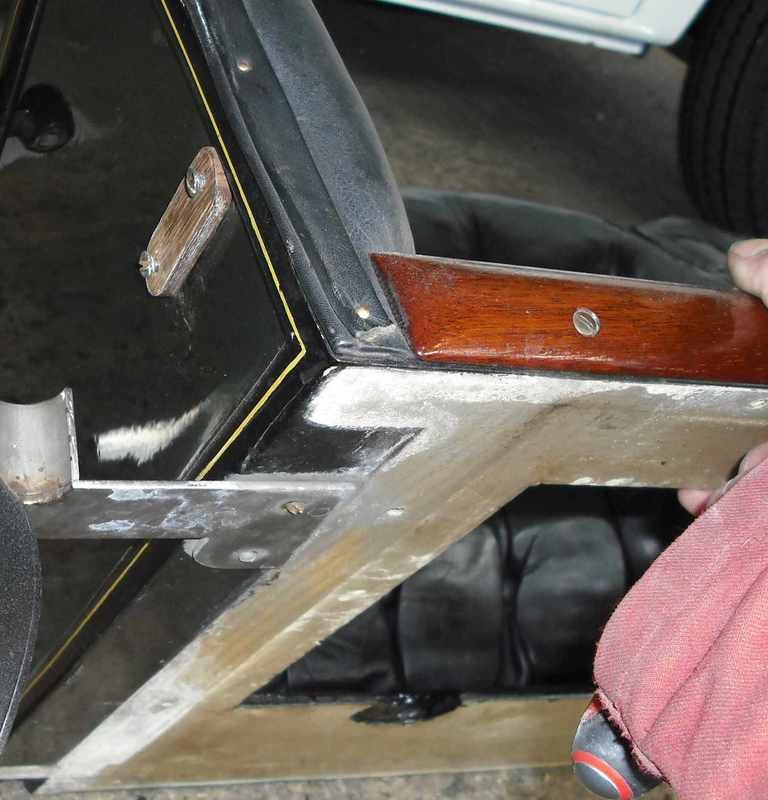 Under the seats we found no paint or sealer, as was the case in many areas. Water ingress into the wood had caused a few problems. Once primed and ready for paint, checks were made to obtain the line detail as used on the model 70. This was done with the help of Alan Blazick. No coach line painter could be found to do the detail work for the lines on the body,chassis, wheels etc. It was decided to do it ourselves by using special low tack tape cut to spec. A local company was commissioned to undertake the work. They cut low tack material into the very thin lines, the sizes for the car and chassis ranged from 1/16 of an inch in increments of a 1/16th at a time up to 1/4 of an inch. Shaped sections were also cut for the wheels and spokes. When the primer had been prepared for top coat we painted the entire body, doors and seats all separately with a base coat yellow- the colour of the lines. Once applied we then taped the lines using the low tack tape. The tape colour was black which helped us get the detailing uniform and accurate. The idea here was that after the top coats were applied that the tape was removed revealing the painted yellow detail lines. Line width was determined by tape width. Once the tape had been applied the seats doors and body were painted black again in base coat. The black also gave an excellent base colour for the green paint used for the balance of the main cars main colour. Once the black had dried, sections of it were taped over , the sections taped over were all the areas that would be black on the finished paint job; moldings around the edge of the seats for example. Now we painted the body and seats etc green again in base coat green. When dry we removed the taped areas revealing the black and yellow detail lines, all in the Matt base coat. The odd touch up took place to make sure the finished job would be to a high standard. Five coats of lacquer were applied to the painted body sections giving the gloss to the paint job. This was slow baked at a low temperature. When dry all the painted areas were wet flattened and then polished using a slow revving polishing mop and various cutting compounds. This now gave us a high quality gloss finish with the added benefit of the detail lines being sealed in place, so no lines could be polished away when keeping the car clean and presentable. The same paint system was used on all the painted parts of the car and chassis etc. With the body now finished and ready for assembly along with the chassis we turned our attention to the wings (fenders) and bonnet (hood). These were in very bad condition . The bonnet had been severely burnt leaving bad heat distortion. The wings had also been damaged in the past leaving them with numerous dents and twists to their shape. As one can imagine the wings needed a large amount of work to include reshaping- in some areas heat shrinking was needed. All the splits were welded up and filed into a flush finish. Some areas were leaded to achieve the final finish required prior to painting them black, again using a base coat and lacquer. The bonnet was a major challenge. We tried to source a new bonnet but none were available. The top lift up flap was twisted and badly heat damaged, as was the rest of the bonnet. Heat shrinking was used to get it back to a workable shape. The pressed leuvures were reshaped by hand both on the flap and sides. A minimum amount of lead and filler was used to achieve the finish shape, as we had to consider the heat in this area. Over a hundred hours were spent on the bonnet alone. Once finished the bonnet was painted using the same method as used on the body.
0 Comments
Part three With the major work complete we now turned our attention to rebuilding the car. All the main steel work had been black powder coated and unpacked ready for inspection and assembling. We decided to pipe up the under body of the car first. So with the body turned over access was easy allowing for neat pipework to be accomplished. This method of assembly also allowed us to install the newly made and insulated fire wall and bulk head piping, exhaust and much more as can be seen from the photos. A new feed water heater manufactured in house was installed into the exhaust system. The pump pit was assembled prior to installation . The fuel and water tank we also fitted and held in place with wood straps. This also allowed us to complete most of the pipework. The piping in the pump pit was later altered. the alteration was requested by the owner. He wanted the rear pump (SECOND PUMP) to be operated on the steering column instead of the front pump. That way he could run with the front pump on all the time but operated by the floor mounted valve meaning he could put the second pump on easily by operating the leaver on the steering column. He reasoned that he did not have to bend down when driving to operate the second pump when needed. The boiler blow down valves were also operated from under the bonnet (hood) instead of from under the car body. Again this meant that the boiler blow down could be done without bending down to get to the valves. The fire wall piping also included the installation of a steam driven donkey pump for pumping water into the boiler. This was made some years ago by my father in-law John Liming and refurbished by him for installation back onto the car. A second water tank was also made. A luggage carrier was made and fitted to the rear of the car. Then a wooded box with a lift up lid was made and upholstered. Inside the box was the second tank and spare parts box. The rear bodywork was strengthened with a steel frame inserted into the frame work under the rear seat. This was to make sure the weight of the water tank when full did not stress the body . The rear water tank top was level with the front water tank top. This allowed both tanks to be filled to capacity. The rear tank was piped to the front tank using a one inch stainless pipe, incorporating a flex joint as we did not want the pipe work to be rigid. Because of the design the rear tank gravity fed the front tank as water was being used. A shut of tap was also fitted. The front water tank was also altered. It discovered that the siphon and overflow pipes inside the tank were fitted two inches down from the top of the tank. The meant that the tank could never be filled to capacity. As is normal with Stanley water tanks ,top hat pieces were added to the top of the tank. these stand up above the top of the tank by about one inch. The old over flow and siphon pipes were removed and new ones were then correctly fitted. The steering and boiler installation will be covered in the final part of the story.
Stanley model 85 ongoing restoration7/8/2018 Part 4 Steering The steering was found to be in a very dangerous condition. We concluded that the steering was incorrectly installed by the then owner when the car was first constructed in early 2000. The pinion to segment mesh was just connecting on the tip of the segment resulting in extreme wear and load to both the segment and pinion. We recommended to the owner that a new segment and pinion should be installed in place of the existing pieces, or that the pieces should have a non destructive test to check for cracks etc. in the units. Unfortunately this suggestion was refused. This left us with having to construct a steel mounting unit to be bolted to the body in place of the usual wood block. Unusual angles were need to allow the pinion and segment to mesh correctly, and also allowing the mesh to be adjustable when meshing correctly. Although this was an improvement to the steering, it did not satisfy us that it was safe. We followed the owners instructions, given after we informed him of our findings and concerns. Boiler and Burner. With the steering complete we turned our attention to the boiler and burner. With the new boiler ring complete we inspected the boiler for installation. Although the owner had himself installed a new Bourdon boiler and burner a few months earlier we discovered that the installation had been incorrectly done (this had lead to some of the major fires the car had recently had). As can be seen below an attempt to seal the burner to the boiler was made but failed, note the fire damage and damage to the recently fitted new burner. As can be seen we saved the burner outer skin, although we did have to weld in some new sections to replace the burnt areas and replace the inner skin correctly including new insulation . The boiler was re-drilled and tapped with NPT thread in the correct places. We plugged the incorrect tapped holes, but this was a problem as the holes had been drilled slightly into the boiler shell itself meaning the plugs hit the burner inner skin not allowing the burner to fit correctly to form a seal. We did overcome the problem successfully. So we were now satisfied that the boiler, which had been re-insulated and newly skinned on the outside with stainless steel (rather than reuse the burnt galvanized sheet as used before),and the newly refurbished / repaired burner were ready to be installed. Spare Wheel Carrier and Siphon Hose A new design of siphon hose carrier was installed to tidy up that area. We also installed a mirror on the frame work to allow the driver to view the water level indicator for the water tank. Above as it was. New design of siphon hose carrier plus a rear view mirror was added to the new frame to allow the driver to view the water tank level in the indicator tube.
We are now In the final stages of the restoration.With pressure being applied to get the car finished we were instructed to skip some of the much needed work. So after 5 months we commenced final assembly . Final assembly of the new gas box containing two propane gas bottles, including an auto change over device. When one propane bottle used as the fuel for the pilot runs out the second one automatically takes over. The new electrics box was finished . It housed a new battery, fuse box, switches for turning on the 12 volt spark system, this system keeps the pilot on irrespective of conditions, so no jumping out to re-light the pilot. The spark runs constantly whilst the car is running. The box also contained a port for plunging in a 12 volt compressor which was also also installed in the box, a battery condition indicator gauge was also installed. Final checks to pipework and burner installation. Check, bleed and adjust the newly manufactured and installed braking system Install the refurbished and lacquered lights. Complete the wiring and check that all 12 volt LED lights work. ,Final check for new rear box and water tank pipe work prior to the box being upholstered. Finishing pump pit and bulk head controls and gauges. This was followed by pressure testing the systems. With the car finished as instructed we did one road test and the car was then taken away.
Five months of hard work was now over and complete but not to our satisfaction. Although there are no genuine parts on this car could still be one of the the best replica Model 85 Stanley's around. rESURRECTION OF A PORTER-PART 15/8/2018 Founded in 1900 by Major D Porter of New York, inventor of the Porter Motor, the Porter Motor Co. of 950 Tremont Building, Boston Massachusetts, claimed to build “The Only Perfect Automobile”. In that case, perfection was too much for the average American of the time, as the company folded in 1901. Many claims were made by Major D Porter (Major being his Christian name, not a rank). Automatic water control, a perfect burner, a fuel and water supply that will last 60 miles; all to be made in a 100 ft x 35ft factory “within a mile of the business section of the city” that is “well fitted for building motor carriages”. All wishful thinking. Further research carried out by my friend Keith Burton during his visit to Boston revealed that Major D Porter’s occupation was a “Patentor”, patenting others inventions for a living hoping to live of the royalties. Inventions with patents in his name included an electric motor and a Fibre Container, very similar to modern day Cardboard Milk Containers. However, at the time, it seems his income was slight; he and his family shared a house with another family in a modest house in Boston; the company office of 950 Tremont building, was in fact a hotel-9th floor, 50th room. It seems that a factory, of the type previously described, was built, the building surviving until fairly recently.However, it appears Major Dane Porter was arrested for Larceny of upward of $3000 . A Canadian by birth, he attempted to repatriate to Canada towards the end of his life, and indeed, died there in 1918, aged 59. I believe my car to be the only Porter Stanhope ever produced. Featuring a much more complex chassis than most steam cars of the period, a swivel joint is incorporated into the centre of the front axle, with the chassis tubes “bottlenecking” in towards the front axle, allowing a foot of independent movement of each front wheel. Furthermore, truss rods that go from the front axle towards the back of the car, have hook joints on either end to allow further flexing of the chassis. Over complicated perhaps? Simpler, rectangular shaped chassis’ worked perfectly well on the rough roads of the time, and were almost definitely cheaper to build; over-engineering perhaps. All for a price of $750, similar to a contempory Locomobile of the period, the company’s chances of survival were slim. I came to owning this car when, in 2013, at the age of 15, I decided I would like to build a tiller steered steam car, having experience with my family’s Stanley, Mobile and White Steam Cars. Help from a kind friend of mine, Basil Craske (who has helped me considerably throughout the subsequent restoration project), managed to get me a new boiler from America, and the tracing of a set of patterns and formers for making a Locomobile Chassis, along with brand new carriage springs. Just as I was about to start having the chassis castings made, a friend emailed. I had been trying to help him find a London to Brighton Veteran Car Run eligible steam car, and he had come across a partially restored original car in the states, which he asked my opinion on. It seemed a good buy to me, at the right price. Negotiations with the owner, proved to my friend that it was outside his budget, although at the time I had no idea of the cost. A month or so went by, and with little progress on my chassis, my thoughts turned to this car in America. An email to the then owner then proved that the car was available for a very reasonable price-indeed, I could never have made a chassis for that money, and there were many more expensive parts included in the sale, including the body and gauges. So a deal was done, with me purchasing the car with my savings. Indeed the whole project has been funded by myself, with some kind donations from Family and friends! A friend was also importing some Steam Car parts from America, due to arrive in August 2014, this now being February of that year. But then there were some delays with some parts he was having refurbished. The Porter Stanhope eventually arrived in the U.K in August 2016, which neatly coincided with the start of my gap year before going to university, something I had always decided to do, so that I could restore the car. In the Next Part-The Restoration Begins. George Hounslow PART ONE My name is Roel Rasker from the Netherlands. As a regular visitor and exhibitor at the Great Dorset Steam Fair i became more and more interested in steam cars. After building a Likamobile from Steamtractionworld in 2009 i have had different Locomobiles. The Locomobile i own now is a good running car from 1900 witch was previously owned by Steven Theobald. I drove last Melle tour in Germany almost without any problems ( thanks George Hounslow for riding with me and helping ! ). A few months ago i went to America to have a look at a 1907 Stanley EX. This car was advertised for a long time on the Steamcarnetwork website as well as other websites. On this trip i have bought the car and i also went to Don Bourdon to meet him and have a look at his workshop. There i orderd a boiler and burner for the EX. This week the car arrived to my home. I am planning a full restoration. Most work i can do myself having some experience in metal- paint- and woodwork. Some parts i will have to buy. The car has number 3511 and is very original. In the deal was also a new body. Pictures show the old parts temporary put on the new body. I want to use as much as possible from the original body. This will be a lot of extra work, but an old car is original only once. In this and future articles I will try to show pictures from the process. If anyone has ideas or parts to complete this car, please let me know. Best regards Roel KELLYlink
I looked at that car closely at Hershey. It's a wonderful starting point, with so much original material and build detail. I do applaud your intent to retain as much original material as possible. It's much more interesting to have a car where a high percentage of its content came bolted together into the same car out of the Stanley factory door all those years ago. - Part Two I have decided to use the new body. The old body was cracked and damaged to much to restore and still keep enough strength. A lot of parts from the old body will be used on the new body as pictures show. The car has been in a accident once. both wood layers were badly damaged and the body was not straight. This week i have done a lot of sandblasting on wheels,leaf-springs and chassis. Every part is cleaned and spray-painted in a K epoxy coat. Between sandblasting all kind of small parts are made, cleaned or repaired. The steering column did not move anymore and i had to make new bronze bushes to get it working the way it has to. The steering-system is pre-fitted on the body before painting the steering column. I have glued and riveted brake liner on the brake-shoes. I gained experience with this process on my Oldsmobile curved dash so this was an easy job. Also much work is done on the differential. The 3 gears are made from scratch and it took a lot of measuring and testing before everything runs fine. For this part i had help from a 84 year old local craftsman. The un-restored top gives a little bit a “titanic” feeling but gives a goo idea how the final layout will be. The engine is taken apart and checked on wear. All parts look fine and it didn't take much work to get the engine running on air. Some small parts were missing but i have took them from a spare engine i have. Back to the sandblasting cabinet..................................... Part Three After sandblasting and small repairs the framework is given a 2K epoxy coat and a 2k Color paint. 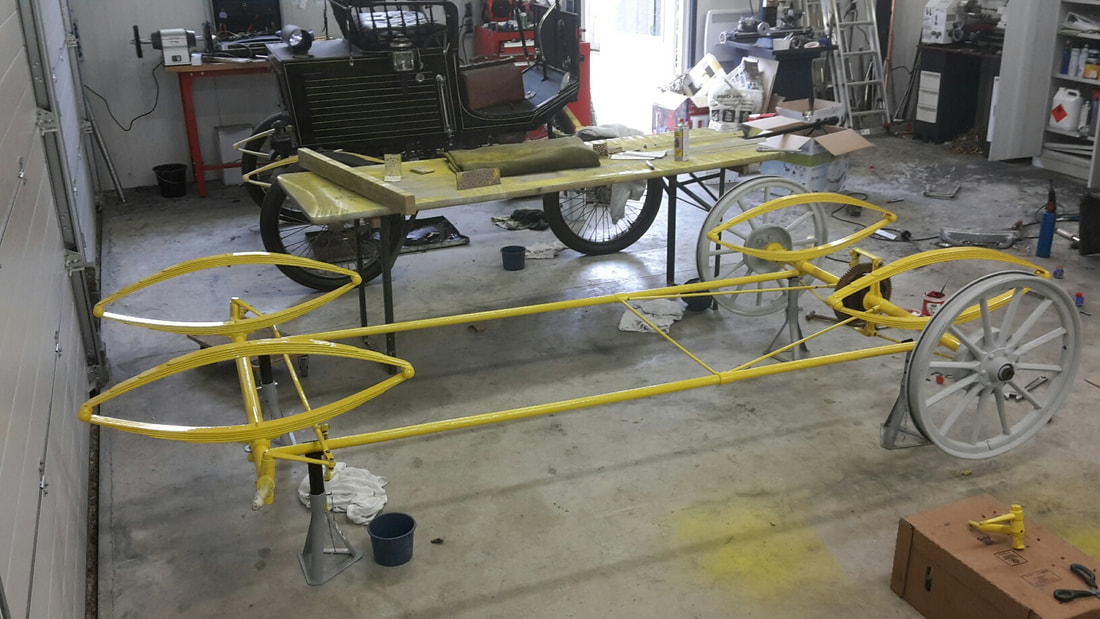 The springs are taken apart and each leaf is epoxy coated. I then applied a thin layer of colour paint on each leaf. After drying i assembled the springs and painted them again.  The front wheels were not the correct size. They where a different size than the back wheels. I decided to fit smaller rims to fit 30 x 3 tyres as well. Being a very difficult job that needs experience i have sent the wheels to Robert Hurford. When ordering Wheels, valves, boiler, burner i have noticed that all craftsman have a lot of work and i have to wait a long time. Nice to see that they are all very busy, but i have to get used to this. I have pre-fit the body on the chassis for the first time and it fits perfect. 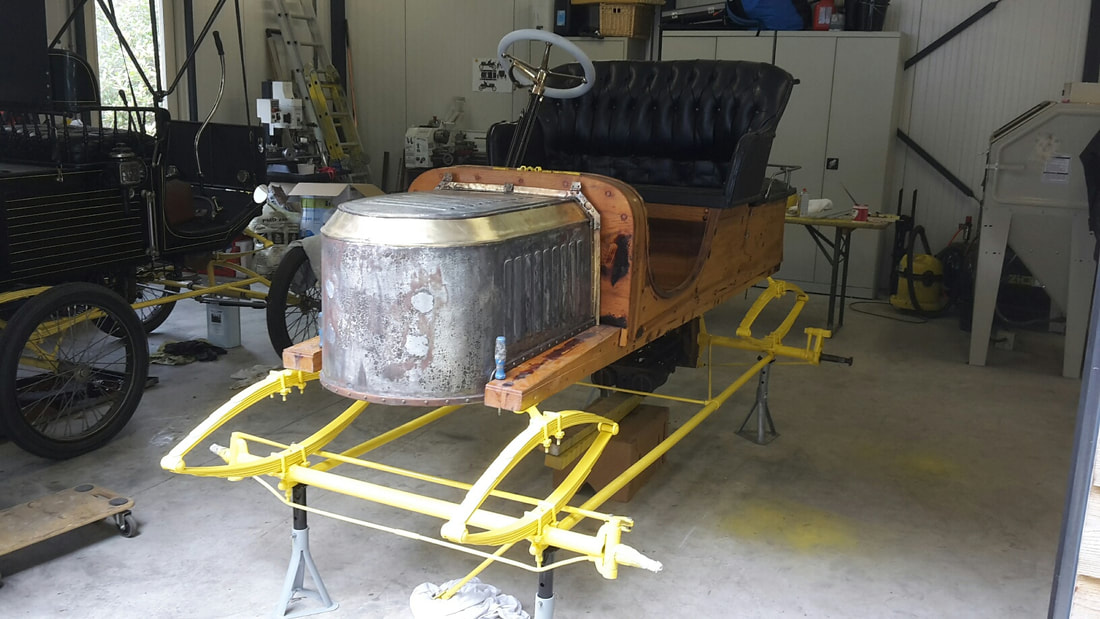 In the meantime all kind of small projects were done like repairing the bonnet, overhauling the steam-oil system, throttle and water bypass. The dents in the bonnet are hammered out and holes are filled with tin. The steering wheel was in a bad condition so i decided to repair the cracks and paint it black. The engine is pre- fit as well and runs on steam provided by my locomobile. Part 4 Working 40 – 60 hours a week on the Stanley EX i am making progress. Robert Hurford did a great job adjusting the front wheels. It was nice to meet him at his workshop in the old mill after a week of dust and steam at the Great Dorset Steam Fair. At the GDSF i also bought a beautiful taillight. It happend to be exact the same model as on Terry Fry’s EX. After testing the engine i mounted the copper covers on the engine. I made a 18 mm thick oak pump-pit board and prefitted all the pumps. The missing parts are made in brass on my lathe. 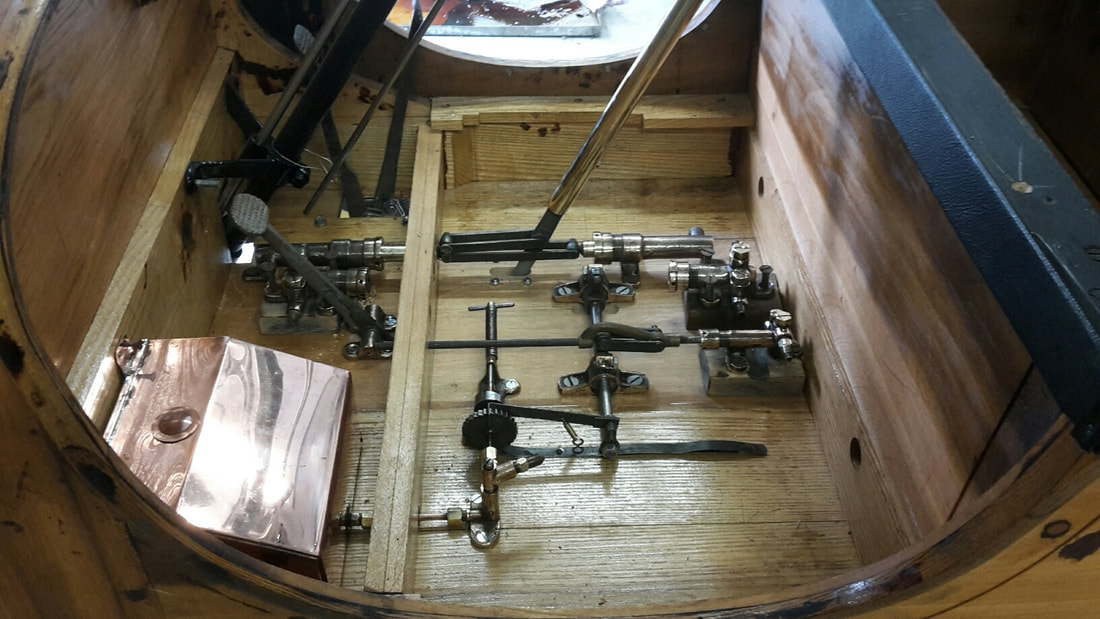 On a sunny day i filled the gas and water tank with water to check for leaks. The fuel tank was in a good condition. I have found 3 old dipsticks in it, probably left there when they fall in the tank checking the fuel level. The water tank had a few minor leaks, making it a easy fix. 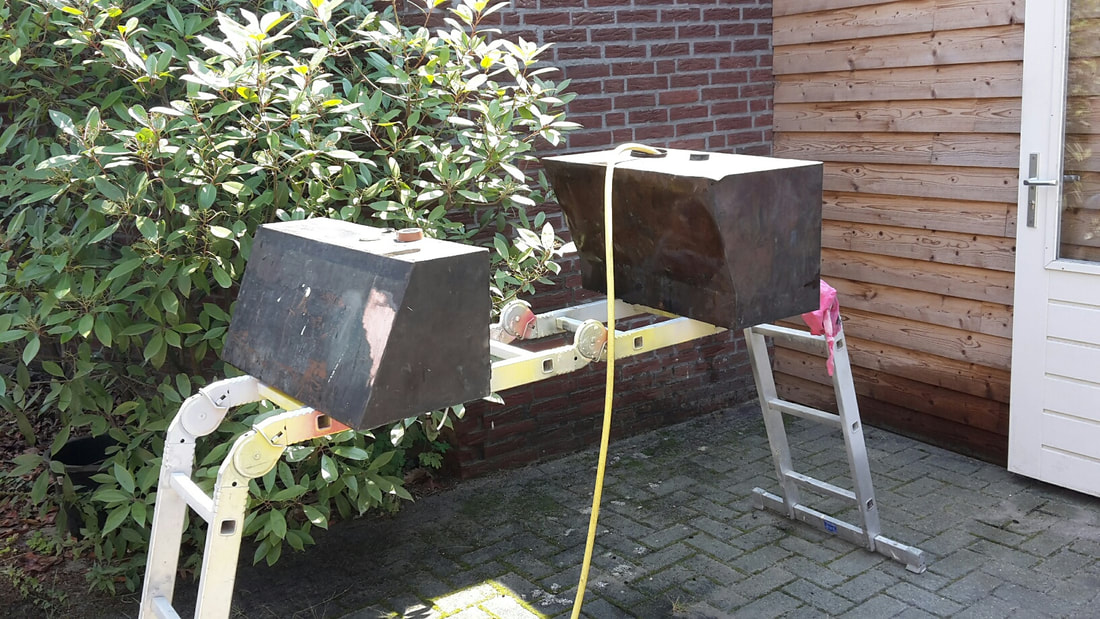 The two fuel pressure tanks are made of steel and the inside was corroded. In America i bought two beautiful and safe new thick copper tanks. They are mounted under the seat so unfortunately you can not see them when the car is ready. After pre-fitting most of the parts i have taken everything apart. The body is given a epoxy coating and after a lot of sanding it is now spray-painted in Brewster green. All the preparation is done in epoxy. The last layer of paint is done by a professional in a spray booth . My worst nightmare is that someone says; “nice car, did you paint it yourself ? “. The very original seats were in very good shape but the paint was very old and needed to be removed completely. The wood underneath was in perfect shape. The two lights that came with the car were in bad shape. It took me many hours of soldering and polishing to get them right. 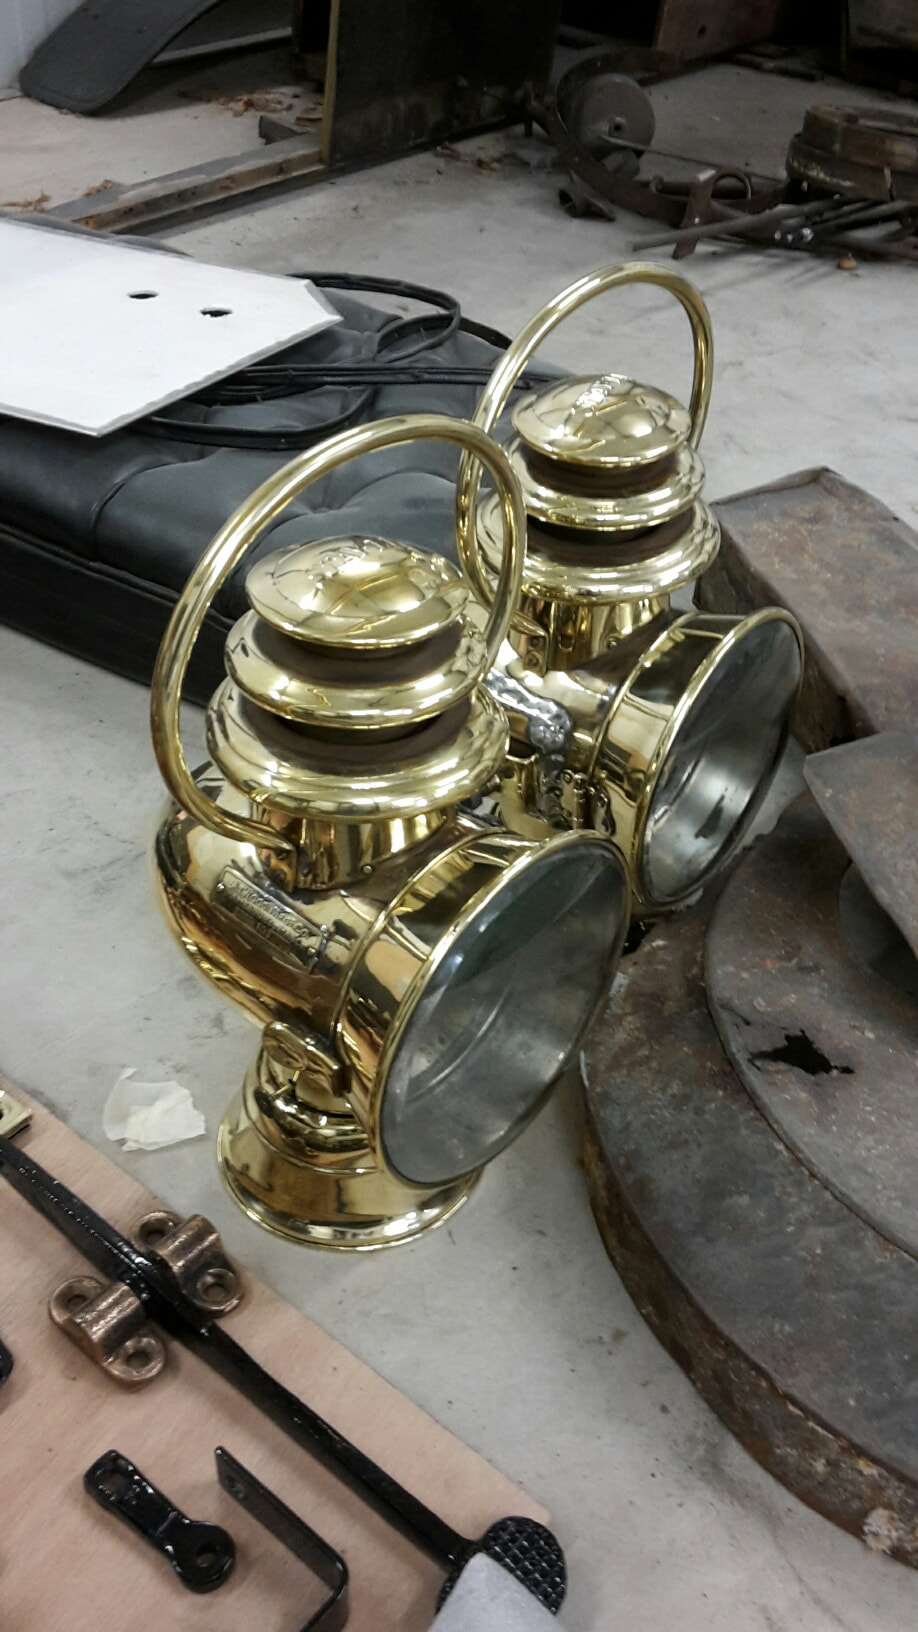 Steam and Fuel automatics are taken apart and cleaned. With pressure test equipment they are set to 350 and 50 psi. I think this is a good starting point. If anyone has other ideas about that please let me know. I have been trying to force a boilerring from a steel profile but i did not succeed. A lasercut ring with a welded hoop and some bended parts were combined to a nice original looking boilerring. I also made a new asbestos free firewall from ceramic felt and bended tin plate to get as close as possible to original standard. It might look that i am working on all parts with no schedule but on this way i can keep working on the car while i am waiting for all kind of parts. Roel.
|
Archives
December 2022
Categories
All
|
 RSS Feed