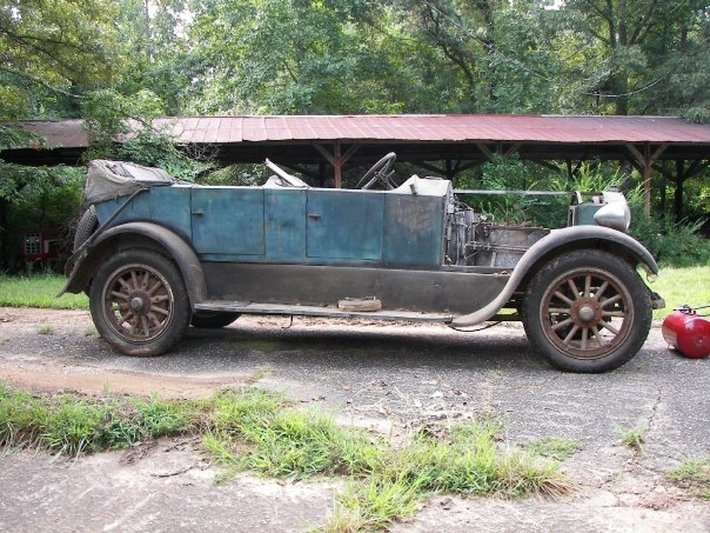
 Part One The following article is Steve Bragg’s story of his family’s restoration of their 1922 Model 740B Stanley Steam car. The story of this car is a long one but I first saw this car in the mid-1970s. My dad purchased the car from the estate of Mr. George Howland, originally of Asbury Park New Jersey. Mr Howland was a chemical engineer who graduated from Lehigh University in Pennsylvania in 1925. He resided in Alabama from 1930s to the late 1940s when he moved to Atlanta GA. The car had a 1935 Pennsylvania Inspection Sticker on it, so I assumed that he did not purchase the car while he lived in PA. The car was last licensed in Ohio in 1946 (last tag for the car and it was still on it when I got the car). The car was said to have been driven to Atlanta in 1946, it was also supposedly wrecked, possibly on this drive. There is no evidence he ever registered the car in Georgia. When Mr. Howland died in 1976, he still owned the house in Atlanta but lived in my hometown in Alabama, about 75 miles from Atlanta. My father and uncle had gotten to know Mr and Mrs Howland and after his passing, they assisted Mrs. Howland with several things and she agreed to sell this car to my dad. My uncle was able to acquire their other Stanley. My father held onto his car, despite Mr. Carl Amsley coming to Alabama with a truck and trailer to purchase the car, without ever contacting my father about selling the car beforehand. My father refused to sell, whilst my uncle did sell his car later to a collector in Oklahoma who did restore the car. My dad’s car sat in his workshop from the purchase until a shop fire in 1999. It was luckily spared significant damage but was moved to another storage location until I got the car in 2009. My plan was for my dad and I to restore the car together. We started in September 2009. The car had substantial damage to the body and frame, including a repaired section of the front driver side of the frame. Mr. Howland was also a very tall man (I managed to locate his nephew, he never had children) according to his nephew (about 6’6” or 7”). This is also evidenced by modifications to the car such as lowering the from seat frame by about 4 inches and removing the air tank to the back of the front seat (where jump seats would be located). He had also moved the condenser forward about 6 inches, removing the front condenser cowl and custom making replacement metal. The tear down and restoration is documented in a series of photos and Videos both in this article and in more depth in the media section of this site and also on this sites YouTube channel. Steve has his own YouTube channel (sbragg000) Facebook (www.facebook.com/FullSteamAheadDownSouth/) page called Full Steam Ahead Steve Bragg. Mechanical Restoration The Chassis and all mechanical parts were disassembled, inspected and repaired were necessary. The chassis was restored along with all parts and fittings. An oversized 26-inch Bourdon Boiler and Burner was added along with an Earnst Boiler Sight glass. This required moving the front cross member forward two inches. The larger boiler also required fabrication of a new stainless steel bonnet, this was hand hammered around wooden forms, then insulated. The bonnet has an inner and outer shell per the original design. The story is better told in the following photos,and videos. Below we are testing the pilot, and then firing the burner. We were satisfied that the burner and pilot would be OK when installed. Major work was carried out on the engine... The car came with a spare engine which had the same number as the engine installed in the car. I can only guess that when the car was ordered from the factory that a spare engine was also ordered and hence the same number was put on the spare to keep matching numbers on the car. Both engines are numbered 740-4099. Photos of both engine serial numbers are shown. Photos of both engines and matching serial numbers are shown. Below we are checking the pump pit is working correctly. Below Doing an engine test using steam. The engine needed a major rebuild after the frame rods broke during testing the car. We made and installed new from rods, refaced the valve seats fitted new piston rings, hard-chromed the piston rods and refurbished all other parts of the engine. We have a second engine still to be rebuilt. Engine slide valves in motion. 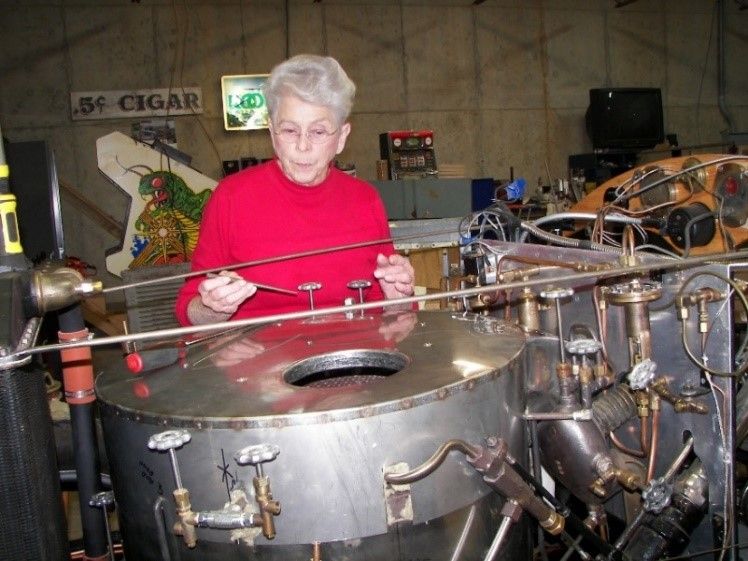 My Mother inspecting some of my work. The video below shows one of our many test runs. Series 1 issue 2 will present part two of the restoration.
1 Comment
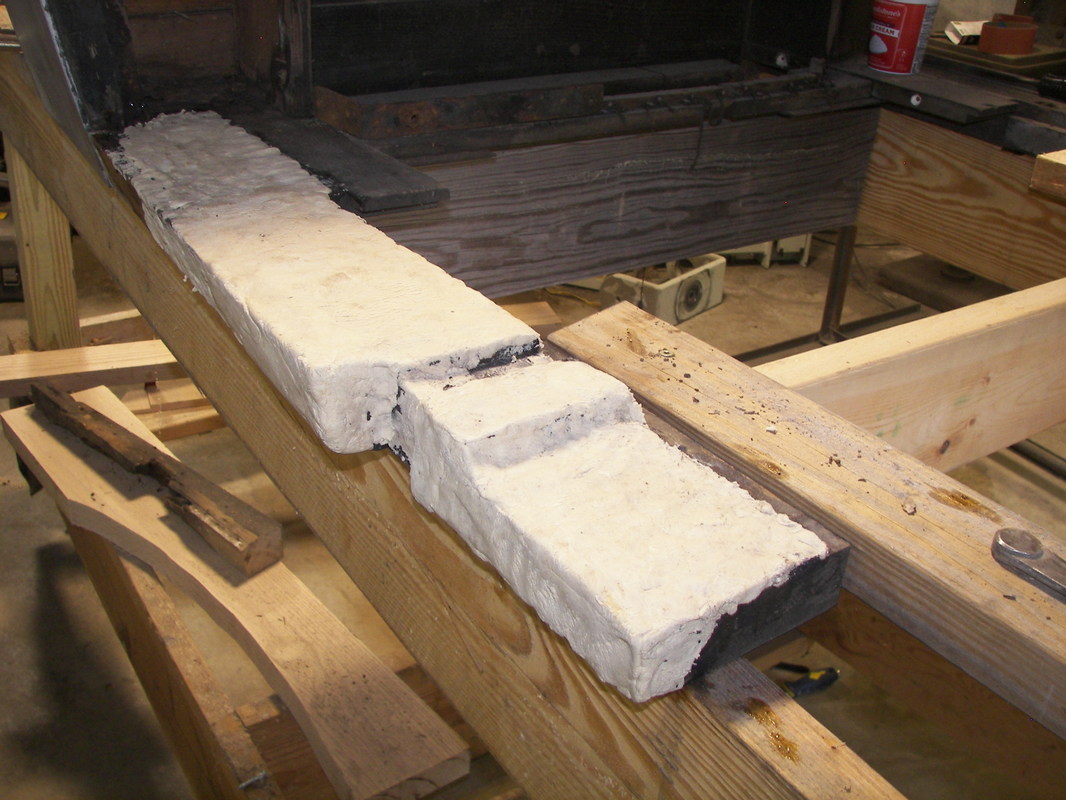
The following article is Part Two of Steve Bragg’s story of his family’s restoration of their 1922 Model 740B Stanley Steam car. Finishing the Mechanical Renovations. The fire wall was carefully removed and the rotted wood replaced and reconstructed. A new aluminium plate was also fabricated and installed with new fasteners, all matching to the original steel slotted screws. During the mechanical restoration, we are careful to match all of the original style fasteners, no phillips screws, all slotted, fillister head screws, square head, heavy hex and flat head bolts were all carefully matched and replaced as needed. Good sources for correct fasteners are McMaster-Carr (mcMaster.com), Restoration Specialties & Supply, (restorationspecialties.com), Restoration Supply Company (restorationstuff.com), my wife seems to think they deliver every day to my workshop. The front cross member was moved forward to accommodate the larger boiler. All the valves and fittings were refurbished and packed. A few required replacement – those were sourced from the J.R. Goold in England (stanleysteamcarparts.co.uk), Howard Johnson (Steam Works Ltd) and Don Hoke (Vintage Steam Products). The steam automatic was rebuilt and calibrated, the fuel automatic was also rebuilt and tested along with the water automatic. The relief valve was rebuilt and tested (it relieves quite nicely about 750 psi). The kidney gauge was also dissembled, cleaned, restored and water level indication verified. An additional level indication was also added in the form of an Ernst sight glass. The water automatic, kidney gauge and sight glass were all tested individually and as a group to verify tracking and function – all of this was done cold and after initial steaming. The Smoke Hood With the over-sized Bourdon Boiler, the smoke bonnet had to be re-fabricated. 308 stainless steel sheet, .032” (.813mm) was cut into circles, fitted to wooden forms and hand hammered into the proper shape. An inner and outer shell, like the original, was fabricated, then insulated with mineral wool. All of the insulation is completely covered in the sheet metal, including curved angled caps, so that the inner wall sits directly on the top of the boiler per the original design. It makes a good smoke tight seal. A new exhaust down comer was also fabricated and it also seals and drafts nicely. Water Tank and Drive Covers The tank was taken off of the car for cleaning and repairs. Although the tank did not leak, the top and water return did have a few spots where solder was needed. There was still water (although very nasty) from the last time the car was operated, it had not fully evaporated. The steam siphon was also cleaned and reattached to the support on the tank top. Upon trusted advice, a tank cap was added to the copper water tank and while the tank was opened, the interior was further cleaned. A large amount of hardened sludge was removed after some painstaking work. The water intake screen was also carefully cleaned and re-installed. New hangers and strapping were also made. The tank was cleaned (for final appearance) with technical grade citric acid mixed to a solution of 5-10%. The cleaning solution turned a nice green colour and the result was too nice to paint like was done at the factory. The engine cover was fairly well bent up and required some attention so after some hand work, it was straight and shiny like a new copper penny. The mid band (to cover the engine packing) was missing but luckily an almost perfect one turned up in the Stanley Museum Auction in 2012. The covers will be installed once the second engine is installed in the next couple of months. The pump rod cover was in terrible shape, it apparently had been badly mangled in the wreck and requires a new one to be made. That is still in progress but is being fashioned out of copper sheet to look like the engine cover and water tank. The original was galvanized but all of the copper (now unpainted) begged for a similar cover for the pump rod. The Condenser The condenser shroud was bent and coming apart where it was soldered together. It was taken completely apart, cleaned, re-soldered and then nickel plated. The condenser core was found to leak so we refurbished it and re-soldered all joints. The 740 condenser was quite a challenge to stop all of the tube sheet leaks so a few of the tubes were flared again at the top and once flared, soldered an in a few cases some extreme temperature (>2300F) epoxy was used. The condenser cap was broken, all of the Bakelite was missing. A condenser cap proved almost impossible to location, none could be found for sale so I resorted to making a new one. I found one for loan so I could cast a mold. From there I used a modern two part epoxy of the correct specification to make an identical replica. My custom designed jig allowed me to make replacement caps. I have produced several (contact me for information). The loaner for the mold was captured in exact detail so even the scratches were duplicated down to the colour, weight and feel. Sitting side by side, the original and replica are identical. The Burner The new Bourdon Boiler was also purchased with a new burner. The original mounting clamps were salvaged but a new mounting ring and new super heater ring were fashioned. This resulted in a very tight seal on the burner to boiler connection that is sealed with flat surfaces, bolts and high temperature fiber gasket. So far, there have been no indications of air leakage. After seeing Howard Johnson's temperature indication for his 1916 Stanley, I knew I wanted to make this addition to our car. I was able to locate a proper thermocouple and a period correct meter that all functions quite nicely. I have assembled several meter kits that are available for sale (contact me for details). The added thermocouple, when tested with a modern millivolt meter, and compared to the thermocouple table, have proven to be extremely accurate, checked against a laser thermocouple and the proper tables, the meter setup is within 5 degrees accuracy. With just the pilot lit and at operating temperature, the meter will register 250-290F and at full fire, almost 600F. This gives a high confidence level of the burner's operating condition and with the sight glass also, quick response for upset conditions. The Body Except for the front fender and splash aprons, the body at first appeared to be very in solid shape but the top had fallen in so there was some concern. Further investigation though revealed a great deal of rot under the aluminium skin. This discovery resulted in the wood work taking a great deal of time to complete but the results have been worth it. Once the skins were removed we could inspect and see the extent of the repairs needed. By use of some modified pliers, small chisels and a lot of patience, all of the tiny nails and brads were removed. There were hundreds to remove. We decided to salvage as much of the wood framed body as possible, as a result the work took over a year to complete. The rotten and damaged wood was carefully removed and replaced with new wood. Jointing of all replacement sections into the original was carried out in an attempt to keep to the precise shape and style. Good quality glue was used as well as mortise and tenon joints. In some of the joints, only tenons and pegs, along with glue, was used. Original style slotted wood screws were also used, hopefully meaning the longevity of the wooden frame would last for few more decades to come. On one of the rear sections, at the driver rear door, there was only surface rot present. I found an epoxy made of wood based products that was designed to repair surface rot. The rotten wood was drilled every ½" to make a grid of holes to get to good solid wood, then treated with ethylene glycol to kill the organisms present. That takes the glycol 203 weeks to kill everything. A two part epoxy filler was then carefully applied and when hardened, created a solid surface repair to the rotten wood. This was sanded and reshaped and could be drilled, and was in fact as strong or stronger than the original wood. This is an excellent means of repairing surface rot. Some interesting notes: The body for our car was made by the Shields Carriage Company in Massachusetts. The wood used for the rear seat supports was apparently wooden slats from the shipping pallets. The top material was also apparently supplied by the Troy Sun Shade Company. After researching both of these companies, both have very interesting history's with Stanley (that will have to be a chapter in the yet to be written book). The wood in the photos below is original to the car, the body was made by the Shields Carriage Company, the top materials from the Troy Sun Shade Company. This wood and as you can see, looks to be shipping pallet material and the lettering was preserved with the car. Now that we were satisfied that the wood framework of the body was completed, we turned to the aluminium body work.
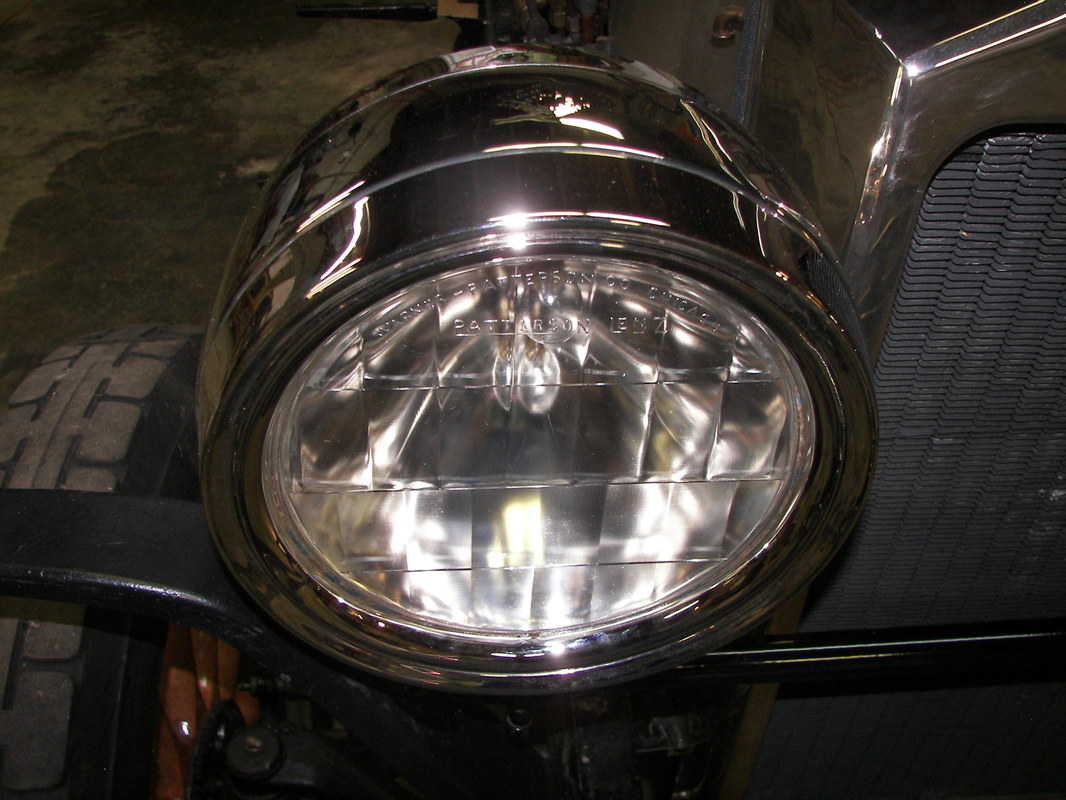
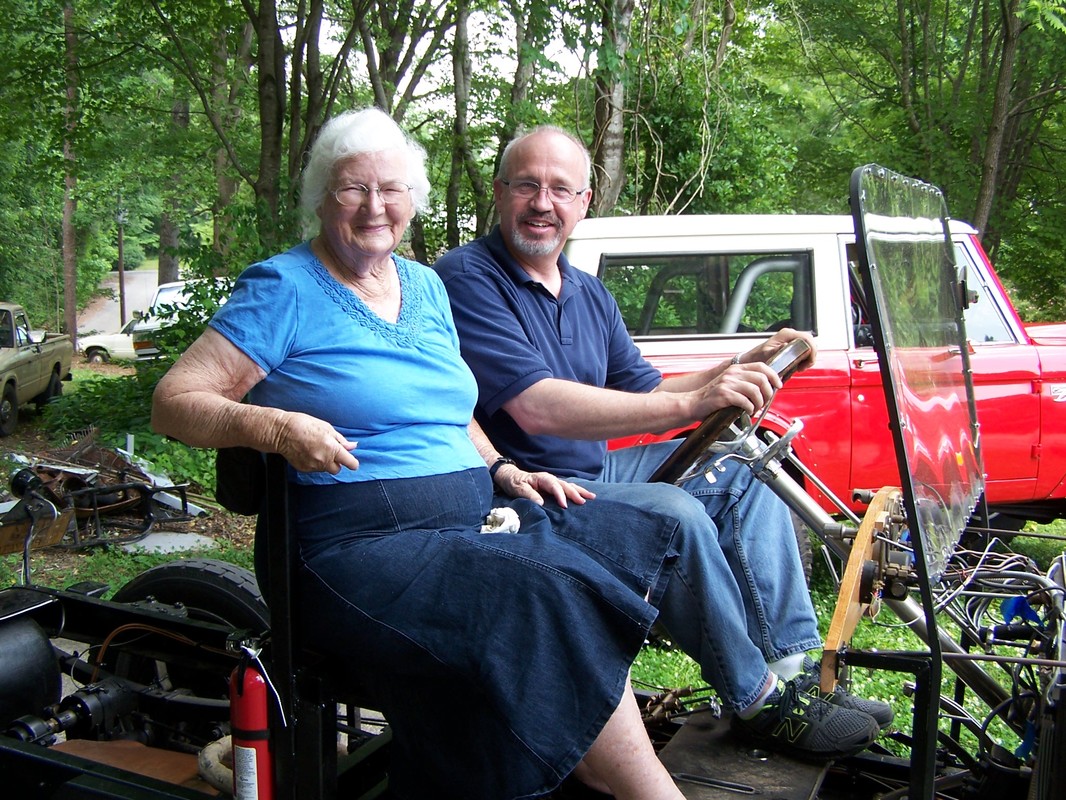
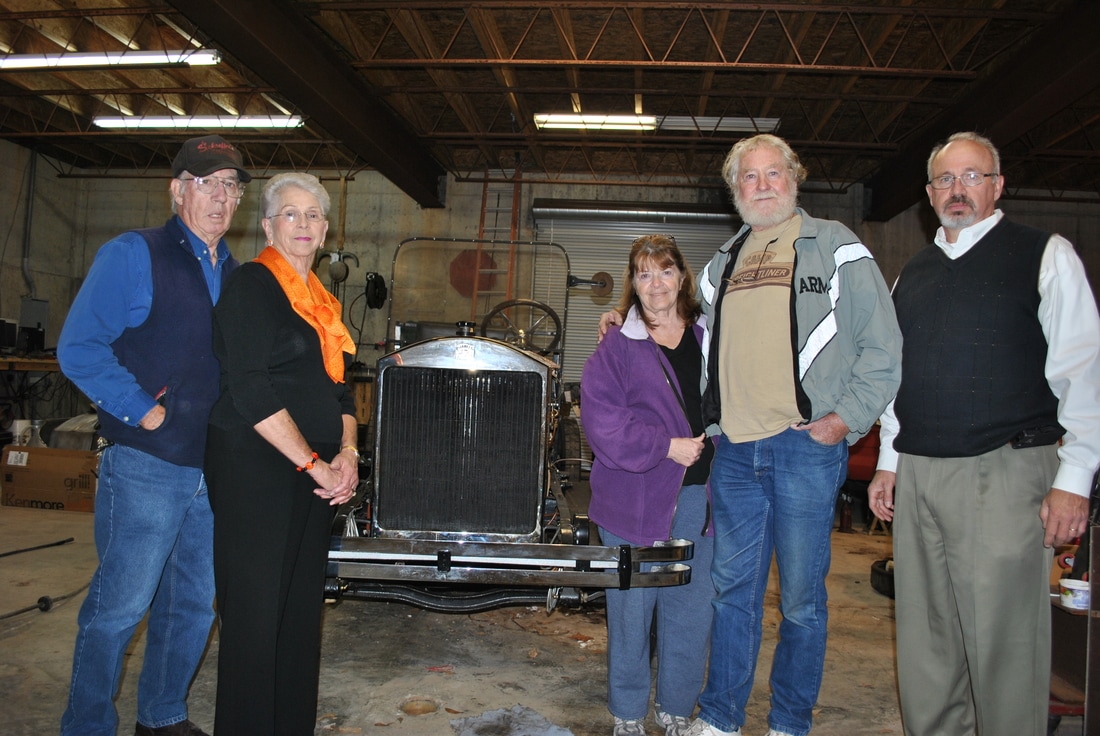
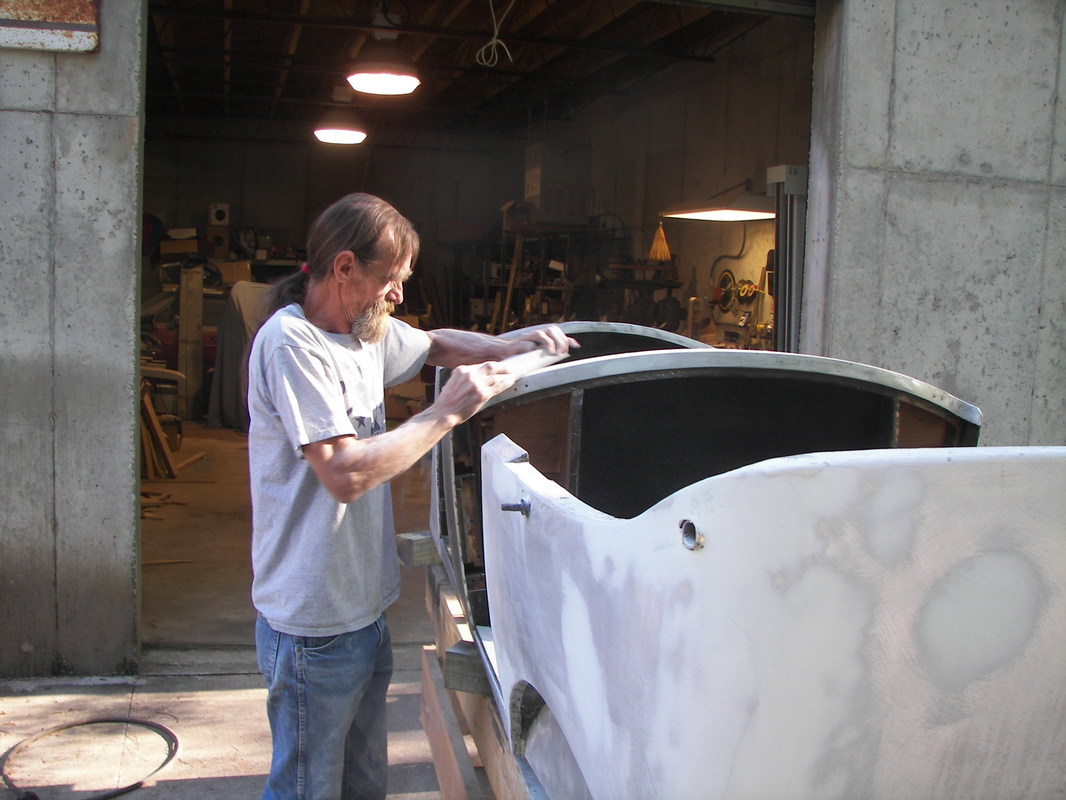
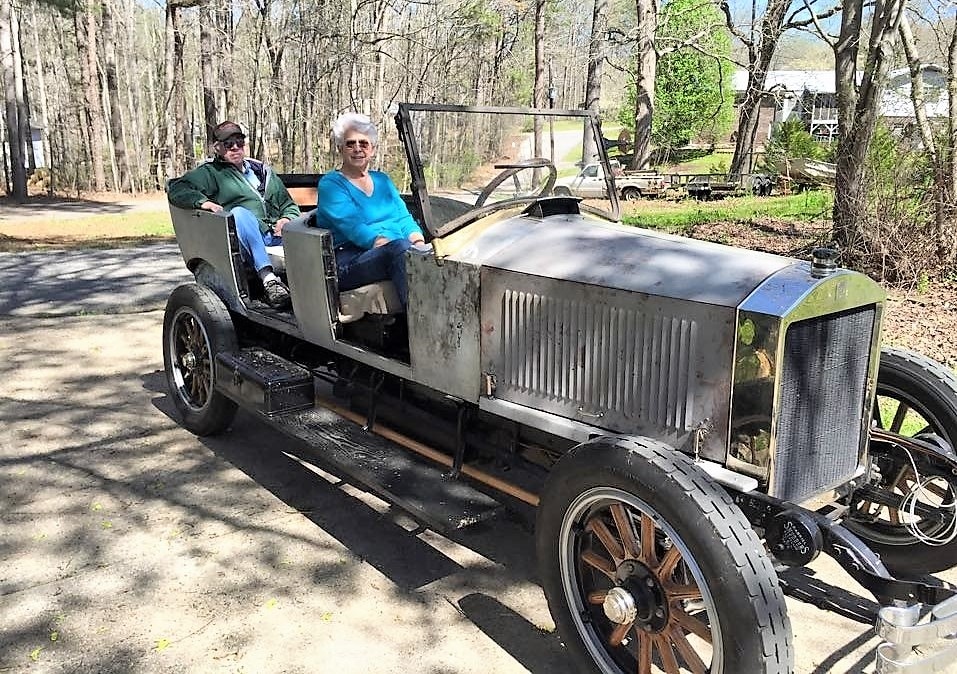
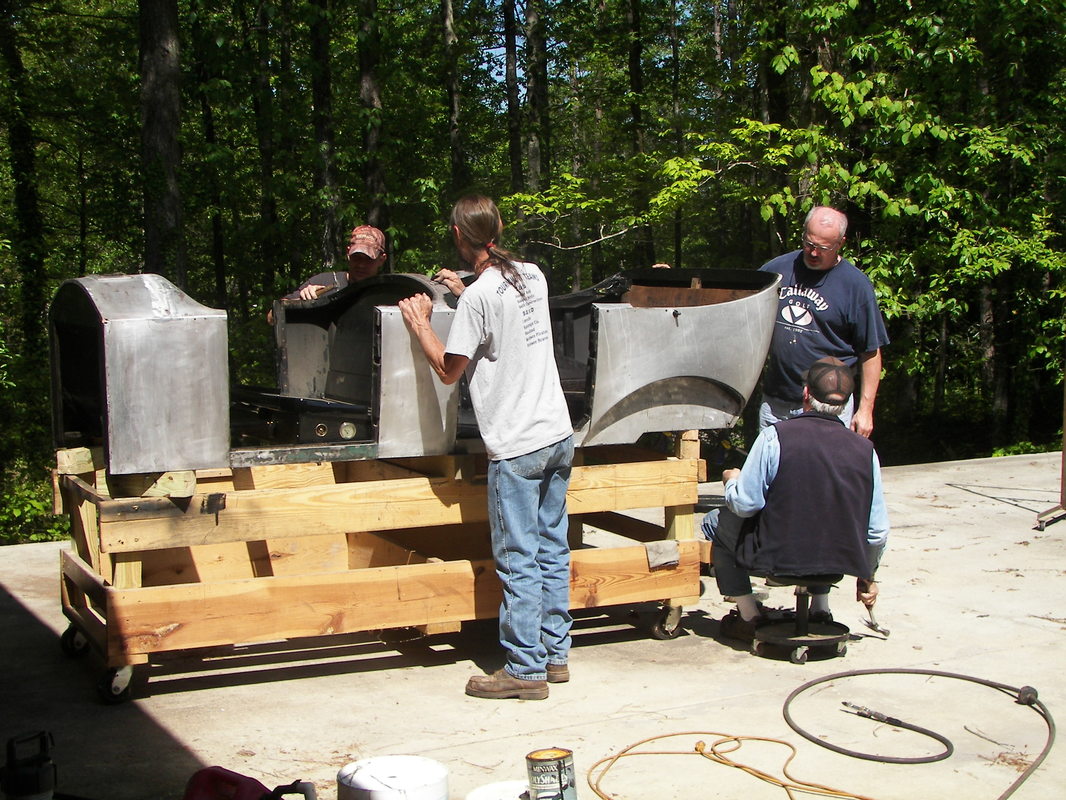
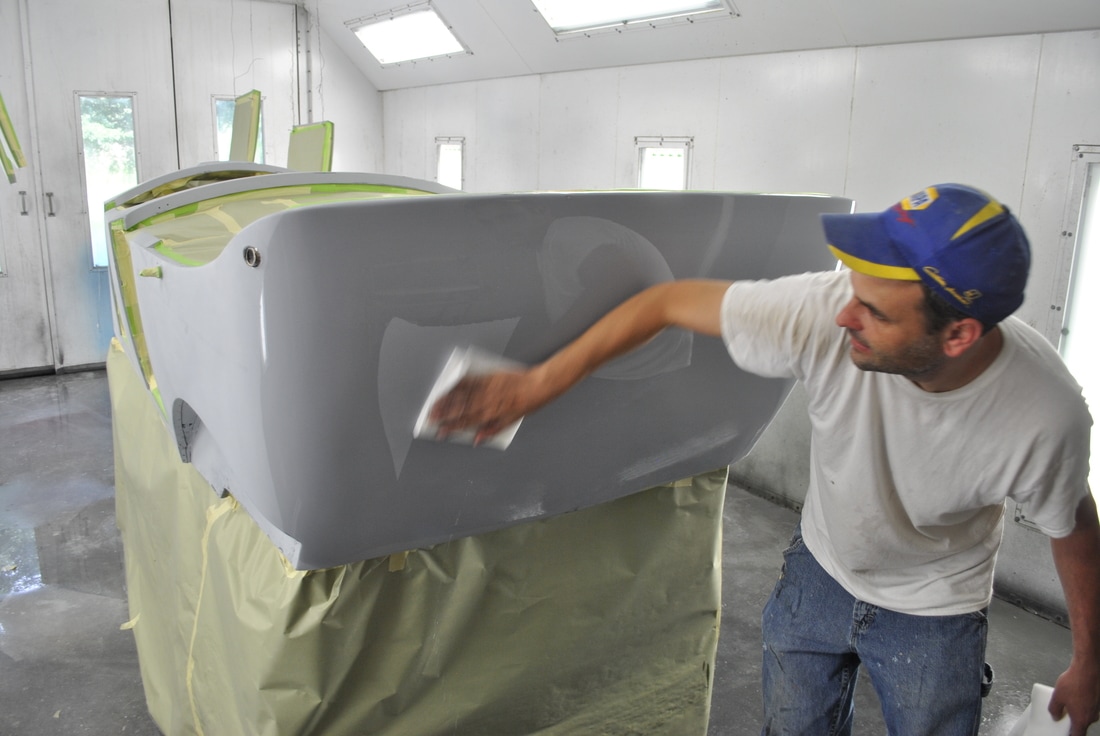
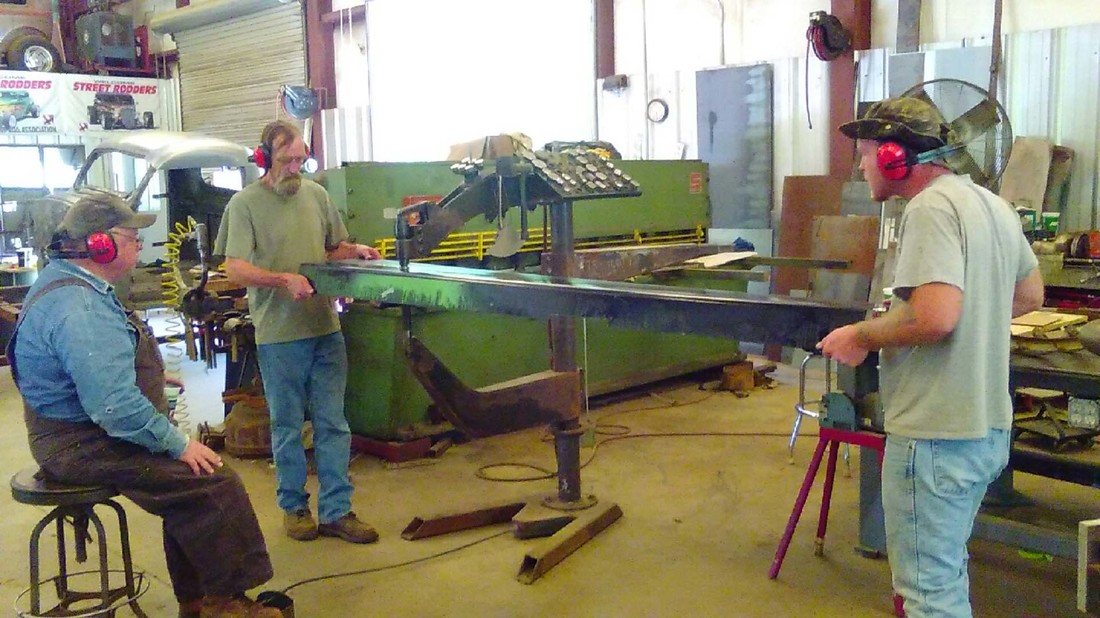
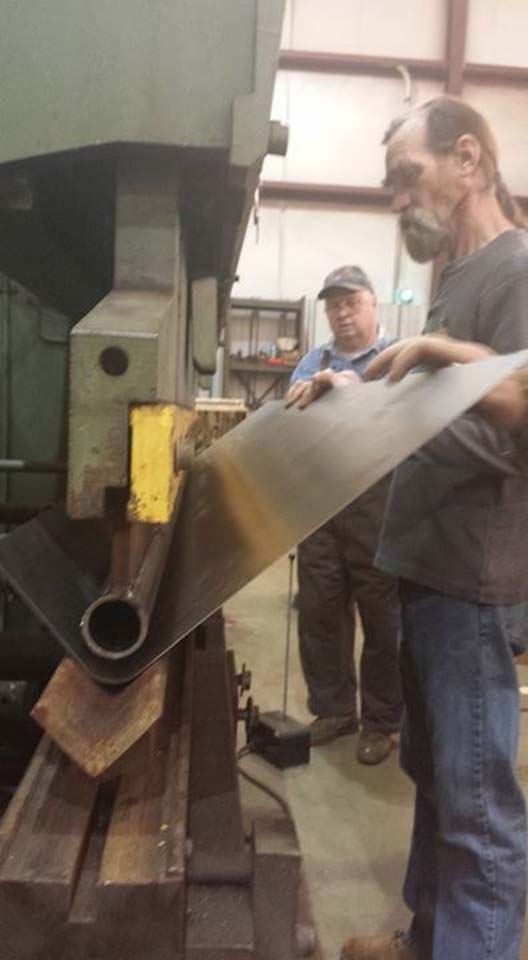
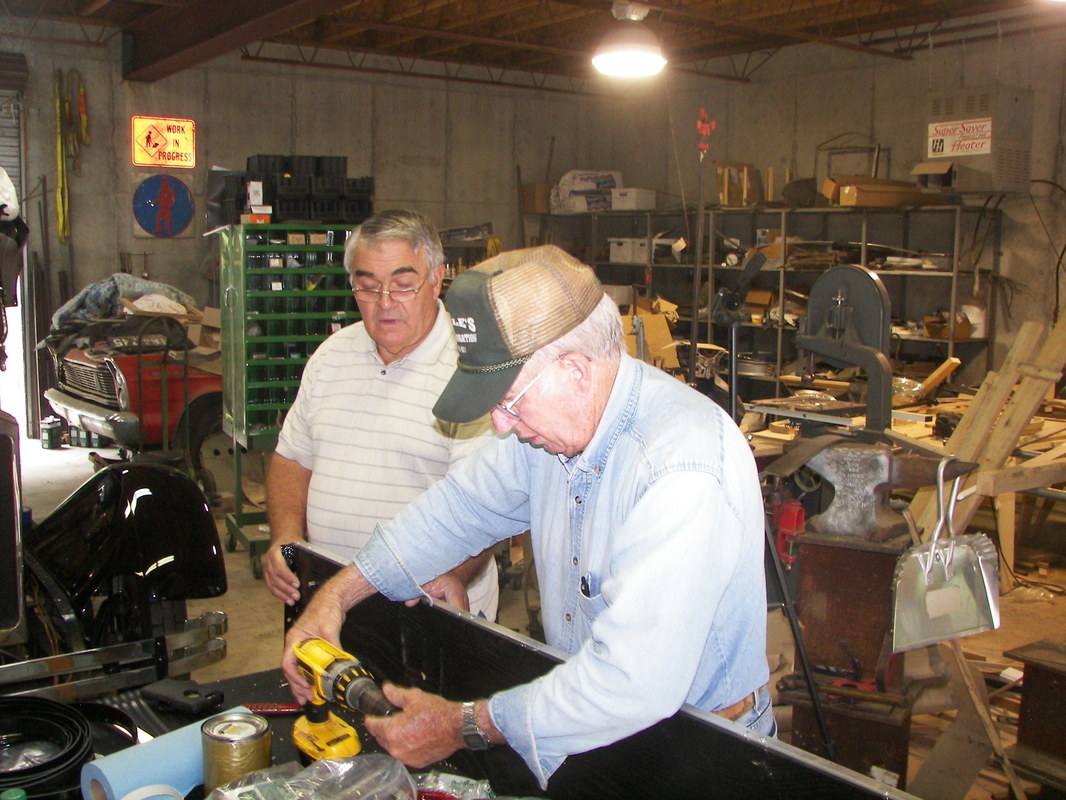
We will talk about that in part 3 of this story. The following article is Part Three of Steve Bragg’s story of his family’s restoration of their 1922 Model 740B Stanley Steam car. The wooden frame of the body was finally completed after almost one year of work. It was then time to mount the body to the now restored chassis for final inspection. This gave us the opportunity to make sure all our work was completed correctly and to do any final adjustments. It was very satisfying that the body fitted correctly after all of the wood replacement and repairs. This was a significant point in the restoration; I think for the first time we could really see the end point of the project. This was very satisfying after, at that time, almost 6 years of work. Now that we were satisfied that the wood framework of the body fitted the chassis, we then re-skinned the frame with the original aluminium “skins”, which we had also cleaned and repaired. There were a few spots that required some welding, we used a MIG wire system that enabled us to properly repair and then grind back down and shape the skin being careful not to “heat work” the thin aluminium. The aluminium sections of body were in pretty good shape when removed with only a few square inches of repair. Most of the minor dents were removed using a wooden and leather “slapping” stick. When done, we turned to the doors and again completely restored them to the same standard. We did not have to remove the skins but completely dissembled the doors except for the skins and wood frames. The latches were removed, cleaned and preserved and then re-assembled with the door. The Bakelite handles were cleaned and replated with nickel, then being re-attached to the door with metal locks, made on our lathe, in the same manner as the originals. The latches were made by the English & Mersick Co. New Haven, Connecticut Manufacturers of Automobile Hardware, Specialties, Mountings, Etc. With the body completed, we turned to the fenders and splash aprons for the next piece of the puzzle. The driver fender and splash apron were severely damaged, part of the splash apron was missing and the front fender was wrinkled and split in several pieces. We were convinced that it would have to be fabricated but we were able to resurrect it. It required cutting it into several pieces, shrinking sections of it, and also the creation of a support jig so we could use the good fender to mirror the one being repaired. Pretty good results on the two. Tony “Tinman” Inman did some outstanding work on the fenders and the two splash aprons. The complex curves of the aprons required some great hand work but the results are very pleasing. A new pilot door was also required to be made. Once the body, fenders, and splash aprons were all fitted correctly, it was time to take everything apart, remove the body and get it finally prepped for paint. Again, this took a lot of time and effort to make sure the final product was the way we wanted it. One of the pieces of metal trim was in poor shape. This was the trim around the hood. It is a simple aluminium piece with a rolled edge detail. This proved to be impossible to find so I set out to make it. First we had to make a die for a bead roller to match the original trim. Once this was made and matching to the original, then it became fairly simple. Rolling the proper width took some trial and error but proved to be simple enough. Now with the fitted trim and hood lace, the assembled hood could finally be installed. The original windows (both wooden and side curtains) were with the car but were good only for patterns. The canvas and leather had shrunk to the point of not even fitting all of the snaps. The side curtains even have labels to show which position to install them. The eisenglass was well beyond yellow and brittle but again serves as good patterns. The wood windows could not be repaired, although we did salvage all of the hardware and saved many parts, including the two brass plates from the G. A. Schmidt Company (from Chicago – the address and telephone number is imprinted onto the plates) who made them. This makes a nice detail in the restoration of the windows (this is not yet completed). We have made new wooden frames and in progress of making a full set of new side curtains along with a storage bag to match the originals. I think that will be a project for next winter! There are shows and tours to try to get in this coming summer. The paint colour was selected after a great deal of research into the available paint colours from the 1920s. While the original green and black was acceptable, the car seemed to beg for more. We finally settled on the colours after narrowing down to three on some test panels. The black fenders and Washington Blue body was sprayed by Jonathan Embry who did some excellent work. The base and clear coat was applied over epoxy primer after many hours of blocking and sanding to get the aluminium skin almost perfect. We considered reds, blues and the original green but ultimately the dark blue and black just suits the Stanley perfectly. We briefly considered painting her in the same manner as original but decided the work was not worth the reward – the car had been brush painted with varnish and hand rubbed. I really can’t imagine how hard that task must have been: Automakers started painting cars around 1900, and it could take up to 40 days to apply a paint job. These early cars were brushed with varnish, which came from the era of horse-drawn carriages. After the varnish dried, the car was sanded, refinished and polished. By the time this car was made in 1922, the car painting process began to speed up. Automakers like Henry Ford began using nitrocellulose lacquer, which had a quicker drying time, on assembly lines. Then, in 1924, paint spray guns made their way onto the assembly lines as well. The spray gun made it possible for workers to paint cars more quickly, and also apply the finish in a more consistent manner. As a result, cars didn’t need as much sanding between coats, and a car could be painted from start to finish in a third of the time that it used to take, so while it was at least 2 years out of time, we decided that spraying was ultimately the way for us to go. The paint work has turned out very well. A great deal of time and care has been taken on the paint work preparation and finish, but as can be seen it was worth the effort. The colour is Washington Blue, I found several references to this colour from 1920s paint literature and chose this deep rich blue to show off the Stanley. Every part of the car was stripped down to either bare wood or metal. Epoxy primer over the bare aluminium was needed for proper paint adherence, and sealer, stain and polyurethane was used for the wood. Electrical System The electrical system was intact except for the missing generator and the incorrect headlights. The Solar 1130 headlights were missing along with the light bar. I assume it was destroyed in the wreck. Also missing (later found in a door pocket, was one of the light switches. This car had a three gang light switch assembly on the dash. All of the interior lights were present, two dash lights, one under dash light and the pump pit light. The pilot light was missing. We did discover that the car had been assembled with the electrically heated pilot so that was a must to restore it. Imagine directly shorting the battery through the pilot to heat it up before assembly. No wonder the battery would have to be charged after starting – the Owner’s manual states to drive the car for 20 miles or so after starting to properly charge the battery. The wiring for the car was intact except for the proper headlight wiring so it was decided to test the wiring after inspection. I never made it to testing, during inspection, I found that the wiring had to be completely replaced due to missing insulation, splices and overall condition. I found the proper wire, complete with wrapped metal sheaths like the original. I also replaced the metal armour and all of the connections with the proper brass terminals. Next I wanted to ensure I had plenty of fused portion, so I did add an additional correct style fuse block. With the re-installation of the new wiring harness, the car’s electrical system was almost completed. It took some time to find a correct generator but felt it best to stay with the 6-volt system per the original. I finally located the correct one and it was a fresh rebuild. However, one cannot just find a wet cell 4” X 9” 6-volt horizontal battery so I went with a modern 6 volt AGC battery that can be mounted on its side – it fits the battery box perfectly. I also have added a disconnect to allow the battery to be isolated during shutdown periods just as a safety measure. I did manage to acquire a new John Packard pilot that I modified to accept the electrical connections. This meant that I could test the pilot heater switch – this arrangement worked great – with the high capacity of the AGC battery, it quickly heated the pilot and after only 20 seconds or so, the pilot lit without problems. I have yet to finalize the configuration on the car so, for now, it is a torch to preheat the pilot. I did find a couple of the correct headlights (from Honest Don’s Steam Car Emporium), along with the Patterson Lenz – this is an interesting lens in that it is thicker at the bottom thus weighted, to keep it from vibrating and turning. It is important to keep the proper alignment of the light beam. It also took about three years of on and off again research – the three gang light switch was made by Cutler Hammer (the same one as in business today). From everything I could find, the switches last went out of production sometime around 1911. So of course Stanley used them until they had no more. After months of painstaking research, I found 5 switches, new old stock, in a warehouse in Colorado, some complete with new bezels. Needless to say, when the gentleman told me the price, I bought them all. He also had a few two gang and single gang switches, the single gang have removable pull handles that function as a key. (Yes I have them all). With the electrical system reassembled and fully functioning, it was time to install the painted body. TOP BOWS After the body was installed, the final assembly has been worked on over the summer and is nearly completed. Quite a while (about 4-5 months) was spent measuring, designing and constructing the top and top bows. Out of the original top bows, only one was intact. The rest had collapsed, broken or otherwise rotted beyond use other than patterns. The rear bow was in at least three pieces, and the side rails were missing except for an 18” piece on each side. I was able to use the remaining pieces to figure out the length, width and shape of the bows. From this, I constructed forms from plywood and built a wood steamer from a section of 6” pipe and an old pressure canner for the steam generator. I could get about 3 hours steaming time on a fill up of water. This would allow the wood to get to near 200F and allow the proper bending. The rear bow was about 9 feet long, 1-inch-thick and 4 inches wide. We put two 90-degree bends in that piece and it worked perfectly. After a bit of trimming and sanding, it fit onto the top sockets just fit. The other top bows were also bent and the top frame was completed by constructing a new visor, along with the matching trim for the visor. Once the top frame was completed, the top could then be installed. I bought good quality top material from Restoration Specialties and proceeded to design and constructed the top, the result is pleasing and functions nicely. This is a California Top, a soft top that does not let down. There are multiple snaps installed per the original design that allows the side curtains to be installed. Those will be made later this year. And finally the interior We selected black full grain leather like the original. We chose a flat colour, nothing flashy for the old girl. After careful restoration of the seat springs, a new rear seat frame and several other fixes, I began to install the leather door panels and seat sides but kept the upholstery as near to original as possible. I did replace a few broken springs, cushioning and the like but as you can see the result is well worth the effort. Leather kick panels and matching leather Hidem trim (custom made) really trim out the new seats and door panels. Remaining work: Finish up the new floor boards and trim along with a few trim details. The white-haired lady in the photo below is my great-aunt Kathleen Wood, she is 97 in this photograph. When she came to visit on Memorial Day of 2014 (May 25th), my uncle asked her if she would like to ride in the steam car. Her short reply was "yes, that's why I came up here, to have a ride". She climbed in, sat down and said let's go. Her 100th birthday is in March 2017; her health is still good and she plans to ride in the car on her birthday. The previous owner of this car (from 1930 to his death in 1975) was George Asbury Howland. He and his wife never had children but in the photo below is his nephew Steven Howland and his wife. As you can see, Mr Howland second from left is quite tall and his uncle was even taller. This is why there were several modifications done to this car – the seat height was lowered, the under seat air tank was relocated to the rear of the car, along with the jump seats being removed to accommodate that change. Mr. Howland located me after hearing about me restoring his uncle's steam car and wanted to see the car in person. In the photo below is Tony "Tin Man" Inman – master fabricator and restoration / rod expert. He has provided much in the way of metal fabrication and project advice, doing most of the body metal work. He was responsible for the paint preparation. The Photo below is of my parents waiting for a ride. In the photo below is Tin Man and crew working on the body and prepping for paint. In the photo below is Jonathan Embry of Embry's Paint and Body Shop preparing to spray the PPG Washington Blue base and clear coat. In the photo below is Tin Man and crew working on the complex curve of the splash aprons. In the photo below is Tin Man: Using a custom die to put the correct radius on the splash aprons In the photo below is Brothers Jackie Bragg and Joseph Bragg (my uncle and father) working on trim for the running boards. Special thanks to: My family, particularly my wife, father, and children: Sabrina Bragg – my wife of 30 years, patience, inspiration, encouragement, keeping me in line. Joseph Bragg– my father and inspiration for the project, help, advice, guidance, and the most encouragement! My children: Landon, Alex and Millie for all the help, questions, and checking in on me when I am “in the shop”. Mildred Bragg – my mother, always helpful, and doing wonderful sewing for parts of the upholstery. Jackie Bragg – my uncle - encouragement and advice along with help. Dennis Bragg – my first cousin – help, assistance, metal work, advice and encouragement. Howard Johnson, training, mentoring, guidance, advice and encouragement – as well as several parts. Don Bourdon – new boiler and burner. Don Hoke – parts, advice, supplies. J.R Goold Vintage Steam Restorations – parts and services. Tony “Tinman” Inman – metal and body work. Jonathan Embry – Paint. Dallas Plating – nickel plating. McMaster-Carr – they should have sponsor recognition after the almost weekly deliveries. The 4th and Final part of the story of the restoration will follow soon. BARBARA HILL Impressive patience, stick-to-it-ness, and loyalty to the original. Beautiful!
The following article is the Final Part of Steve Bragg’s story of his family’s restoration of their 1922 Model 740B Stanley Steam car.
Finally the big reveal day came on May 6. The previous weekend a local newspaper reporter came and interviewed my dad, mother, my wife and I. After 7 years, we had finished the car, so the reporter wanted to interview and take some pictures. All the effort, time and labour was honoured with a front page top center head line, Heflin Father and Son Restores a 1922 Stanley Steam Car. I'm really not sure what was the most rewarding, seeing my dad`s face as we were showing the car, hearing him talk about the thoughts of not getting around to restoring the car until we started or riding with him; which ever it was, the time together was central to what we had done. We spent a lot of time together and along the way, we brought back to life a piece of history. The newspaper article can be read here. The last several weeks had been spent with the details of the top being completed, the interior being installed, mounting and installing the doors, and assembling the hood and trim. For the interior, we choose a black grained leather, matching closely to the original.
The seat frames and springs were somewhat tired but mostly usable. Rust was removed, re-painted and reassembled while the upholsterer sewed the seat and door panels according to patterns I had made. We also put in a modern backing scrim for durability since we plan to tour the car. The most difficult item to find for the interior was an original style hidem welt to match the leather. A Wisconsin company recently started producing welt from the customer's leather and the results are very nice.
The carpet was selected to also match the original - a black wool German Square Weave was the best match.
The remaining work is to complete a set of side curtains, swap out the engines (the rebuilt one is almost ready to install), and complete the wooden framed windows to match the original.
On the day of the big reveal, 6 May, a crowd of almost 100 were waiting on the car as we pulled up to the Community Recreation Center. The local newspaper front page story had attracted many from our town and surrounding community. We were also celebrating my father's two aunt's birthdays. We had my great aunt Kathleen, aged 100 and 2 months, her young sister, Edith aged 88, and a Town Matriarch, Lorraine, aged 100 and 6 months, all assemble in front of the car for pictures.
They then loaded up and we road around our town. This was very special to hear them laugh and talk about riding in a car as old as them. We spent the day celebrating with a large family gathering, eating lunch and birthday cake, and giving rides to everyone who wanted one. After keeping "Effie" steamed up all day, we finally drove her home in the late afternoon.
Several things I have learned during this restoration: These types of work take much time, research and dedication. The devil is in the details which is, to me anyway, part of the fun. Researching the method or researching a part or process is all required. While there are expenses, I think that the main detriment to a project of this magnitude is the unknowns. There are clearly costs and sacrifices, time not spent doing something else, time not spent with a spouse, days off from work; but to every old car enthusiast, that is part of the passion.
I hope you have enjoyed my restoration story.
Steve Bragg |
Archives
December 2022
Categories
All
|
|
|
Steam Car Network functions as a resource for all steam car and steam bike enthusiasts. The website is constantly updated with articles, events, and informative posts to keep the community alive and growing. Feel free to contact us if you have any questions or concerns at the email address below and we will promptly reply.
[email protected] |


 RSS Feed
