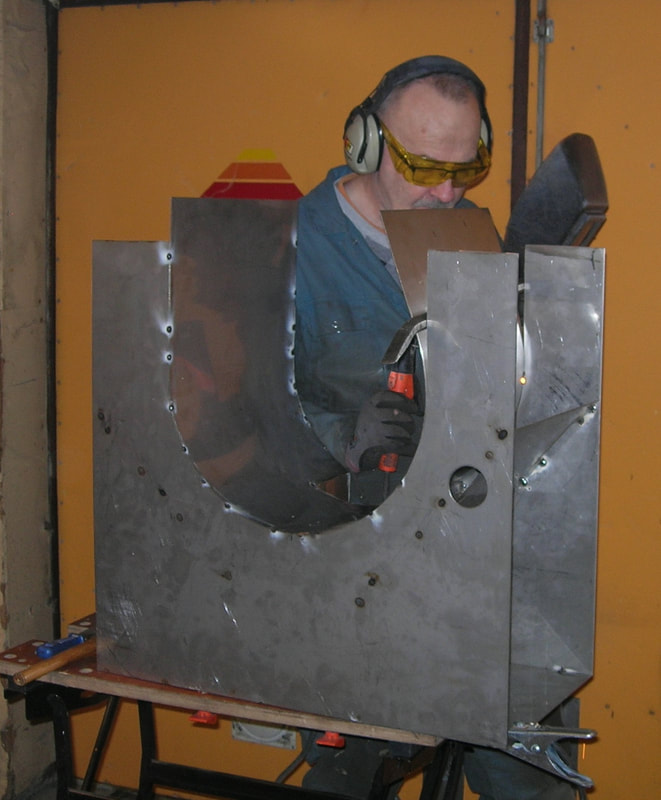
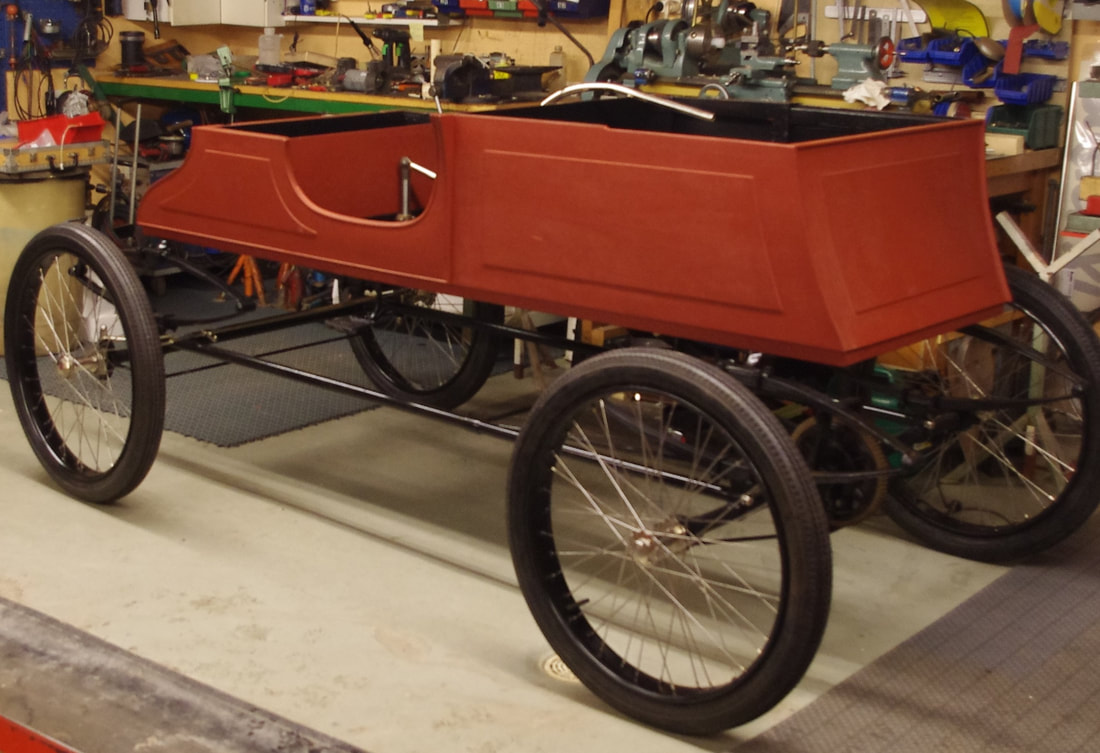
Copper Smithing7/17/2019 When working with early steam cars, there is one material you have to become friend with…. Copper. I think I should devote a post about this. What I was afraid of first has now become one of my favorite activities, I often say that you can handle considerably more than you first think, and this really applies to manufacturing parts in copper. When we started with the 1903 Stanley I was not quite novice about working in copper, to the 1900 Mobile that I previously wrote about, I made the copper protection around the steam engine's cylinders. When it was time to start manufacturing the enclosure for the machine in the Mobile, it was with a certain agony that I took up the job, I walked around and thought a long time before I started. But in the end I decided to make templates in wood and steel, and somehow I got this to work. So it was with a little more confident attitude I started manufacturing the various parts for the Stanley. As always, when you lack knowledge, it is important to carefully consider how a job should be performed. I quickly realized that when it came to shapes that were not straight, I had to first make a template with the help of which I could then process the copper. In the case of curved shapes, this mainly concerns the encapsulation of steam engines and the rear axle's differential, but also some round covers for pressure tanks and water tanks. In a previous post I described how after a lot of thinking I managed to make a new lid for one of the pressure tanks in the Stanley fuel system, at that time it was my old lathe that temporarily served as a metal spinning lathe. It is easier with straight shapes, here you can go a long way with a simple manual bending machine, it is only to calculate in which order the different bends are to be carried out. Then it is just to work ... work ... work. The biggest challenge so far has been the encapsulation of the Stanley's steam engine and especially the part between the cylinders and the rear axle. This part must be provided with some form of doors that can be opened so that the mechanical parts of the machine can be lubricated. Not only that, the encapsulation should also be possible to dismantle. This means that the shutters must cope with the divergences that become when removing the copper shell. But by lining all the door openings with double-weight copper plate and then soldering them, the construction has become so stable that the doors run easily in all positions. One more thing with the steam engine encapsulation. The copper shell itself around the cylinders was among the original parts that came with the car, but it was in poor condition, broken and with several serious cracks. So here was the question, should I make a new shell or should I try to repair the original? I have always wanted to have as much as possible in original, so my first choice was to try to repair the old shell. In retrospect I am very pleased with this decision, I think the result is pretty good. What do we learn from this? Well… don't be afraid to try, as I said, you can do more than you first think! So my friends, buy some copper and start hammering! Gunnar
0 Comments
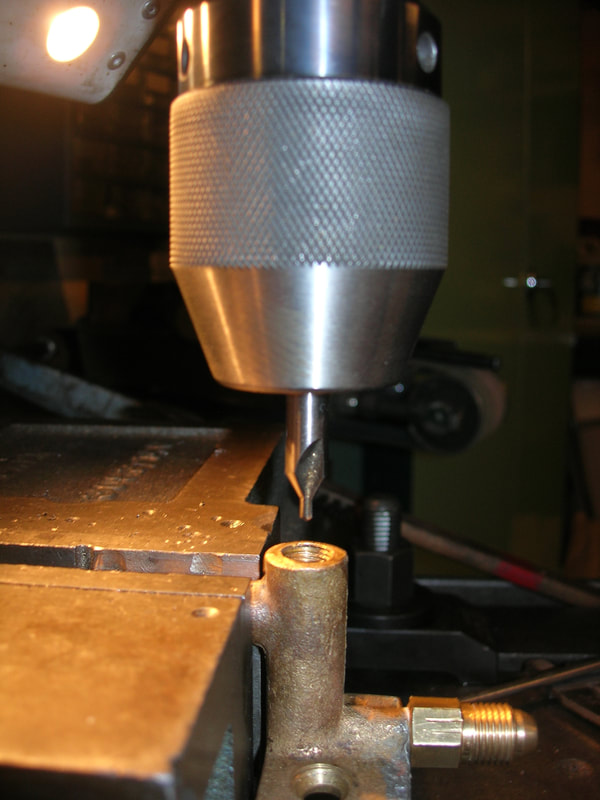
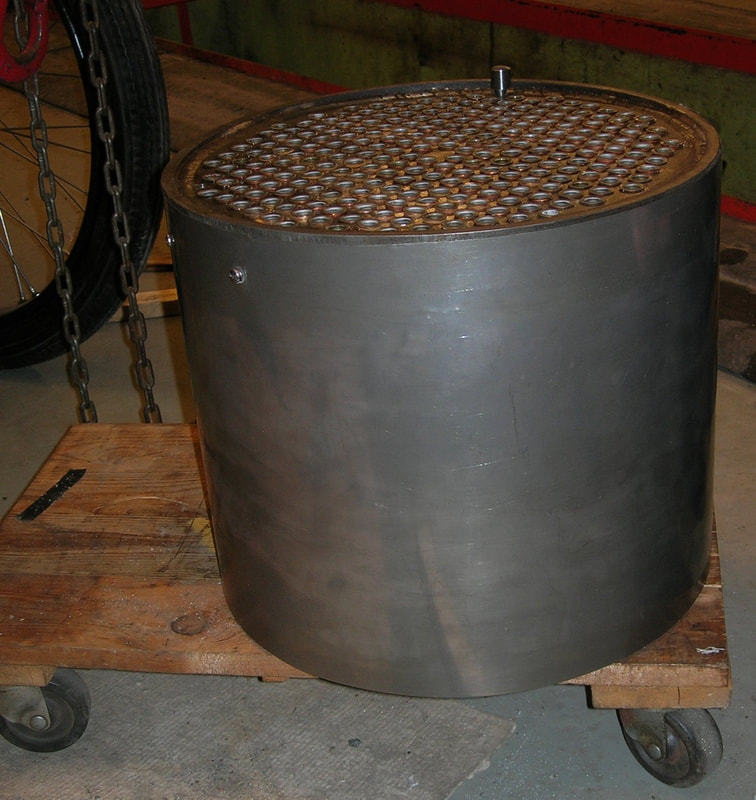
Ok, after a day-fresh post, it is again time for a look back at the renovation work with the Stanley. So now the Stanley is in the workshop. With the help of the photographs we received that show the car before the restoration of the bodywork, we had to start by identifying the parts that were in the boxes that came with the delivery. The photographs were also helpful in figuring out where the different parts were located. New boiler and burner came from Don Bourdon. The boiler arrived after a while, it was worse with the burner which due to a tragic reason, was considerably delayed. But it was okay, you can't be prepared for everything that happens. While waiting for the boiler and burner, there was a lot more to do. The water tank was missing, as well as the fuel tank. The owner's wish was that there would be separate fuel systems for main burners and pilot burners, so we had to manufacture two fuel tanks. The tank for cylinder oil was missing and the two pressure tanks for the main burner pressurization must be checked. Just the pressure tanks for the main burner were actually included in one of the boxes that came with the car . But during test pressurization there was a small hole in the lid on one of them. And at a closer inspection, the material in the lid was in such poor condition that it could not be used. So we had to make a new lid as a replacement for the corroded one. By making a template in oak, I managed to use my old lathe for "metal spinning", the lathe was not quite perfect for metal spinning, but with help of my improvised machine I managed to make a round and lightly cupped lid that suited in the pressure tank. We chose to manufacture the water tank in stainless steel, I know…. it has copper tank in original, but a tank in the SS guarantees that you don’t get precipitates from the walls. So, in consultation with the car's owner, it was decided that the tank would be manufactured in stainless steel. You can have their problems getting old pumps to work. As often it is the check valves that cause problems, attacked balls and worn seats almost always cause leaking check valves. For rusty or worn-out balls there is not much hope, just measure them and buy new ones. The sealing surfaces of the valves, on the other hand, are usually possible to restore, but this requires a little equipment. I am not so sure that a skilled metal worker is so impressed with the method we have found out works best, but we are satisfied with the result and the valves are tight. Our first idea was to grind the check valve's sealing surface using an electric hand drill and a tool designed as a ball on a shaft, this together with rubbing paste we thought would work. But it turned out quickly that it was difficult to get precision with this method, it was impossible to keep the hand drill completely straight and we did not get the valves to seal with this method. What worked best for us, has been to fix the valve in our stationary drill machine. First, fix the valve by using a small drill with the same diameter as the inlet hole in the bottom of the valve, of course, when the drill is turned off. When the drill runs freely, you know that you are in the center. Then we switched to a "center drill" of the type used in the metal lathe. The advantage of a center drill is that it is short but large diameter, this makes the drill very stable. Then we first noted when the drill bumps against the valve seat (of course with the drilling machine turned off), it’s just to have this as the starting point and extremely carefully drill a little, little ... we drill just enough to get fresh material throughout the whole sealing surface. The last step in getting a really good sealing surface against the check valve ball. After cleaning, we put in a ball of the same size as the one with which the valve should be equipped with, then we took a metal rod of the appropriate dimension, placed it against the ball and gently strike with a hammer. Although there are certainly more professional methods, this has in most cases worked for us. Now it must be admitted that there is a difference between what is to be pumped, eg. water and gasoline are relatively simple liquids, but more about the problems with more difficult-to-pump liquids in a later post.
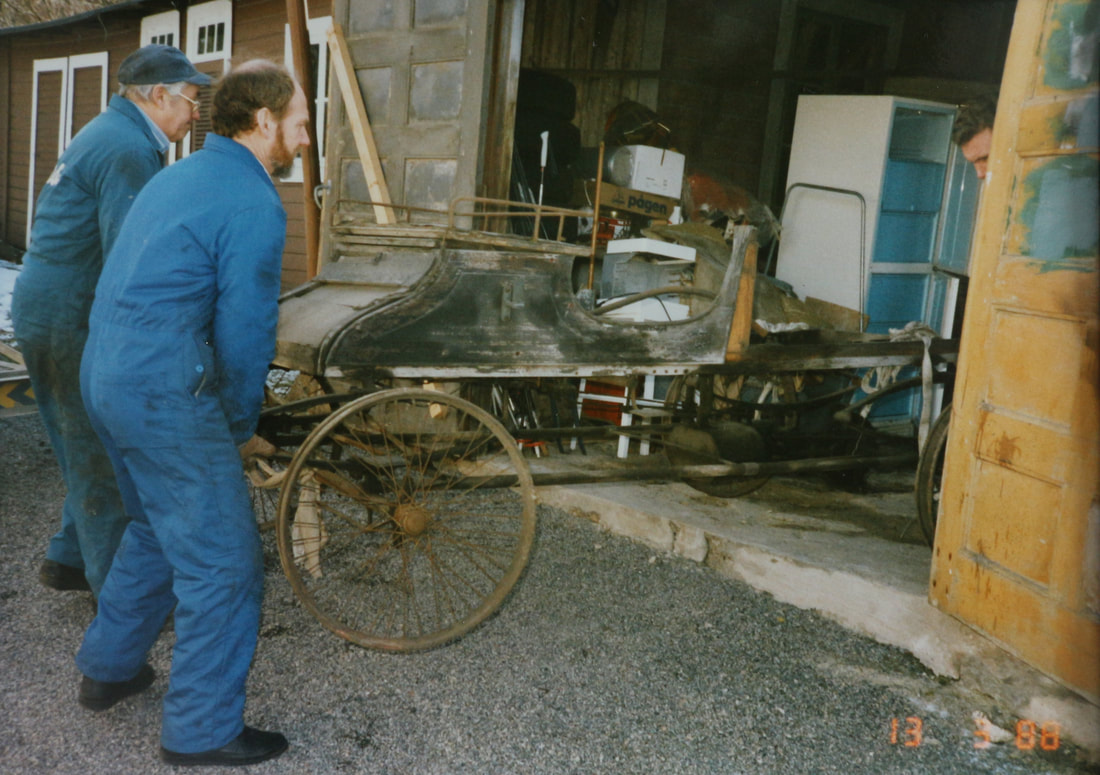
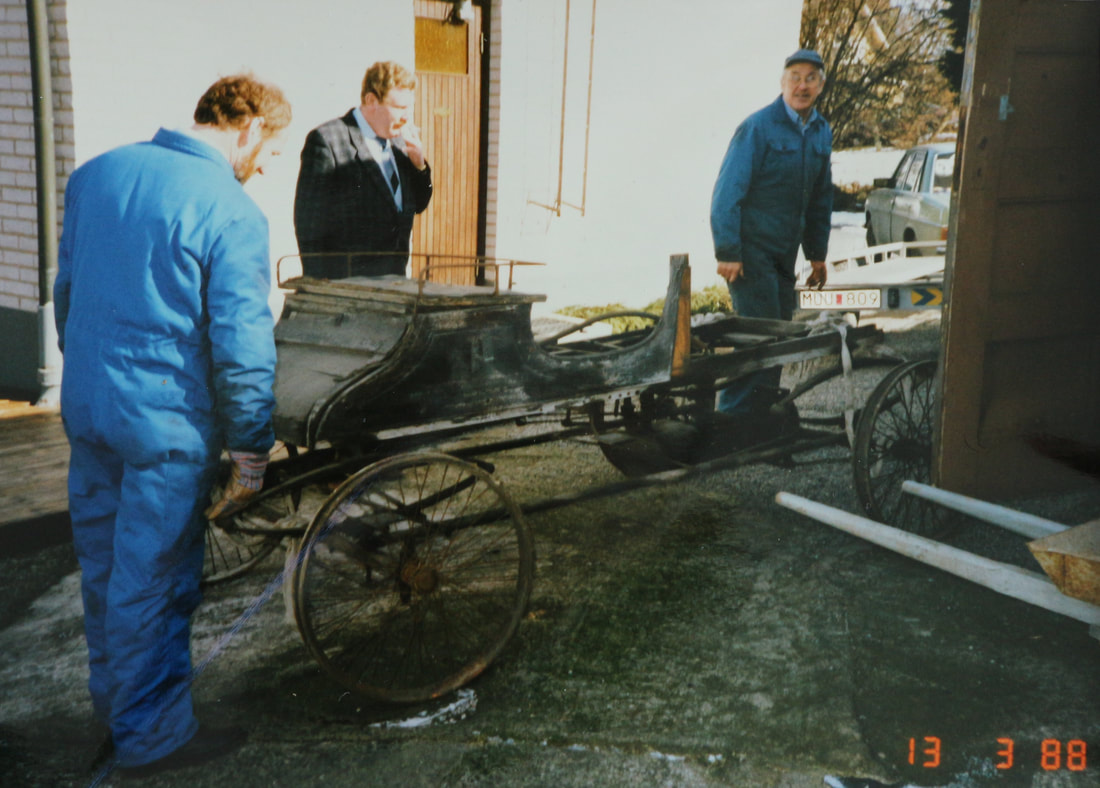
Honestly…. We have not yet come up with a solution to how we should get one of our pumps to work, so the trials continue ... this is exciting. Over and out .... it would be nice to get some reactions to what I write, positive or revealing about which extreme amateur I am. // Gunnar first steam car burner test4/14/2019 Yesterday we lit the burner for the first time since we installed the boiler and burner in the Stanley. Although it was cold outside (here we still have snow) the pilot flame burned fine. The aim of the day was to test the pilot burner which in this case has its own fuel system. But I couldn't resist the temptation to open the fuel tap to the main burner, 30 seconds howling told a clear language…. Here we have a happy burner. After 30 seconds the howling silenced and the burner burned with beautiful blue flames. This gives hope for the future! //Gunnar restoration of a stanley model b3/24/2019 The Stanley 1903 It's time to write a little about the Stanley that we have been working on in recent years, it's actually 4 years since it came to my workshop. This may seem like a long time, but we only work with the cars in leisure time (evenings and weekends), mainly during what we here in the north called the dark season, ie autumn, winter and spring. During the summers we have too much else to do. The year is 1980, Bengt who at the time was 51 years old imported 4 old cars to Sweden. A Cadillac manufactured in 1906, a Ford 1910, a Locomobile from 1903 and a Stanley model B from 1903. Bengt found the Locomobile and the Stanley in a vintage car market somewhere in the United States. Although the cars were in a bad condition, he must have fallen in love with these two steamers and decided to buy them. So almost 40 years later there are 2 of these cars in my workshop, The Locomobile I have reason to come back to later…. probably much later. Right now the body hangs up in the ceiling here in the workshop, and there it will hang quite a long time. So instead, I we now concentrating on the Stanley. What really happened between 1980 and 1988, when I find the next task of the Stanley (a bundle of dated photographs), I don't know. But I can imagine, the pictures suggest that Bengt did not manage to renovate the Stanley himself. So for 8 years it was probably untouched before he found someone who was willing to take up the job. Attached you can see a couple of the old photographs from 1988, showing when the Stanley arrives at the workshop. Today when I write this, it is almost 31 years since the pictures were taken (they are dated May 13, 1988), and now the car has been in my workshop for 4 years. The goal for the car is to be drivable when the outdoor temperature reaches a decent level (this morning it was -19 ° C outside). The wood work that has been done is of very high quality. This makes our work extra meaningful.
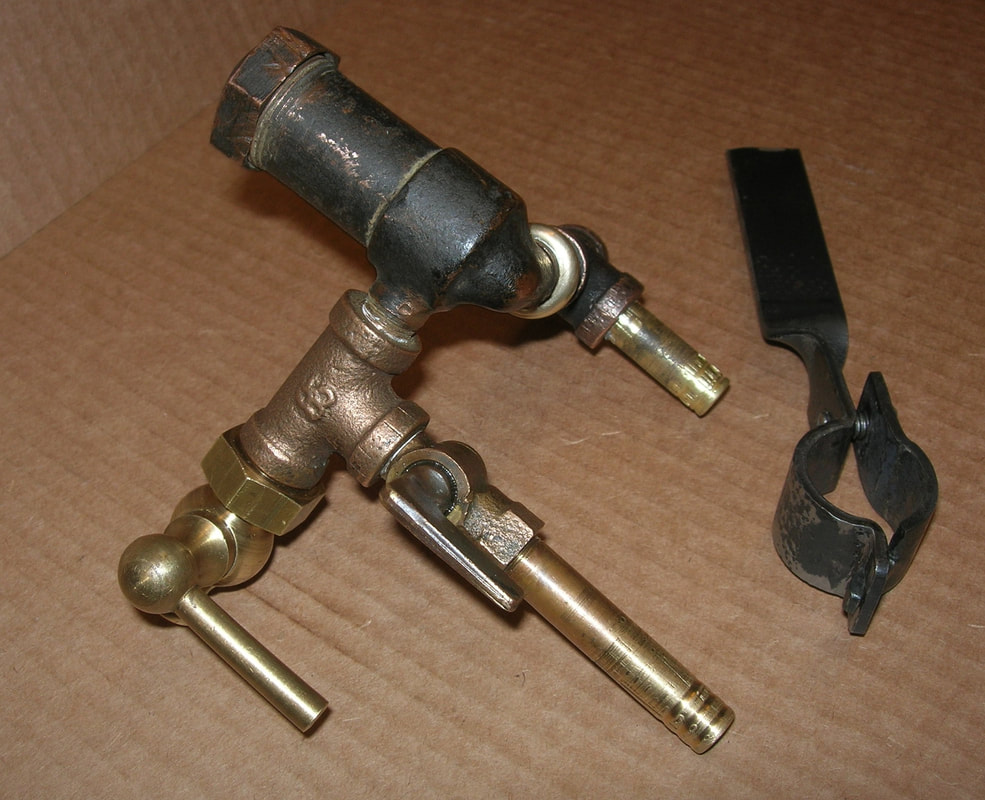
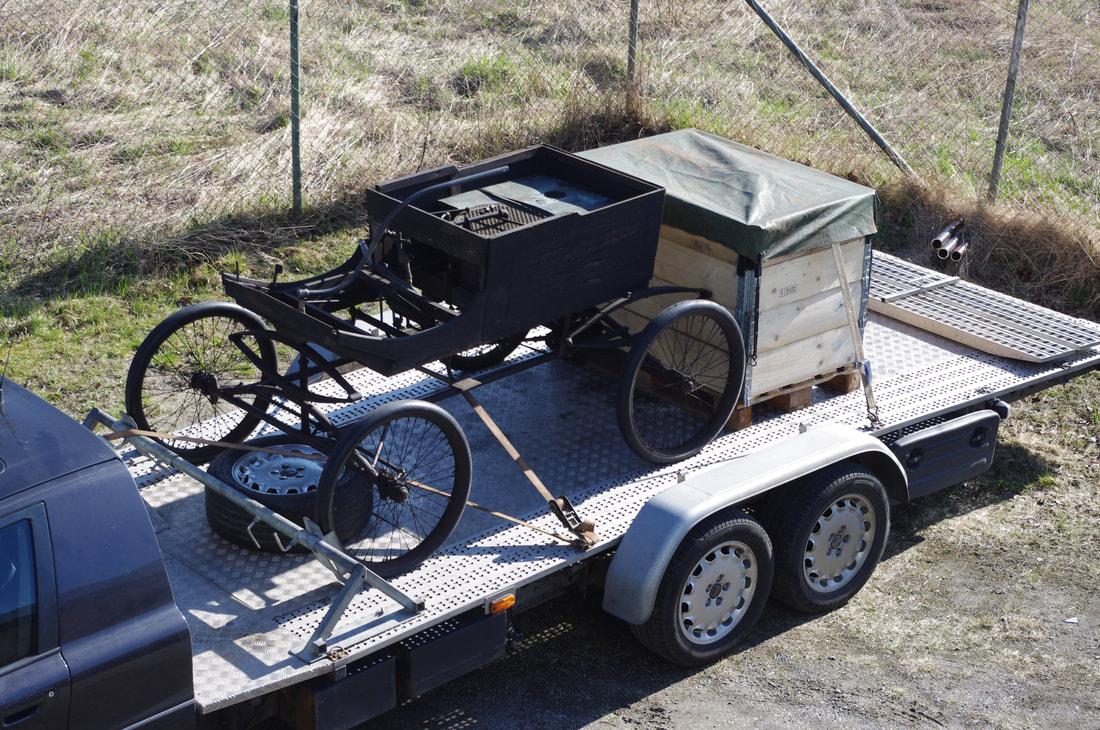
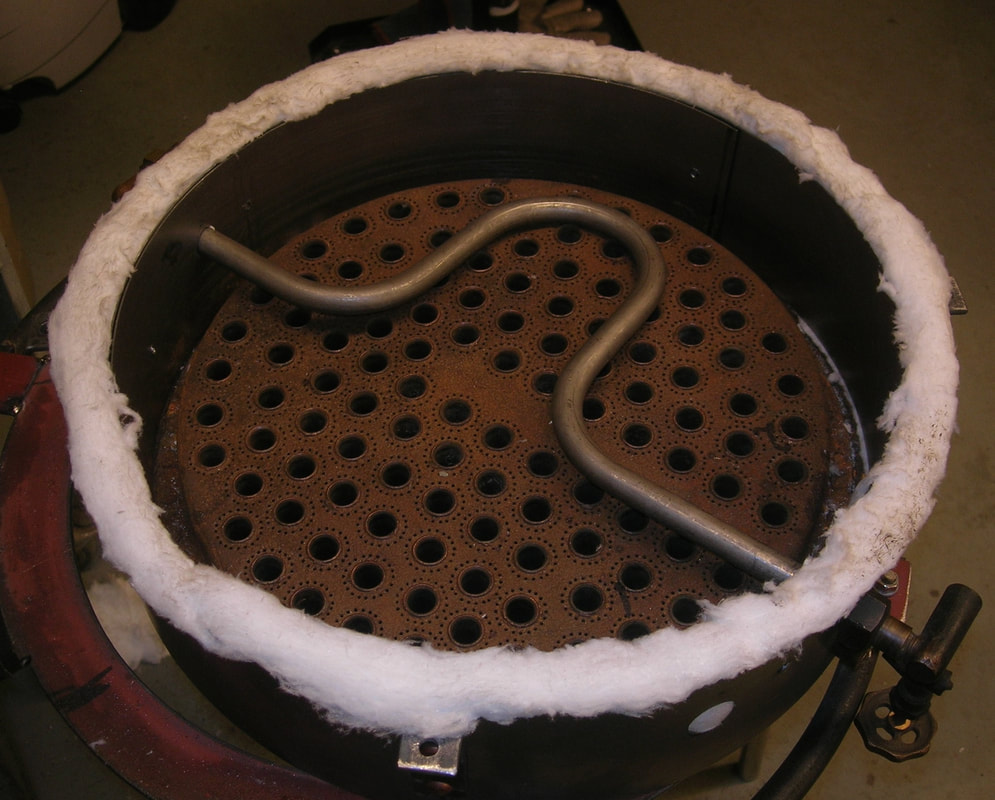
A final finish in the form of a nice paintwork will be the crown of the work. However, this is nothing we will do, the car owner will do the painting himself. I stop here for this time, I will return with some posts about the jobs we have done on the Stanley, and of course a report from our first test runs. I also attach a picture showing how the Stanley looked when it arrived at us. Keep on steaming! // Gunnar Modig New Project-locomobile locosurrey11/22/2018 So far, I've written about my work with other people's steam cars, the reason for this is very simple ... I've never owned my own car to work on. As I said earlier, since the time I first saw the red Locomobile in my sadly now passed friend's cellar, I had a desire to have my very own steamer one day. Those who usually read my postings may remember the story of the red Locomobile, that steam carriage was far from being in a useable condition when it fell to me to try to figure out how it was supposed to work. It took several years to complete the work, but I'm not complaining, I got a new interest that made all previous interests fade. Now it was finally time. When we entered our hotel room in Princeton at 4 o'clock I had not slept in 26 hours and due to the time difference, it was only a few hours until it was time to get up and do what we came to do. The whole story begins when , as I so often do, I looked at the "Steam Car Network". I'm a bit of a dreamer and it's always nice to watch the cars advertised under "For Sale". For a while, I can disappear into a world where I drive around in any of the cars in the ads. It was during such a moment of dreams I suddenly saw it ... 1901 STANLEY STEAMER "LOCOMOBILE" FOR SALE. In the subtitle it read "4-seater with tiller steering". A four-seater Stanley ... or was it a Locomobile? 1901 indicates it's hardly a Stanley, but a four-seater Stanley is more common than a four-seater Locomobile, maybe someone had misunderstood something here. But it's in New Jersey, across the Atlantic. I, who live far enough away from the Atlantic Ocean, thought just forget about it. How could I get such a car home to Sweden? I live so far away from everything. Anyway it has probably already been sold to someone in the US. During the following weeks, I looked at that ad on several occasions, I really could not forget that Stanley-or Locomobile if that's what it was. In the end, I decided to contact the seller. "Well, there's interest in the car, but it's still for sale, nobody has decided on it yet.", was the answer I received from him, his name was William but he called himself Bill. Bill and I started conversing by email, and the story he told me made me even more fond of the car. Now to determine the car's make. When the first pictures came (over time it became closer to 100 images), it became clear that it was a very early Locomobile, a so-called Locosurrey, and it was absolutely not a car manufactured in 1901, as the car is a Locosurrey with serial number 77, which indiactes that it was manufactured in 1899. As I mentioned, the car has a fascinating history, it was not owned by Bill himself but by his elderly mother. The Locosurrey had been owned by this same family since 1902. The person in the family who originally bought the car was named Robert Wallach. Robert, who was the father of the elderly lady who owned the car, had a small collection of cars, this collection consisted of at least 3 cars. First the Locosurrey and then a Stanley (which later was donated to the Stanley Museum, although it is a little unclear as to what model it was). There had also been a Panhard racing car from 1902 in the Robert Wallach Collection (see image of a sign showing this). The collection may have included several cars, but I do not have any information about this. If anyone has information about Robert Wallach or the "Robert Wallach Collection" I would love to know more information. The time is now 9.00 am, and we are in the hotel reception waiting for Bill, he is probably almost as tired as we are. The flight was 2.5 hours late and we knew Bill had stood outside the terminal and waited for us. The queues for passport control crawled slowly forward, also this being my wife's and my first visit to the US, our fingerprints and photos were taken, along with us being asked where would we stay, and how much cash we had. When Bill stopped in front of the hotel, we lifted up our bags and got in the car, at last I would shortly get to see the Locomobile for the first time other than just in blurry pictures. We drove to Bill's parents house, it's empty now and for sale. The only thing left there is an old covered trailer, I recognise it from the pictures I received, it's next to the garage where the Locosurrey is kept. The car really matched my expectations, or even exceeded my expectations, it's absolutely unbelievable how good the body is, after all, the Locomobile is almost 120 years old. Certainly, the seats and tires have seen their best days, but to my way of thinking this is no big deal. There is no boiler in the car and the burner must be replaced. But it comes with a completely unused Bourdon boiler, albeit 15 years old, but quite ok. After accepting the car, we load the car onto it's old trailer and start the journey to a warehouse in New Jersey, where the Locosurrey will be loaded into a container for further transport across the Atlantic. I'll skip the journey with the old trailer being towed by Bill's car. I was worried about the whole trip, the trailer had been standing for many years and I was unsure if the wheel bearings,etc. were going to be able to withstand the journey. The car was then unloaded into the warehouse, and that is where the story currently stands at the time of writing, as my Locosurrey is in a container somewhere on the Atlantic, where I understand the weather is not all too good, I hope my car does not get sea sick! Soon it will arrive, and I can promise that I will document the entire renovation work here on Steam Car Network. Those interested are welcome to check back and read on my progress. Those who live long enough may see it finished! Finally, the last part of the Locosurrey's journey will not happen until the spring. The car will stay in a friend's garage over the winter, the last 1100 km (684 miles) journey will be undertaken sometime in April or May. Keep on steaming! Gunnar Modig I think it's time to make a final article of the previous renovations we've made. It's more inspiring to write about current things than trying to remember what was done several years ago. But back to the last memories of the work we made on our friend's 1900 Mobile. As I told in the last post, the Mobile worked well at the first test runs and it was time for the owner of the car to come and see our work. Sweden is a long country, I live just above the midpoint of Sweden, Tomas who owns the car lives in the southern most part of our country. So for Tomas, this means 1120 km in a car to get up to us to test his Mobile. Now Tomas did not come alone, with him in the car there were also two gentlemen from Denmark, that was Per Nielsen and his friend Eugenio Lai. Per Nielsen is a famous name in the steam car context and his story of the visit to us in northern Sweden is possible to read in a number of the magazine "The Steam Car" probably in late 2014 or in any of the magazines published in 2015. The boys had been driving all night and were really tired when they got out of the car on arrival at our house. But they were warriors and did not want to waste the visit by sleeping, they had come here to watch and maybe even get an opportunity to test drive the mobile themselves, saying “you can sleep when you are six feet under”... Our work got a good reaction, our goal to do a good job and the ambition of using contemporary types of fittings as far as possible was appreciated and our visitors showed happy faces. So we rolled out the Mobile from the workshop and started steaming up. When the boiler was up to pressure, Tomas got up and sat on the temporary seat (in the form of a plank). He had owned the car for more than 10 years, at last he would have to make a first test trip. Tomas test run with his Mobile went well, he looked happy, despite the fact that he got his rest on the temporary seat, which was just an uncomfortable plank. It went a little worse when Per tried to drive the car, if anyone wants to research this subject, I recommend reading the story Per wrote in the newspaper I mentioned above. Although the test run was considered to be successful we realized that, if the the Mobile should be able to be driven any longer distance, it must be supplemented with preheating of the feed water. I have mentioned earlier that the original burner in the Mobile is very ineffective, the Locomobile we previously worked with had such a powerful burner that we never really experienced this problem. But here it became apparent that the cold feed water caused problems, thus the Mobile simply has to be supplemented with preheating of the feed water. We designed a spiral of copper that was placed on top of the boiler, a simple but effective design that we've seen in images of other steam vehicles. After this Tomas took his steamer home, he has a very good transportation car, a converted Volvo with plenty of space on the platform. Since this time, he has completed the body and the Mobile is today inspected and approved to travel on public roads. In fact, today this is Sweden's oldest car that can be driven in traffic. I have visited him on several occasions to teach him how to handle his steam car. It's a lot to keep in mind when you have never come into contact with anything steam driven. On these occasions, the car behaved great and worked without complaint. With this I finish the chapter "Previous Renovations", now the focus will be ongoing work. Gunnar Modig Ok, I admit, I'm probably the world's worst blogger .... Normal bloggers write several posts every day, I can handle two a year .... So then, we had a well-functioning burner, and a new boiler was on its way from Don Bourdon. Waiting for the new boiler to arrive, we took care of other smaller jobs that did not require the boiler to be in place. The original copper water tank remained, but it was damaged and lacked a filler cap so this had to be done. Then we thought (scourge of previous problems) that it would be good to mount a filter that removed particles from the feed water, preferably immediately after the water tank before the feed water reaches the pump's check valves. I had found a handy filter in brass so this had to be modified and a hardware bracket was made. We also manufactured a case of copper around the insulation of the machine's cylinders. It takes some thought to work out the first time you start such work, but after making a couple of templates, the work was quite easy to perform and we are quite pleased with the result. Then finally the long-awaited boiler from Don Bourdon arrived at last. We had to lift it up on the press plate in the drill and drill the holes needed for feed water, bottom blows, water level measurement and pressure regulator. During drilling and threading a hose was connected with a slight over pressure of compressed air, to prevent chips from the drilling and threading from falling into the boiler. Unfortunately, the old Mobile burner was a bit smaller than the boiler, so we had to make an adapter ring between the boiler and the burner. This is a bit sad considering what I earlier had write about the original burner and how little power there is in that type of burner, I doubt it would any better if the diameter of the original burner was 1 to 1.5" bigger. I will be back later about the problems we experienced due to the effect on the burner. had When we had the boiler in our workshop with drilled and NPT threaded connections, it was a good start. After some lifting in and out in order to correct the boiler instillation , it was time to insulate it and provide it with a protective coat made of stainless steel, insulation we use "Insulfrax" with a thickness of ½ " to insulate the boiler. We have good experience with this insulation material. Once the boiler was installed, it was time to start the work with the plumbing. This is a chapter by itself, Today it is not easy to find threaded fittings, elbows, etc. made of bronze and with the right old-fashioned appearance. For the Mobile, we had almost all the fittings we needed, but for future projects, I'm worried about where to find fittings with the right look. Do any of you dear steam brothers know any supplier who can deliver old fashioned fittings, I would be very grateful if anyone can give me a tip. This also includes 1/8 "and ¼" pipes made of bronze, is there anyone who knows any supplier for such fittings? Well, the plumbing is not really something remarkable, just following the system you have done before for the work, try to place the blow-down valves in as neat a way as possible and add some extra thought to making the piping elegant. It took a few nights to complete, but it's just work. Then it's finally time, a very special day .... After two years of evening and weekend work, we can fill the water tank for the first time, the sound of the water flowing sounded like beautiful birdsong. We can finally fill up with petrol and pressurize the tank, with tingles of anticipation in my stomach. The burner starts fine, beautiful blue flames with small orange peaks here and there. After about 20 minutes the boiler is in pressure and it's time for a first exciting tour. Tomas who owns the car had yet to complete the renovation of the body by himself, for that reason we did not have a comfortable seat to sit on, so we had to place some planks where the seat is usually placed to sit on, not comfortable but at this stage you are not really thinking of comfort. The first little test trip went well, everything seemed fine and we felt very satisfied. In the next episode I'll tell you what happened when Tomas came to pick up the Mobile, he did not come alone, he was followed by two Danish guys ... // Gunnar Ok, jag erkänner, jag är troligen världens sämsta bloggare…. Normala bloggare skriver flera inlägg varje dag, jag klarar på sin höjd två om året….
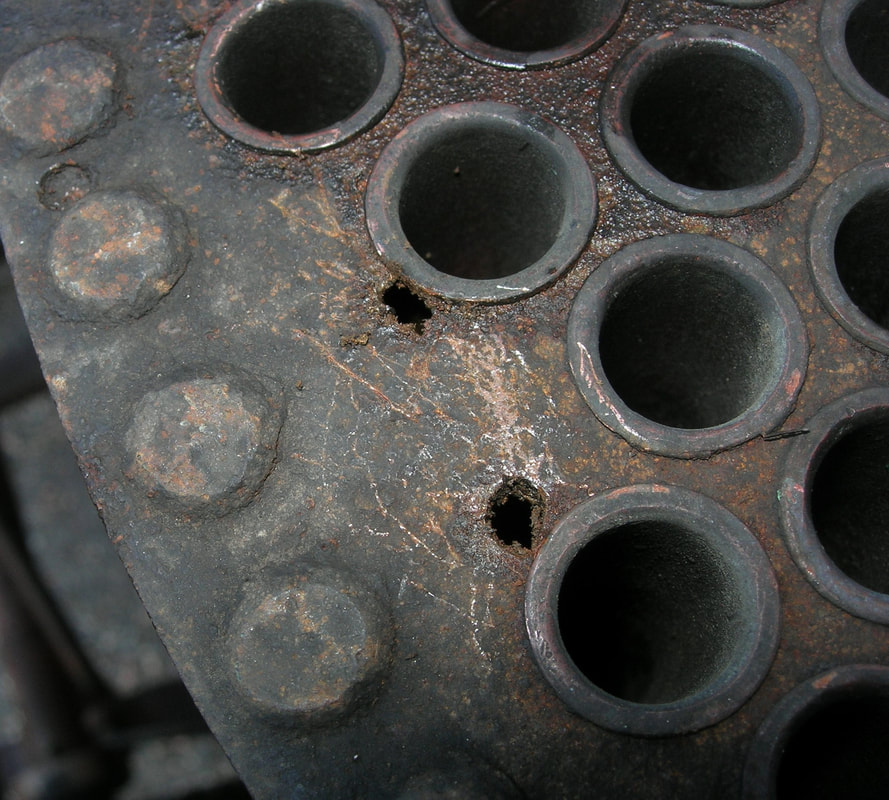
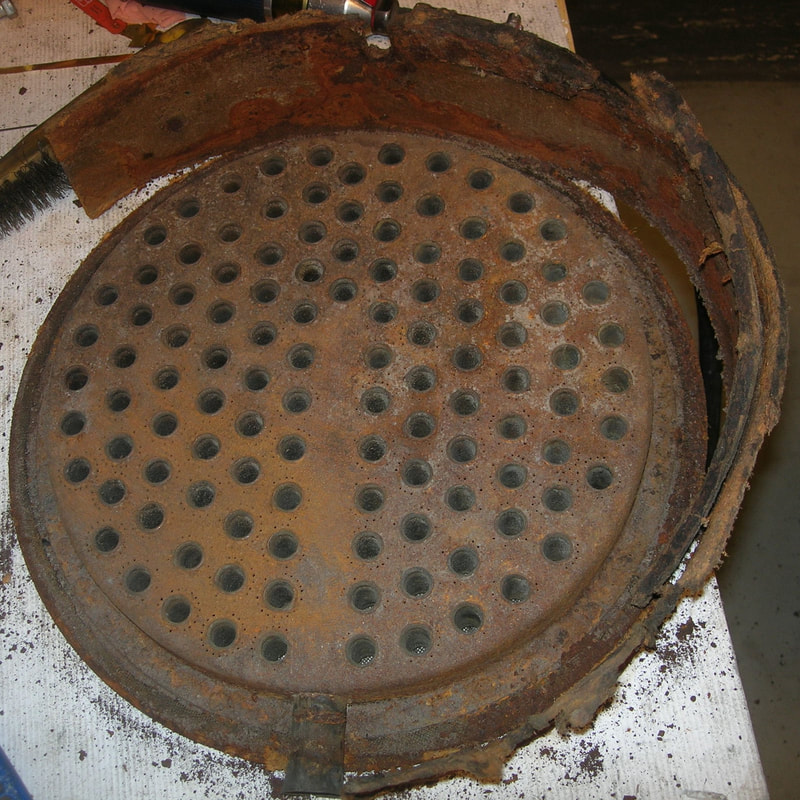
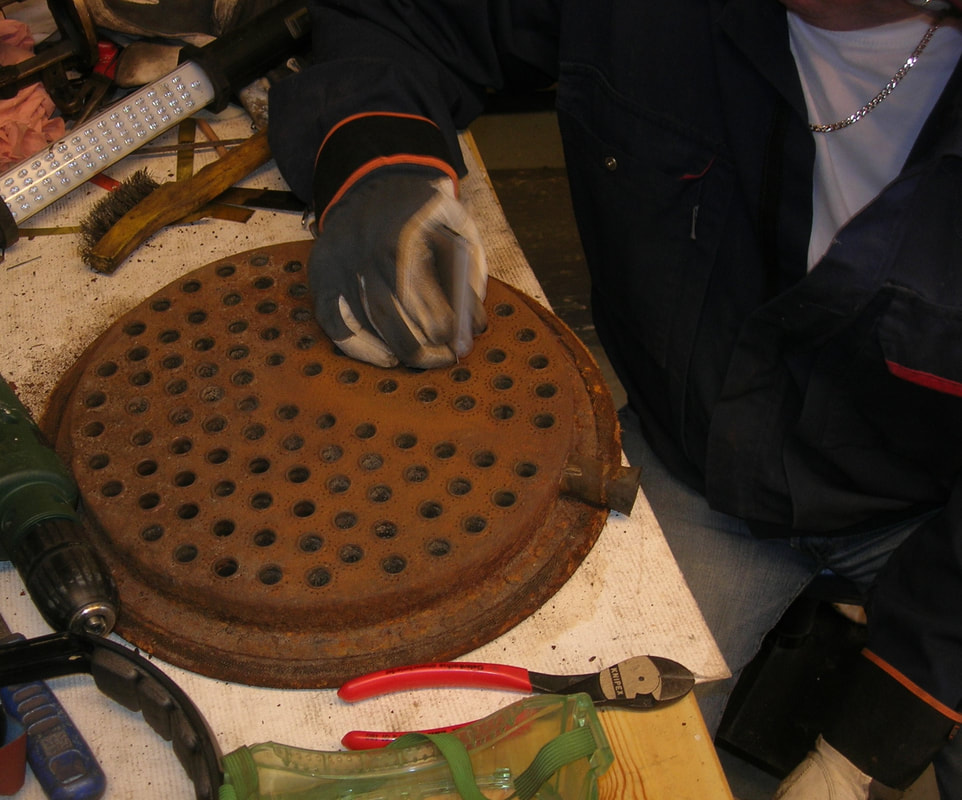
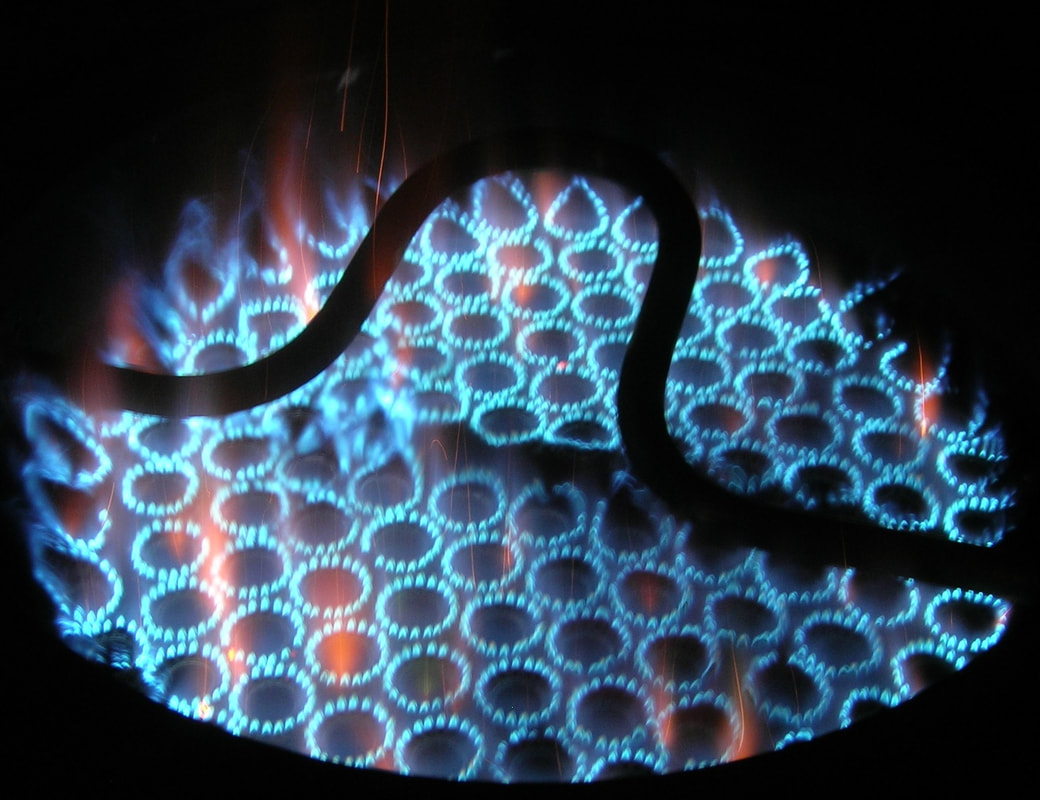
Så då hade vi alltså en väl fungerande brännare, och en ny panna var på väg ifrån Don Bourdon. I väntan på att den nya pannan skulle anlända fick vi ta oss an andra mindre arbeten som ej krävde att pannan var på plats. Den ursprungliga vattentanken i koppar fanns kvar, men den var skadad och saknade påfyllningslock så detta fick ordnas. Sedan tänkte vi (vis av tidigare problem) att det skulle vara bra att montera ett filter som tog bort partiklar ur matarvattnet, helst direkt efter vattentanken innan matarvattnet når pumparnas backventiler. Jag hade hittat ett tidsenligt filter i mässing så detta fick modifieras och ett fäste i järn tillverkades. Vi passade även på att tillverka ett skydd av koppar runt isoleringen av maskinens cylindrar. Det krävs lite tankearbete första gången man tar sig an en sådan uppgift, men efter att ha tillverkat ett par mallar gick arbetet tämligen lätt att utföra, och vi är rätt nöjda med resultatet. Så kom då slutligen den efterlängtade pannan från Don Bourdon, äntligen fick vi lyfta upp den på arbetsbordet i borrmaskinen och borra upp de hål som behövs för matarvatten, bottenblåsningar, vattenståndsglas m.m. Under borrning och gängning anslöts en slang med ett lätt övertryck av tryckluft, detta för att undvika att spån från borrning och gängning skulle ramla in i pannan. Tyvärr var den gamla Mobile-brännaren lite mindre än pannan och vi fick därför tillverka en adapter-ring mellan panna och brännare. Detta är lite tråkigt med tanke på vad jag tidigare skrivit om original brännaren och hur lite kraft det finns i den typen av brännare, det hade inte gjort något om diametern på original brännaren varit 1 till 1,5” större. Jag kommer tillbaka senare angående de problem vi fick på grund effekten på brännaren. När vi nu hade pannan i vår verkstad med färdigborrade och NPT gängade anslutningar var det bara att sätta i gång. Efter några i och ur lyftningar för att få pannans upphängning korrekta var det tid att isolera den och förse den med en skyddande kappa i rostfri plåt, som isolering använder vi ”Insulfrax” med en tjocklek av ½”. Vi har goda erfarenheter av detta isoleringsmaterial. Sedan pannan monterats på sin plats var det bara att starta arbetet med the plumbing. Detta är ett kapitel för sig, det är i dag inte helt enkelt att hitta gängade fittings, elbows m.m. tillverkade i brons och med rätt gammeldags utseende. Till the Mobile hade vi nästan alla rör detaljer vi behövde, men för kommande projekt är jag bekymrad över vart jag skall finna fittings med rätt utseende. Är det någon av er kära ång bröder som känner till någon supplyer som kan leverera gammeldags fittings vore jag mycket tacksam för tipps. Detta gäller även 1/8” och ¼” rör tillverkade i brons, är det någon som känner till någon supplyer för sådana? Nåväl, the plumbing är egentligen inget märkvärdigt, man följer de schema man gjort för arbetet, försöker placera in renblåsnings ventiler på så smarta sätt som möjligt och lägger lite extra energi på att göra rördragningen på ett elegant sätt. Det tar några kvällar att färdigställa, men det är bara att jobba på. Så är det då äntligen dags, en mycket speciell dag…. efter två års kvälls och helgarbete får man för första gången ta fram vattenslangen, det porlande ljudet av vattnet som rinner låter som vacker fågelsång. jag får äntligen tanka bensin och trycksätta tanken, det pirrar av förväntan i magen. Brännaren startar fint, vackra blå lågor med små orangefärgade toppar här och där. Efter ca 20 minuter är vi uppe i tryck och det är dags för en första spännande prov tur. Tomas som äger bilen skall själv färdigställa renoveringen av karossen, av den anledningen hade vi inte något komfortabelt säte att sitta på utan fick vila baken på några plankor som vi provisoriskt lagt där sätet normalt är placerat, inte bekvämast men i det här skedet tänker man inte på komfort. Den första lilla provturen löpte väl, allt verkade fungera fint och vi kände oss mycket nöjda. I nästa avsnitt skall jag berätta om vad som hände när Tomas kom för att hämta the Mobile, han kom inte ensam utan hade två Danska killar med sig….. // Gunnar The restoration of a Mobile Steam car7/10/2017 Here in Sweden we have an expression ... "to slip in through a banana peel". It means most easily translated that you completely unaware suddenly find yourself in an unexpected situation, and that this then leads to a continuation. So it was for me, suddenly I had a steam car in my garage that I would try to get started. I stumbled into steam cars, and since then, I am in love. Before the Locomobile was delivered to Sparreholms museum, we invited the local press as well as members of an association whose stated goal is to preserve our hometowns industrial history, the association is called "Primus Motor". These were invited to attend a test run of the Locomobile, it was also at this time that the movie was filmed. This meeting when we told about the renovation and demonstration drove the car resulted in a small newspaper announcement and got attention in Primus Motors member magazine "the Driving Force". Rumors spread, someone read about our renovation in “the Driving Force" mentioned this to someone else ... and so on. A few months later, I received a phone call, there was a man living about 1100 km away from me. He told us he heard that we completed a Locomobile, the guy who called, his name is Tomas, told me that he had 3 early steam cars in boxes for 10 years. He had bought them from an older man who started the restoration but could not completed it. Tomas asked if we could imagine helping him to complete the cars to driveable condition. So me and my comrade Sven sat in the car and drove 1100 km to see what was hidden in Tomas's boxes. It turned out that it was a Locomobile type 1 from 1899, a Mobile 1900 and a Stanley 1903. If you once have fallen in love with steam cars, you can’t say no to the opportunity to once again get into the wonderful world of the steam driven cars. Of course, we said we would be willing to undertake to renovate Tomas cars, at least those to be driven by steam ... .. After a few discussions, we decided to start with the Mobile, it was on its wheels, there was a boiler in it and there were a lot of parts to it. Unfortunately, the Mobile was in very bad condition when it came to the body, the wood was bitten badly. But Tomas wanted to keep the Mobile in its original condition as far as possible, resonating so that "there are many top refurbished steam cars, but the original ones are not so many." And he is right in that, in addition, there is nothing that prevents the body from being restored at a later date. So our mission was to complete the car in terms of mechanics, steam, water and fuel systems. The Mobile arrives on Tomas's transport car When the car arrived at our workshop, it was time to decide what order we would do for the work. We agreed that if the boiler would have to be replaced, we had to expect a long delivery time, so we started with the boiler and burner. Something that turned out to be a wise decision. The boiler was probably the same boiler that had been in the car since it was new. The bottom of the boiler and the lid were made of iron and the pan in copper, of the piano wire wrapped around the boiler there were only a few leftovers left. Unfortunately, it was found that the boiler lid was heavily attacked by rust so it was excluded that it would be used. It had to be a newly created boiler from Bourdon. The burner was not so beautiful either, but it was possible to repair, a laborious enough work 114 burners with air intakes in the middle and 20 small holes around 2280 small holes to clear .... Perseverance wins As you can see in the picture, the burner burns very fine, but quite honestly ... .. this construction is not quite optimal.
Sure, it's good to have a lot of oxygen available, but the air we breathe contains 20.95% Oxygen, the remaining 79.05% is mostly nitrogen, and nitrogen adds nothing, it just cools. But the burner is original, and Tomas wants his car as close to the original as possible. So then it's the right burner, even if it's relatively powerless. Have a nice summer all Steam Brothers, I'll be back about the renovation of Tomas Mobile. // Gunnar Modig Gunnar's First Steam Car Rebuild4/4/2017 Ok, now it's time for an update .... it is not good enough to leave this amount of time without writing about my projects. As I told you it was the renovation of the Locomobile of the Sparreholms Museum which sparked a passion in me for steam cars. I will not mention much more about this renovation, other than it was a real education for us in the beautiful world of steam cars. Why I fail to mention much about this renovation is that our mission from the owner of the car was not to restore it back to its original condition. He just wanted it to look like it could be run. As we had set our aims a little higher than that, we decided that the Locomobile should be able to work properly when we delivered it. And, obviously, we managed to accomplish our aim. Below is a video called 1899 Locomobile Steam Car. I asked a young guy to document one of our test runs. After a while this film was delivered and after that the guy disappeared without a trace. The movie was nice, but the spelling of Locomobile was the Swedish version "Lokomobile", and I do not have access to the program to change the spelling. I am the person driving the car in the video. But like I said ... there is a lot on the car that is not consistent with the original Locomobile. I enclose a few photos from the handing over of the renovated Locomobile to the Sparreholms Museum, the old man in one of the pictures is the owner of the car and the creator of the Sparreholms Museum, recently deceased Helge Karinen. Next time I write, I will tell you about the consequences of our steam car project, how rumors spread, and what the consequences of those rumors were. Keep on Steaming Gunnar Hi Gunnar,
Nice to see your project finished, the car looks great. The video ist very profesional and who kares how one spells Locomobile! We met I think in 2016 in Melle, Germany. Keep steaming, Charles STEVE BRAGG ( SBRAGG000@CENTURYTEL.NET ) Very nice work and great video as well! I would like to see this car in person, where is it located? I sometimes travel to Stockholm and Karlskoga. Summer Steam Car Projects with Gunnar11/2/2016 *ENGLISH VERSION* After a very busy summer and a somewhat chaotic fall, I shall now try to get started on writing as promised here. It is probably advisable to start with how my interest in steam cars started. As I mentioned earlier, I saw my friend's Locomobile projects remained untouched for years. Once when I visited my friend Helge Karinen he asked me if I knew someone who could take on the job to complete the car, he wanted to move the Locomobile into his museum but it was not in the condition for that. I immediately thought of a relative of mine who is good on vehicles, he are not usually afraid to take on odd projects. So when I got home, I called him up and asked if he was interested in the project. As I suspected, he accepted the challenge and I went down to Sparreholm and brought home the Locomobile, a pretty journey of 550 km single path.
I delivered the steam wagon to my relative's workshop and he immediately started trying to figure out how everything would work ... |
About GunnarI am a self-taught steam car engineer whose interest is in the renovation, repairs and manufacturing of steam car parts.... Archives
July 2019
Categories |
|
|
Steam Car Network functions as a resource for all steam car and steam bike enthusiasts. The website is constantly updated with articles, events, and informative posts to keep the community alive and growing. Feel free to contact us if you have any questions or concerns at the email address below and we will promptly reply.
info@steamcarnetwork.com |
 RSS Feed
