|
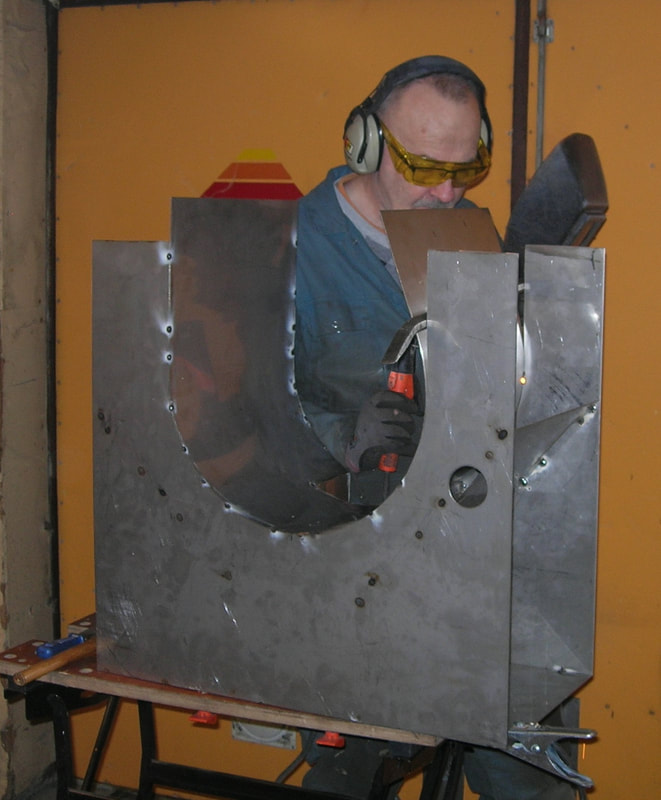
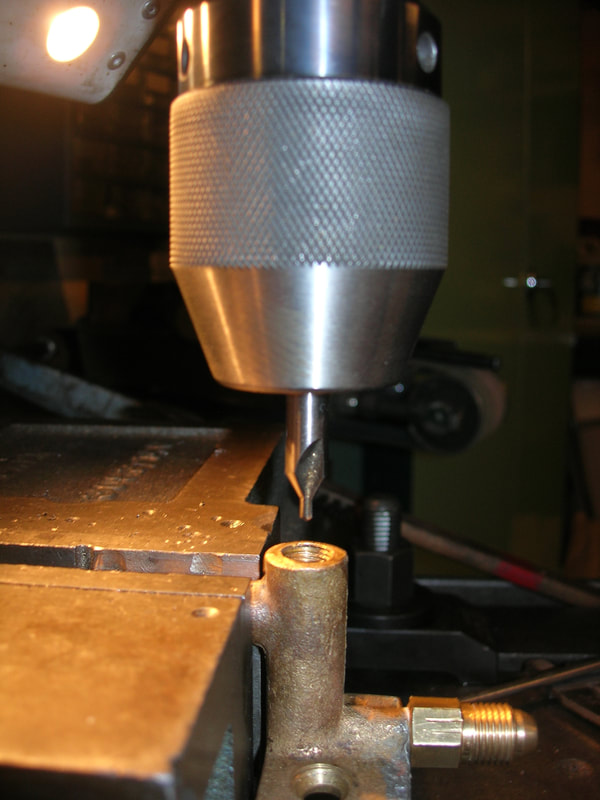
Ok, after a day-fresh post, it is again time for a look back at the renovation work with the Stanley. So now the Stanley is in the workshop. With the help of the photographs we received that show the car before the restoration of the bodywork, we had to start by identifying the parts that were in the boxes that came with the delivery. The photographs were also helpful in figuring out where the different parts were located. New boiler and burner came from Don Bourdon. The boiler arrived after a while, it was worse with the burner which due to a tragic reason, was considerably delayed. But it was okay, you can't be prepared for everything that happens. While waiting for the boiler and burner, there was a lot more to do. The water tank was missing, as well as the fuel tank. The owner's wish was that there would be separate fuel systems for main burners and pilot burners, so we had to manufacture two fuel tanks. The tank for cylinder oil was missing and the two pressure tanks for the main burner pressurization must be checked. Just the pressure tanks for the main burner were actually included in one of the boxes that came with the car . But during test pressurization there was a small hole in the lid on one of them. And at a closer inspection, the material in the lid was in such poor condition that it could not be used. So we had to make a new lid as a replacement for the corroded one. By making a template in oak, I managed to use my old lathe for "metal spinning", the lathe was not quite perfect for metal spinning, but with help of my improvised machine I managed to make a round and lightly cupped lid that suited in the pressure tank. We chose to manufacture the water tank in stainless steel, I know…. it has copper tank in original, but a tank in the SS guarantees that you don’t get precipitates from the walls. So, in consultation with the car's owner, it was decided that the tank would be manufactured in stainless steel. You can have their problems getting old pumps to work. As often it is the check valves that cause problems, attacked balls and worn seats almost always cause leaking check valves. For rusty or worn-out balls there is not much hope, just measure them and buy new ones. The sealing surfaces of the valves, on the other hand, are usually possible to restore, but this requires a little equipment. I am not so sure that a skilled metal worker is so impressed with the method we have found out works best, but we are satisfied with the result and the valves are tight. Our first idea was to grind the check valve's sealing surface using an electric hand drill and a tool designed as a ball on a shaft, this together with rubbing paste we thought would work. But it turned out quickly that it was difficult to get precision with this method, it was impossible to keep the hand drill completely straight and we did not get the valves to seal with this method. What worked best for us, has been to fix the valve in our stationary drill machine. First, fix the valve by using a small drill with the same diameter as the inlet hole in the bottom of the valve, of course, when the drill is turned off. When the drill runs freely, you know that you are in the center. Then we switched to a "center drill" of the type used in the metal lathe. The advantage of a center drill is that it is short but large diameter, this makes the drill very stable. Then we first noted when the drill bumps against the valve seat (of course with the drilling machine turned off), it’s just to have this as the starting point and extremely carefully drill a little, little ... we drill just enough to get fresh material throughout the whole sealing surface. The last step in getting a really good sealing surface against the check valve ball. After cleaning, we put in a ball of the same size as the one with which the valve should be equipped with, then we took a metal rod of the appropriate dimension, placed it against the ball and gently strike with a hammer. Although there are certainly more professional methods, this has in most cases worked for us. Now it must be admitted that there is a difference between what is to be pumped, eg. water and gasoline are relatively simple liquids, but more about the problems with more difficult-to-pump liquids in a later post.
Honestly…. We have not yet come up with a solution to how we should get one of our pumps to work, so the trials continue ... this is exciting. Over and out .... it would be nice to get some reactions to what I write, positive or revealing about which extreme amateur I am. // Gunnar
0 Comments
Leave a Reply. |
About GunnarI am a self-taught steam car engineer whose interest is in the renovation, repairs and manufacturing of steam car parts.... Archives
July 2019
Categories |
|
|
Steam Car Network functions as a resource for all steam car and steam bike enthusiasts. The website is constantly updated with articles, events, and informative posts to keep the community alive and growing. Feel free to contact us if you have any questions or concerns at the email address below and we will promptly reply.
info@steamcarnetwork.com |


 RSS Feed
