White Technicalities Issue 23/25/2021 30th May 1989 Covered in this article- Post 1906 (New regulation) Thermostat, running board aprons, insulation, and disassembling steam generator coils. Dear Robert, Sorry to be so slow in getting back to you but I have truly been busy…. First, let me thank you for the photos. I’ll send you some later on. Also, I have received both of your letters. Now I shall try to answer them. It is important that you return all the items that I lent you, except those I marked for you to keep. If you don’t return them then I will not have a spare since what you have constitutes my spare, you understand? It cost $45.80 U.S to ship it to you but that will be more than made up by you when you return the things to me along with the new casting. Note that this letter also contains my 55 pages of White information (to be published in due course), which you requested, along with copies of the four newsletters I’ve written since. No charge-I’m happy to help when and where I can. Now, as for the thermostat casting, there are things you should note. In discussing them I will refer to the end with the square control box as the “front” and the other end as the “rear”.
The reason is this: If one wishes to adjust the temperature on the 1907-08 type all one needs to do is remove the right bonnet section, then reach down with an ordinary clock key, then make a half turn or so. A very easy arrangement. But the 1909-10 thermostat butts up against a frame cross shaft and thus there is no room for the clock key setup. To adjust these cars one must go to a lot more trouble. Remove the toe boards, take out the water valve needle, undo a lock nut, turn up or down the washer nut, etc.,etc. For all of the White Co. engineering improvements, this has to be considered as a step backwards. I did not send you the gland nut which fits onto the rear gland, simply because I did not have a spare to send. An ordinary gland nut looks like this:  The tapered extension is merely there to protect the squared end of the copper rod. The hole must be big enough to accommodate the clock key.
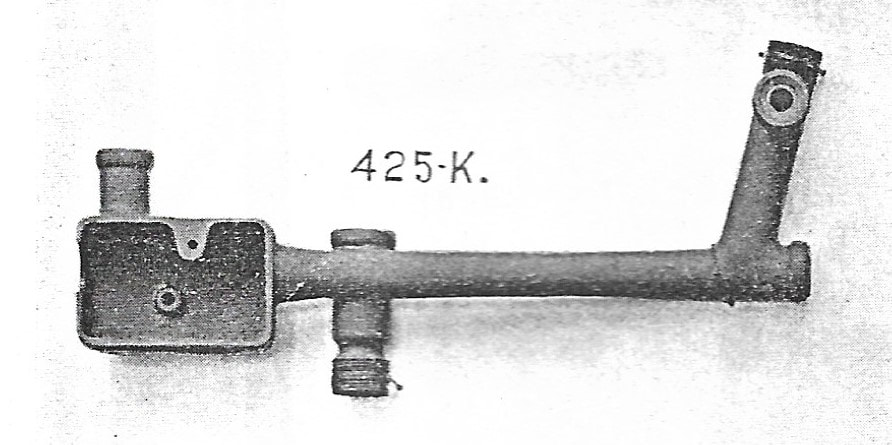 Model H, G, L, & K White Thermostat Casting
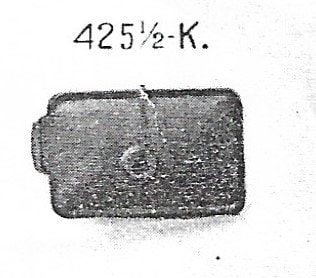 Model H, G, L, & K Thermostat Control Box Lid
If I am correct (and I think I am), your father’s model “F” did not have any sort of running board aprons. All the pictures and old ads I’ve seen for the 1906 cars (note the magazine cover enclosed) show all the machinery exposed-a feature I rather enjoy. It’s rather nice to see some of a steam car’s interesting innards! In 1907 leather aprons were installed but this proved to be a bad idea since they didn’t last long due to heat and weather, etc. So in 1908 metal aprons were installed. If you have them you are lucky. About the asbestos insulation: Yes, indeed, there was oodles of it under the front seat and inside the steam generator compartment. I had to put all of this in my model “K” restoration and it was not one of my favourite chores. I’m 6’ 2” tall. Had the body sitting up on sawhorses. It wasn’t easy getting up in there to get the stuff attached satisfactorily and so it wouldn’t fall down. I had to improvise somewhat and did so on the old theory, “If a little bit is satisfactory then a whole lot must be better!” What’s more, I’m glad I went to the trouble involved since a lot of heat is generated. Your country is cooler but over here in the summertime the climate can get hot, in which case sitting in an envelope of heat is no fun at all… I am enclosing samples of the materials I used. Of course, none of it is asbestos since that is a no-no these days. I do not know precisely what these materials are called but feel sure your local heating & furnace shop will be able to supply you with similar products. You will also need to obtain from him some insulation glue. This stuff helps hold the materials in place and will not ignite from heat even when dry. Then you will need some thin galvanised tin such as used by the furnace industry for air ducting. Lastly, you will need a bag of powered insulation material. This you mix with water and some of the glue. It’s like making mud pies when you were a boy. In fact, old time boiler room workers commonly referred to it as “mud”. This you use to fill up all the cracks and hard places to get at. The woven cloth-like fabric enclosed is what I used on curved surfaces such as inside the generator housing, etc. The ½” thick pressed product is what I used on flat surfaces such as the sides of the body under the front seat, removable front seat panel etc. The bottom of the front seat is recessed. I installed the ½” pressed stuff into the recessed squares then covered it over with the thin black sheet, also enclosed. And I tacked this material all along the underside of the rear floorboards. On my car these boards sit exactly upon the chimney with almost no clearance. So, the black stuff was all I could get in between. The pressed board, even though glued, tends to break up and fall away if not secured. For this I snipped out 3” diameter pieces of sheet metal and placed these here and there, using a tack to hold it onto the wood…plus lots of glue! The woven fabric stuff tends to unravel while being worked with. Some chaps cut it to shape then has a seamstress sew along the edges. But this was a lot of trouble so I just used plenty of glue and went back over it with my fingers time and again, until it dried. For two days I was a mess…I put glue on anything an everything. And when it was all done I was very proud of the job. What’s more, it does what it is supposed to do! In addition to being overpowering, my 55 pages of White info plus the Newsletters, comprise a rather large portion for one meal. I never intended it to go on so long. It just grew and grew as I recollected more and more information. My only reward is the fact I’ve helped get more Whites running than ever at any time since they were built. That’s all the reward I need. I’ll be interested in hearing your view on it all. Joe Ersland’s White meet was just what Lynda and I expected- small but fun. Even if no one else had shown up I would have been satisfied at just visiting Joe’s warehouses. But about twenty White owners did show up and we had some delightful bull sessions. There were five Whites running. One little 1901 Stanhope, one 1904 rear entrance model “D”, two 1910 model “00’s”, and my 1908 model “K”. So, despite the fact it was a small meet, that’s still more Whites all running at the same time than I’d ever seen previously. Most important of all, the meet was Fun. Good food, good weather, good cars, good people, and good fun. What else is there? Good News! I just called my machinist friend and asked him about those taps and dies. He got out his catalogues and quickly ascertained you can buy just about any tap or die you need and at reasonable prices. Well, almost reasonable. For example, a ¾”x18 plug tap is $13.55. To go with it you would need a bottoming tap the same size and it is also $13.55, plus shipping, of course. He also looked up the prices for the big steam union nuts, 1 ¼”x14 (or so I think-better double check this). Price was $33.17 each for the two same type taps. I asked him what a “plug” tap is. He said it is not the same as an ordinary pointed tap and is designed to work in a shallow hole. Then the “bottoming” tap finishes the job. And they also have in stock all the various dies you will need. There is no point in my ordering these things for you since I don’t know the exact sizes you will need. So, I obtained the name of the company for you. They are: J&L Industrial Supply Company 19339 Glenmore Detroit, Michigan 48240 I have just re-read your letters to see if I have missed anything. I did not. One other thing: If the day ever comes when you need to disassemble the steam generator coils you will discover the threads on the fittings on top are also non standard. And some of these are left hand thread. Lots of guys don’t know how to get these unions of those big steam unions apart when they are stuck. Take a big hammer on one side and rap sharply with a small hammer on the other, then repeat all around. Also, soak with a mixture of kerosene and light oil. The kerosene penetrates even the smallest crack, taking the oil with it. If you tap long enough, pretty soon the union will come apart. If all else fails, try adding some heat with a torch. Do it in such a way that you expand the nut rather than the fitting inside. If everything fails then you must hacksaw the nut or union lengthwise, splitting it open. This is better than twisting off the end of the pipe or breaking a delicate casting (such as a throttle and thermostat). Best Regards Dick Hempel 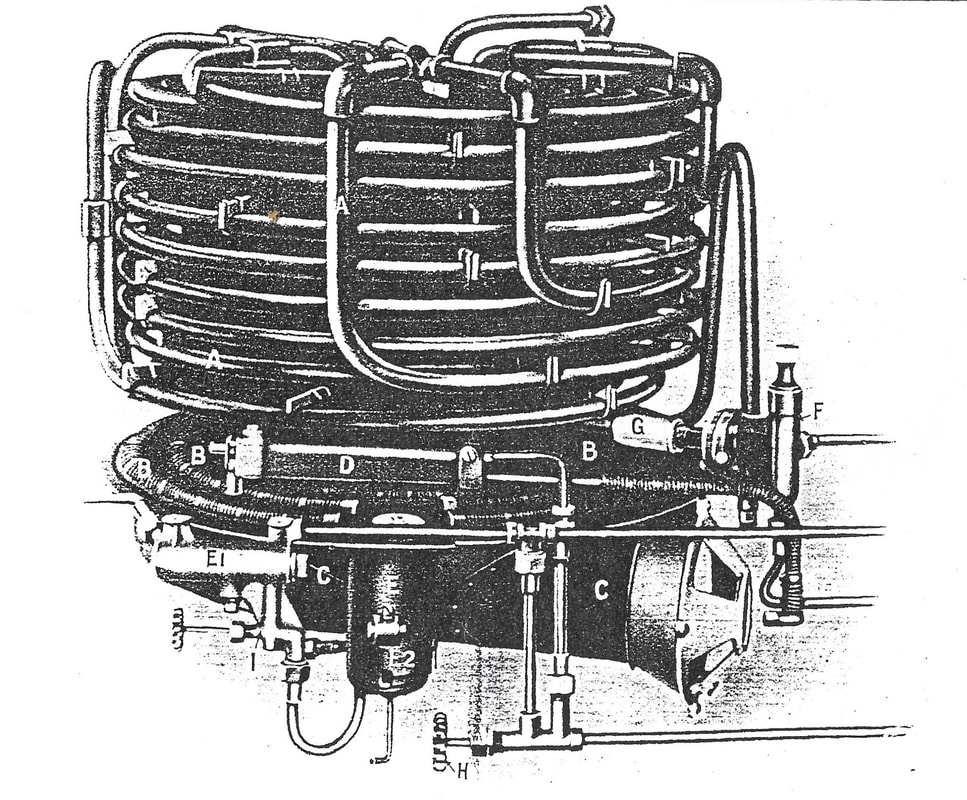 1907 White Steam Generator and Burner Assembly
0 Comments
Leave a Reply. |
Archives
June 2021
Categories |
 RSS Feed
|
|
Steam Car Network functions as a resource for all steam car and steam bike enthusiasts. The website is constantly updated with articles, events, and informative posts to keep the community alive and growing. Feel free to contact us if you have any questions or concerns at the email address below and we will promptly reply.
[email protected] |
|